Showing posts with label falling plate camera. Show all posts

Sunday, December 27, 2015

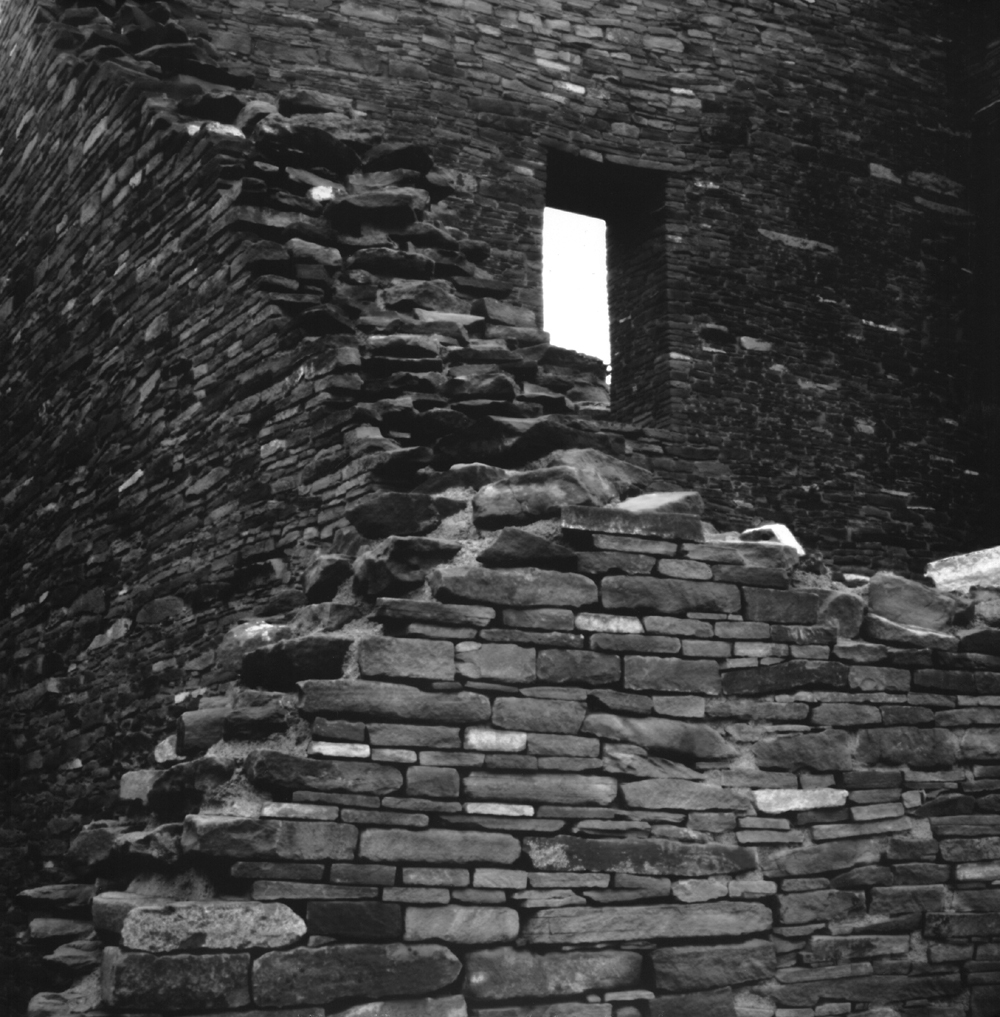
Pueblo Bonito, Chaco Canyon

Chaco_Canyon001a
I first became aware of Chaco Canyon from the PBS documentary "The Sun Dagger," narrated by actor Robert Redford, from back in 1982, and since then have made a handful of day trips to this National Historic Park and UNESCO World Heritage Site.

Despite it being relatively well-known, and managed by the United States National Park Service, Chaco Canyon is located in a desolate part of northwestern New Mexico, requiring the lengthy traversing of dirt roads to gain access, which can be treacherous in inclement weather. Yet I've made the trek a handful of times over the last 30 years, and always came away from the experience with a renewed sense of appreciation for the native peoples who managed to build these structures, over a millennium ago, with their high walls of stone and alignment to the celestial sphere, far from the relative conveniences of their home settlements, where finding sources of food and even fresh water would be a challenge.

There is evidence that, over the centuries, thousands of people traveled tremendous distances to spend time here at Chaco, for what purpose we are not entirely certain, perhaps ceremonial; but archaeological evidence suggests visitors came from as far away as central Mexico. I get this sense of a connection with the past when I stop to consider that I, too, am one of those many visitors, not entirely certain of what I'm expecting to find, but drawn nonetheless.

Though this area has been studied more thoroughly than virtually any other archaeological site in North America, it remains an ever-present mystery; which is part of its appeal.

On this day in 1997 I came equipped with my 8" x 8" format falling plate pinhole box camera, loaded with paper negatives, and spent several hours exploring the various ruins at the main site. It was at Pueblo Bonito, the largest of the remaining structures, that I created this image, a window-like opening high up on the wall of the ruins. Though I had a general sense of what I hoped to capture in the composition, I was pleasantly surprised at the results. A contact print of this negative has since graced my living room wall for years.

It's been years since I've been back to Chaco Canyon, the last time being in company with an out-of-state work colleague, where we spent time exploring and shooting video. This image is by no means the definitive representation of Chaco Canyon, but for me it's satisfied my curiosity by providing something tangible to hang my memories upon, while still maintaining that sense of mystery that will always be part of the Chaco experience.

Monday, December 14, 2015

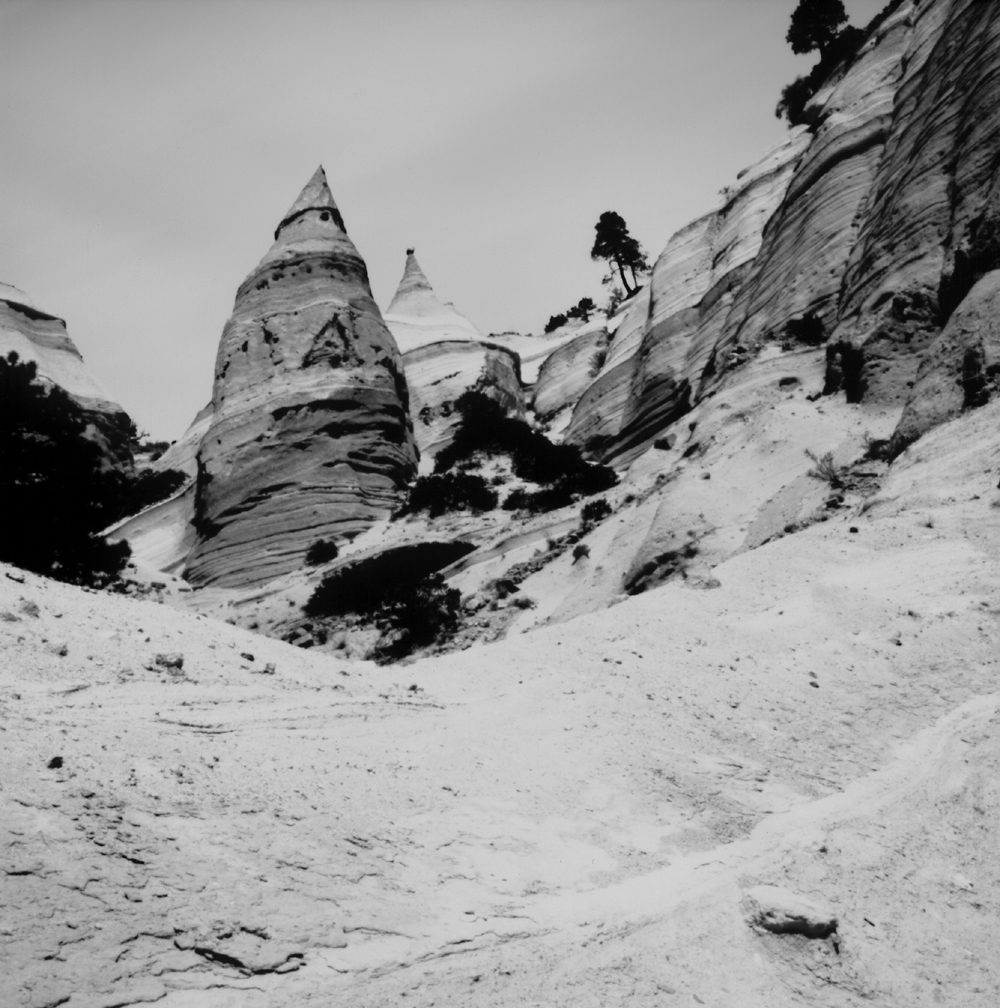
Tent Rocks Reprise

Tent_Rocks001a
The last several articles have had us revisiting a day trip I made to Tent Rocks National Monument in north-central New Mexico, back in 1998, equipped with the 8"x8" falling plate pinhole camera loaded with paper negatives, and a large wooden tripod.

Because of the size and weight of the equipment, my agility was rather restricted, and thus I could only progress so far up the increasingly steep trail before I felt I had to turn back.

The image posted in the previous article shows the entrance to a narrow and winding slot canyon that, while spectacularly scenic, was so restricting that I could barely manage getting through without incurring damage to either box camera or tripod. In addition, because of the narrow passage I could not manage to find adequate footing for the large tripod, else I would have tried an exposure in the shaded gloom between high canyon walls; which would have required several minute's exposure time.

Then there was the matter that this is a public National Monument and there were other people on the trail that day, and attempting such a lengthy exposure, even if I could have managed it, would have meant either blocking their passage or them interfering with the camera gear. So even though I had wanted to try my hand at a pinhole image of the slot canyon, I knew I couldn't. It is personally disappointing when you can sense there is such a powerful subject matter almost within your grasp, but forces outside your control conspire to prevent success.

It was with this sense of temporary disappointment that I proceeded forward, yet remained hopeful that something fortunate might present itself up ahead. After more bends in the trail, as it climbed higher and higher, I suddenly came across this scene and knew immediately that this was what I'd been hoping for.

The trail widens as it makes a bend to the left, in a relatively open area that's a marked change from the confines of the slot canyon now behind us. Though the terrain is steep and sloped, there's plenty of room for fellow hikers to pass, while my tripod's legs can find adequate footing. The challenge will be managing to tilt the camera up toward the conical formations while keeping the tripod from toppling over. I use to advantage the upward sloping terrain on the far side of the trail, where I can adjust the legs' splay to tilt the camera up while the terrain's contour serves to stabilize the center of gravity.

Knowing that this scene was directly exposed to the bright sun, and very light in tone and thus more reflective than other, redder geologies, I opted to shorten the exposure time a bit, so as not to over-expose the landscape.

With exposure complete and film plate properly dropped into the camera's lower storage area, I contemplated continuing ahead, but could already see that the trail only gets narrower and steeper up ahead. I decided that this was a good way to end my day, with several hopeful images yet to develop once back home.

I've returned numerous times to Tent Rocks since then, and every time I do it is with the memory from this day that serves to remind me of the lessens learned, of perseverance and overcoming challenges, of not ceding one's hopes to temporary disappointment but always looking further up the trail for more opportunity.

Friday, December 11, 2015

Tent Rocks Slot Canyon

Tent_Rocks003a
In the precious article we are back in 1998 and are visiting Tent Rocks National Monument in north-central New Mexico, equipped with the 8" x 8" falling plate pinhole camera and large wooden tripod.

Carrying the camera atop tripod over one's shoulder, the path starts out from the parking area fairly gentle and wide, but as we progress into the canyon it gets steeper and narrower, with frequent stops to consider a potential composition.

The great thing about Tent Rocks is that the further inward and upward one hikes the more spectacular the scenery. But the limitation this day will be the massiveness of the box camera and the length of the tripod, because there is a narrow slot canyon one has to thread in order to get a view of the higher terrain and the spectacular conical formations up ahead that give the site its name. Parts of the canyon are so narrow that one can't progress further without leaning against the canyon's walls and struggling to get the box and tripod through without damage.

And get through I did, but not before first stopping to make this image of the rock striations and the dark fissure-like opening to the slot canyon itself, through whose passage we will find even greater vistas up ahead.

It is sites like this that challenge the whole concept of large format photography, where just being able to gain access to a particular vantage point represents a significant logistical challenge, given the weight and bulk of the gear, especially these box cameras that don't collapse down into a package small enough to fit into one's backpack.

In the next article we will examine my favorite image made with a pinhole camera at Tent Rocks, but couldn't have been made had we not been able to progress through this slot canyon.

Tuesday, December 8, 2015

The Power of Tenacity

Tent_Rocks002a
It is 1998 and I have worked out enough of the bugs in the large wooden falling plate pinhole camera, and accompanying wooden tripod, that I've begun going afield, exploring what it might be capable of creating.

Every time I go afield with this bulky contraption I can't help but think of the formative years of photography, in the 19th century, when adventurous explorers, much braver than I, spent weeks or months in the wilderness capturing on photographic plates for the first time the wonders of this new continent. I'm no explorer, for certain, merely walking in the footsteps of giants.

Though the advantage I hold today is that of mechanized transport via automobile, and commercially manufactured films and papers rather than hand-coated on site, it still comes down to having to lug camera, tripod and accessories by hand, absent the portage once provided by pack mule. Today, I'm my own mule.

One drives north from Albuquerque along Interstate 25, then exit at mile marker 264, at the base of La Bajada Hill just south of Santa Fe, heading toward the town of Cochiti Pueblo. Directly adjacent to the massive earthen Cochiti Dam a left turn takes one out along what was then a rough, dirt road to the Kasha-Katuwe Tent Rocks National Monument.

I had learned how to carry the large box camera, mounted atop its tripod, over my shoulder in such a way so as to keep the film plates from becoming dislodged, but I still had to be very careful as I hiked up into the slot canyon at Tent Rocks, in search of photographic possibilities, which I soon discovered to be all around me.

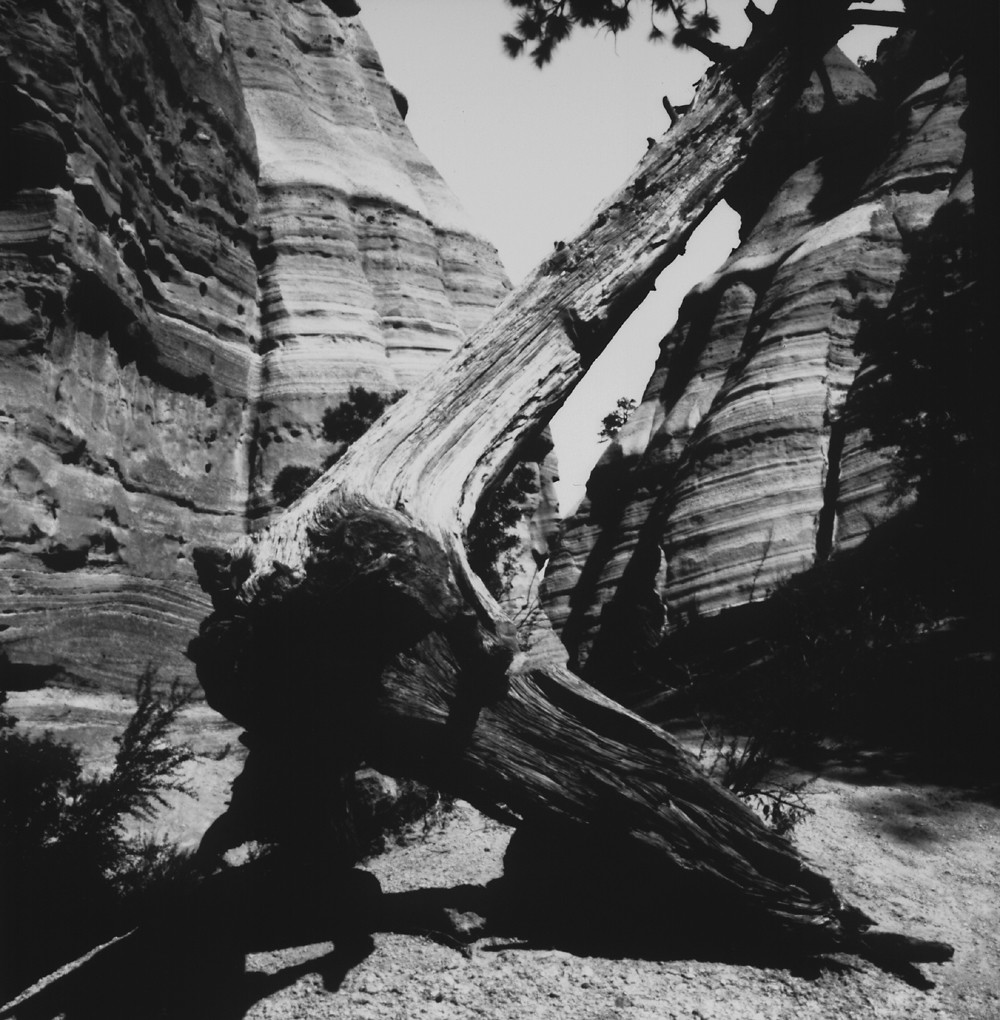
I soon found the main limitation to my handmade tripod was the lack of an articulating head, which limited how far from straight horizontal I could aim the pinhole; this is a canyon, after all. Yet I was able to come away with a number of decent images, among which is this portrayal of a tree which has been partially toppled over by flood waters and whose root system has been exposed by erosion.

Interestingly, I visited Tent Rocks again just this past summer, some 17 years later, and this same tree yet remains in its same precarious position, testimony to the power of tenacity.

Because of the bulk and weight of the camera and tripod, I turned back before entering the steeper parts of the hike through Tent Rocks, but not before recording a few more images, which I will share in subsequent articles.

If there's anything this project has taught me it's reliance upon adequate preparation beforehand, and tenacity to stick with one's intention to fruition, like that tree that yet clings to life in the harsh environment of the New Mexico badlands.

Saturday, December 5, 2015

Sandia Mountains, 1994

Sandias002a
It was way back in 1994 when I had built this large format pinhole camera and was first experimenting with using paper negatives. I had a few years of darkroom experience under my belt, but there were no Internet discussion forums within which to share one's experience and gain from others' knowledge, and so a person had to do things on their own, study the results and learn from their mistakes.

I remember driving off of Tramway road onto a dirt road, now covered in snow, trying to get as close as I could to the mountain without too much distracting foreground clutter. I ended up with this image, whose principal foreground feature is the tire tracks in the snow. This camera has all along lacked any kind of viewfinding device, even viewing dots, and thus framing up a shot requires a certain amount of luck and serendipity. There is the fact of leveling the tripod head, which helps in getting the horizon straight (unless the terrain is sloped). Perhaps in the future, should I decide to start using it again, I can upgrade it with viewing dots.

What's most striking to me about this whole series of images are the dense shadows, caused by the fact that, in 1994, I had yet to discover the magic of pre-flashing paper negatives, which will be a topic in an upcoming article.

Sandias001a
This second image was made during this same outing. Examining the paper negative itself, it appears very much under-exposed. But what detail there is comes to life when reversed into "normal" tones, as I lucked out in getting this image of Sandia Crest, atop which you can just make out the frost-covered antennae. I had to hike a fair bit from the truck, in the snow, and ended up planting the tripod up against this treeline.

Tuesday, December 1, 2015

The Prototype Falling Plate Pinhole Camera

P1110201a
The year 1994 doesn't seem all that long ago, in a geological sense, but it's still some 21 years ago, a lifetime photographically. That year saw me well into a new and rewarding career, and with it the time to begin working on some of my long-nascent camera-building ideas, that had up until then lingered in various sketch journals. This was my first major camera build, employing the idea of a series of film plates that each could be allowed to fall, face-down into the bottom of the camera, after exposure, revealing behind it the next plate ready to be exposed.

P1110199a
The camera is large and heavy, built from an inner frame of 3/4" square sticks and covered in 1/4" oak plywood, with tripod bushing underneath and carrying handle on top. With an 11" focal length, its pinhole aperture operates at F/458. The shutter is operated guillotine-style, simple and reliable.

P1110194a
The film plates are accessed via a rear door, that's secured by a set of machine screws. Just in front of these screws, on either side of the door, are the control knobs for the film changing mechanism, that slide up and down to drop the front-most film plate when required. Each knob operates a sliding wooden plate located in the space between the outer and inner walls of the box, which in turn have a set of brass pins protruding into the camera, that operate the film plates.

P1110195a
Here the door screw has been removed, with the door ajar.

P1110196a
Both the edges of the door and the door opening are beveled to give a clean exterior appearance, but for light-tight integrity there's a substantial light trap, comprised of a deep groove around the edge of the door opening, with a corresponding protruding flange on the door itself. Also make note of the pusher springs on the inside surface of the door, to help keep the film plates neatly situated up against the control rods.

P1110197a
Here's a view of the interior with one film plate in place. Note the guide rods in the two lower corners, that support the plates and guide their motion as they fall. Unlike the later 5"x8" aluminum falling plate camera, featured earlier, this design lacks the lower lip that keeps the bottom edge from slipping off the rear shelf. A possible upgrade could be made here.

Also note the two sets of notches on either side of the film plate, and the two sets of brass control rods keeping this plate from falling; in actual operation the camera would be tilted slightly forward, then both left & right control knobs would be pushed up simultaneously, permitting the plate to fall forward. In a quiet environment you can hear the plate fall, further confirmation of proper operation. Rather than the plate fall all the way to the bottom of the camera and risk scratching the film or paper, there are two black plastic film capsules bolted to the bottom front corners of the floor that stop the plates' fall. The next film plate would have its notches in the opposite orientation, requiring the two knobs to be pushed down for it to fall; the notches alternate thusly for the remainder of the pack of eight plates.

Though the image format is 8" x 8", in practice this camera uses 8" x 10" sheets of paper or film. There are two 1" wide strips of heavy black paper on the front side of the plates that hold the paper or film in place without the need for tape, permitting the 8" square clear image area.

P1110198a
Here can be seen the front plate in its fallen position, with the two sets of control rods clearly visible on either side of the door opening. Also note the top of the fallen plate is slightly elevated off the floor of the box by the film capsules underneath.

Note how the two curved guide rods, protruding through holes in the bottom corners of the film plates, keep the fallen plates from jostling around the inside of the box, in case the camera is roughly handled. You can easily see how upsetting the fallen plates could otherwise easily cause a plate to block the view of the pinhole aperture, which has happened on numerous occasions and was the main impetus for adding this feature.

Though simple and rugged in design, this camera represents a number of evolutionary steps and upgrades along the way, before its operation out in the field could be guaranteed. Even so, I'm cautious to transport the camera in any position other than upright, and usually carry it by its handle between shots, rather than atop the tripod and over my shoulder. As I indicated earlier, further improvements could be made to make it more reliable. However, it has sat in storage for years, with my attention directed to newer camera projects; 1998 is the last year I see record of it being used. Despite that, this camera is significant to me in that it served as prototype for all the falling plate cameras I subsequently made, while also demonstrating the stick-frame-and-outer-sheathing method of camera construction that I've employed in later designs.

In the next few installments I'll be posting images made using this camera.

Sunday, November 22, 2015

Sandia Foothills Boulders

Boulders001a
Albuquerque is a city that abuts the Sandia Mountain range on its eastern edge, along whose foothills are numerous opportunities for hiking, supported by convenient parking areas maintained by the City. This destination represents an opportune subject matter, when the desire to go out-and-about with a pinhole camera suddenly hits, as it did on this day, back in November of 2004.

I grew up in the eastern part of the city, literally in the shadow of the Sandia Mountains. Like many of my peers, we were used to telling directions by the massive presence of the mountain to our east, a lodestone of sorts, directing our inner compasses. Put me in some other town or city absent such a striking landmark and I'd be lost to tell which direction is which. But not in Albuquerque.

Long before I was born, my dad as a young man would hike many miles, from what is now downtown, up through the east mesa to the mountains, often accompanied by his buddies - back when the Great Depression offered little else for young men to do. One story he told was when he and his buddies each brought with them a .22 rifle with which, inspired by the cowboy movies, they had a regular shoot-out, hiding behind these massive granite boulders, ricocheting bullets zinging past their heads. One can't imagine doing such a thing today, it would be considered sheer madness, or downright criminal activity. Back then, it was just clean fun for kids living in a tough world; which activities might also have prepared them to face the trials of the Second World War, just a few short years ahead.

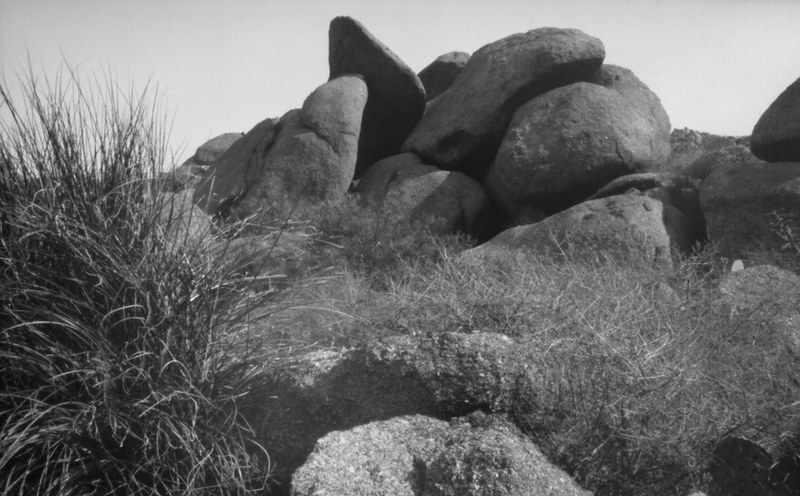
I thought about this story as I hiked the trails meandering around these massive boulders, preparing to do a bit of shooting of a different kind. I had with me the F/300 aluminum 5"x8" falling plate pinhole box camera and tripod, while I was by now also experimenting with paper negatives instead of the orthographic litho film I had been using, and which I was finding difficult to control its contrast.

I had already noticed that conventional multi-grade photo paper could also too easily produce images of excessively high contrast, caused by the blue and UV-intensive daylight activating the paper's high-contrast emulsion. For this reason I had begun experimenting with using RC photo paper of a fixed contrast grade instead, whose contrast was insensitive to the color of light; along with adding a faint, even exposure to the paper in the darkroom ahead of time - what I call a "pre-flash" - which serves to increase the paper's shadow detail without significantly increasing the highlight exposure, thereby serving to limit the excessive image contrast. This particular image was created during that period of intense experimentation.

I can't recall now whether the camera was mounted atop my homemade tripod or the heavier but more flexible Bogen; but I do know that, by judging from the foliage along the left side, the wind must have been very calm that morning, since this was a 45 second exposure. This was but one of a series that I've shot since in this same general area, and no doubt you'll be seeing more of these foothills images herein.

Having such an easy to access locale (about two miles from my house) for experimental scenic photography has proven to be of immense help in ironing out the bugs in my process before embarking on lengthier excursions afield. But even so, I periodically return to the Sandia Foothills, that ever-present lodestone that grounds me to home.

Friday, November 20, 2015

Message Received from Ojito Wilderness

Kokapeli's_Rock_Garden001a

I'm standing in the hot, dry wasteland of the Ojito Wilderness, the sun blindingly bright reflecting off the hard-packed talus. I come here regularly, as it represents a relatively easy-to-access scenic area from nearby Albuquerque, from where I drive north 20 miles to the town of Bernalillo, then on US550 northwest another 20 miles, then onto Cabezon Road, bare dirt and sometimes barely passable, another 5 or 10. The Ojito is BLM (U.S. Bureau of Land Management) managed land, meaning that it's public access. Cabezon road winds west through the Ojito, where it meets the main electrical power transmission and gas lines from the Four Corners area of the State that feed Albuquerque.

There's a particular spot I park at, directly adjacent to Cabezon Road, that doesn't involve getting into loose sand or otherwise risk getting stuck. From there it's a short hike to a scenic area with otherworldy rock formations, that seem to morph and change over the seasons of wind, snow and rain, as if the terrain were some slow-motion monster whose presence one must always heed. Nearby my truck is a shallow trench being eroded away by snow and rain just slightly below ground, as I carefully place my footing, not wanting to fall through into some earthbound abyss.

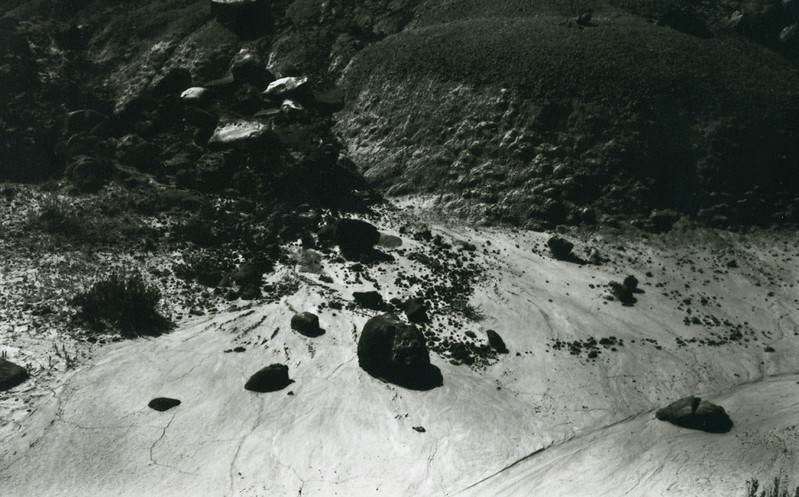
On this day I had the F/300, 5"x8" format falling plate pinhole camera, and the formations of interest were this textured hill and foreground with volcanic-like rocks littering a bright, parched surface. The camera would need to point down to get the composition I wanted.

I used the viewing dots on the sides and top of the box camera to frame the shot, adjusting the tripod as required, then metered the scene using reflective metering with my Gossen Luna-Pro F. Once my exposure was determined, I waited for the breeze to subside before opening the shutter - there's always some air stirring about in this climate.

I finished the batch of film that had been pre-loaded into the camera on other compositions, which involved some tricky hiking down steep slopes of soft sand or talus, but this image I had high hopes to be the best from that day; and I wasn't disappointed. I returned to civilization excited at the prospect of what I had recorded, but also knowing there would be yet another day's opportunity in the Ojito Wilderness.

Technically, I was satisfied to have captured a pretty decent tonal range, getting both dark shadow detail and the tricky highlight of the desert floor.

Yet, there's something otherworldly about this image, as if it could have been from some NASA Mars probe instead of the American southwest. Which serves as reminder that we do live on a planet, Spaceship Earth, orbiting the same star as does Mars; and that this is just as much science as art; the photons of light that struck the crystals of silver halides in this film had their eight minutes of freedom through interplanetary space, then passed uninterrupted through the tiny pinhole aperture, until their flight was ended herein; this being a mere record of the event.

Tuesday, November 17, 2015

Down by the Rio Grande

Tree_in_Woods001a
When in Rome, do as the Romans. And if in NYC, it would be Central Park, no doubt. But this isn't Rome or New York; and so when in Albuquerque, do as the locals - which means either a hike along the foothills of the Sandias, along the eastern boundary of the city, or a walk along the bosque river forest, where the Rio Grande threads its way through the heart of the valley and the more historic parts of town.

This image was created circa 2004, during a period of time right after I had finished the F/300, 5"x8" format, falling plate pinhole box camera (featured in the previous article), and it had yet to be upgraded with the heavier articulating plywood base, meaning that its sharpest images could only be possible in calm weather devoid of wind, that would otherwise vibrate the box enough to degrade the image as it sat atop its tripod.

During this time I was also experimenting with Freestyle Photo's Arista 200 orthochromatic film, which was less contrasty, and with a bit thicker (and hence more durable) base, than their APHS graphic arts film that I'd already been using. But I only used this film for a short period of time, before engaging in a lengthy period of experimentation with paper negatives, that has since been my primary box camera media of choice. I probably have the remaining pack of Arista 200 film still in my film storage cabinet; perhaps I should give it a try once again.

For me, the problem with using large format film, besides the cost, was that, in order to realize a usable image, I'd have to contact print it after developing and drying; whereas with paper negatives (and one of the prime reasons I've stuck with them since) is that they can much more easily be scanned and converted into a positive image, to be conveniently shared online; which harmonized well with the online photographic community that I was a part of at the time, on F295. This brings up the point that I haven't been printing many of these images onto silver paper in the darkroom; the paper negatives have thus represented a convenient intermediary for going from pinhole camera to digital image.

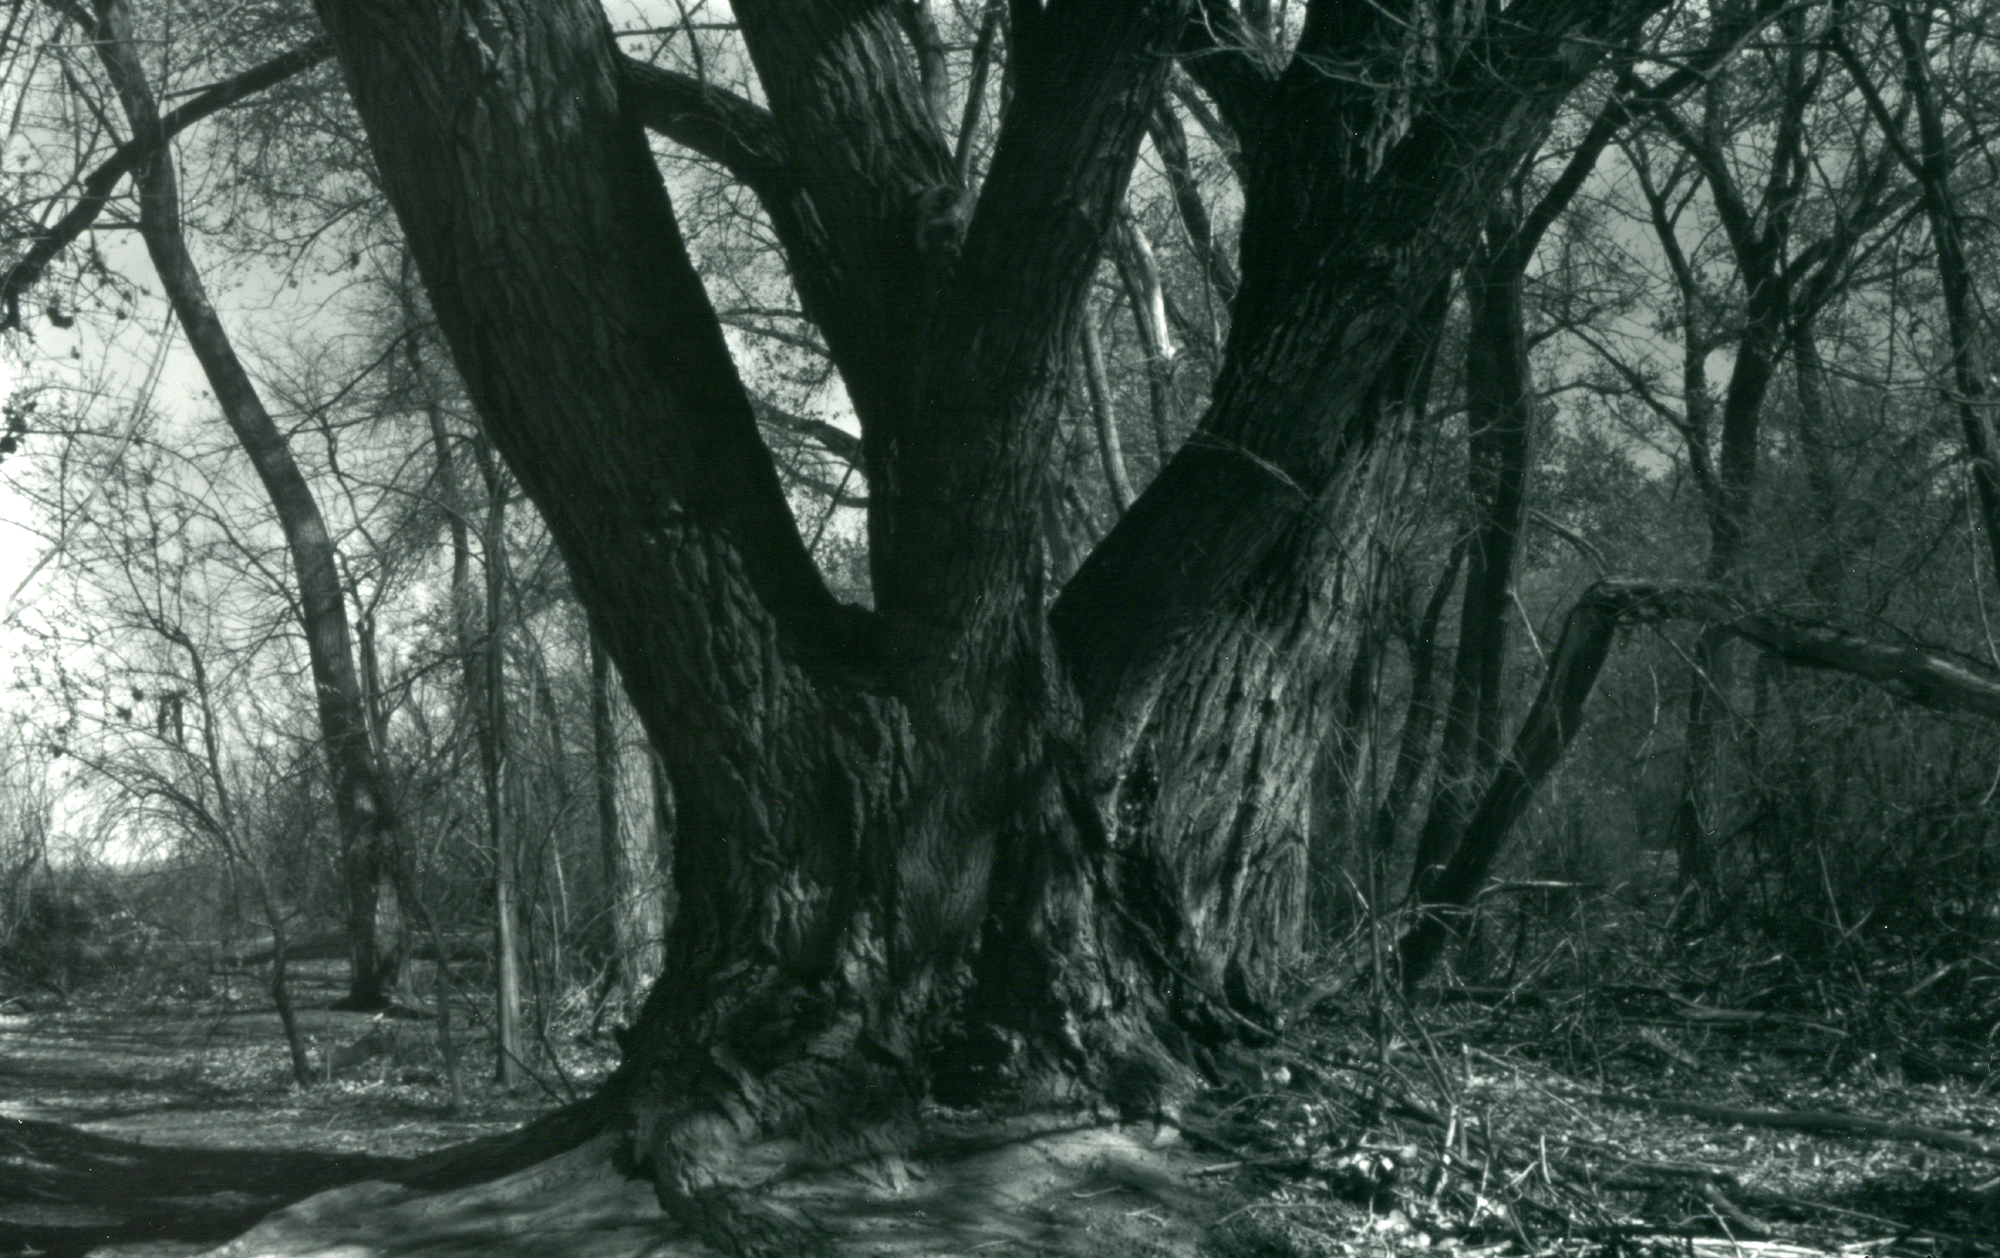
But this image is a scan of a contact print; I've chosen to retain the color tones picked up by the scanning software, rather than converting to strict monochrome, hence the cyan-like hue; which I rather like.

To get down to the forest along the Rio Grande, one parks along a residential neighborhood and walks a few blocks in, with backpack, tripod and box camera in tow. I like to carry these large boxes already mounted atop the tripod, making for a quicker setup if and when a potential image presents itself.

Instead of peering into a ground-glass view screen under a dark cloth, as is the case with the conventional large format photographer, with this camera one frames the scene by sighting along the viewing dots, mounted to the sides and top of the box, deciding where the left- and right-hand limits of the image will be located, as well as where to place the top and bottom edges. In this image, I wanted a bit of the old cottonwood tree's root system to be visible near the bottom edge.

I was pleased to get a decent amount of shadow detail on the tree, more so than what I was getting with the higher-contrast APHS lithographic film I had previously been using; no doubt aided by using HC-110 film developer instead of the paper developer used with the litho film. As for the bright sky behind the trees, I've learned with these 19th century-like, orthochromatic emulsions not to worry about the sky detail, as it will have to be grossly over-exposed in order to get adequate foreground tones.

There were a fair number of hikers out and about along the river that day, and I always wonder what they think about happening upon this primitive-looking kind of box camera, but done up in some shiny, mechanical appearance with its aluminum skin; an anachronism, perhaps. Luckily, I didn't ponder the thought too deeply, as I went further into the bosque in search of more images.