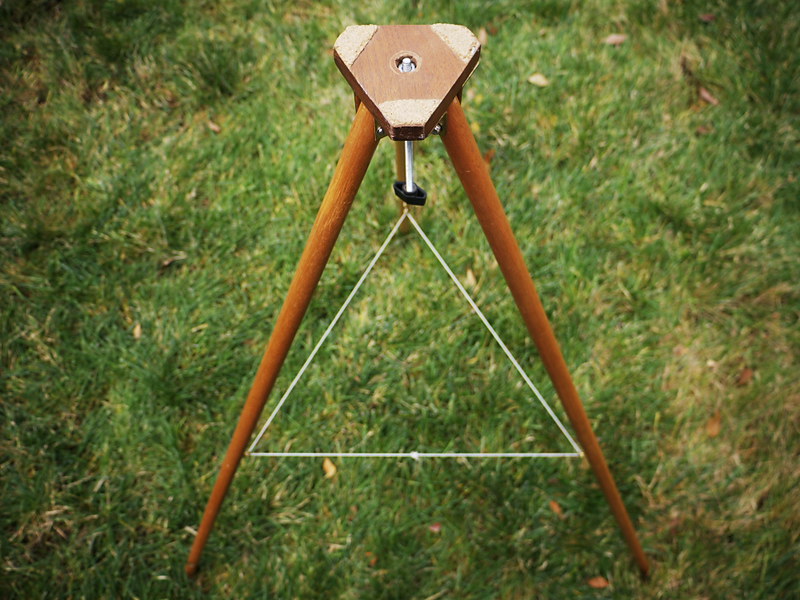
One of the things that's so enjoyable about pinhole photography is the maker aspect of it, either adapting commercially made cameras with makeshift pinhole lenses or making one's own camera from scratch. If you're like me, after a few years of successful camera building a person begins to think wider afield than just cameras. In my case, the size and weight of some of my larger cameras required me to use a heavy Bogen tripod, that still lacked adequate resistance to vibration. So I began to wonder if it were possible to make a tripod with the requisite sturdiness, in a package lighter than a commercially-fashioned unit.
My journey into handmade tripods I've documented with an informational video on the two handmade tripods described herein:
Large Tripod:
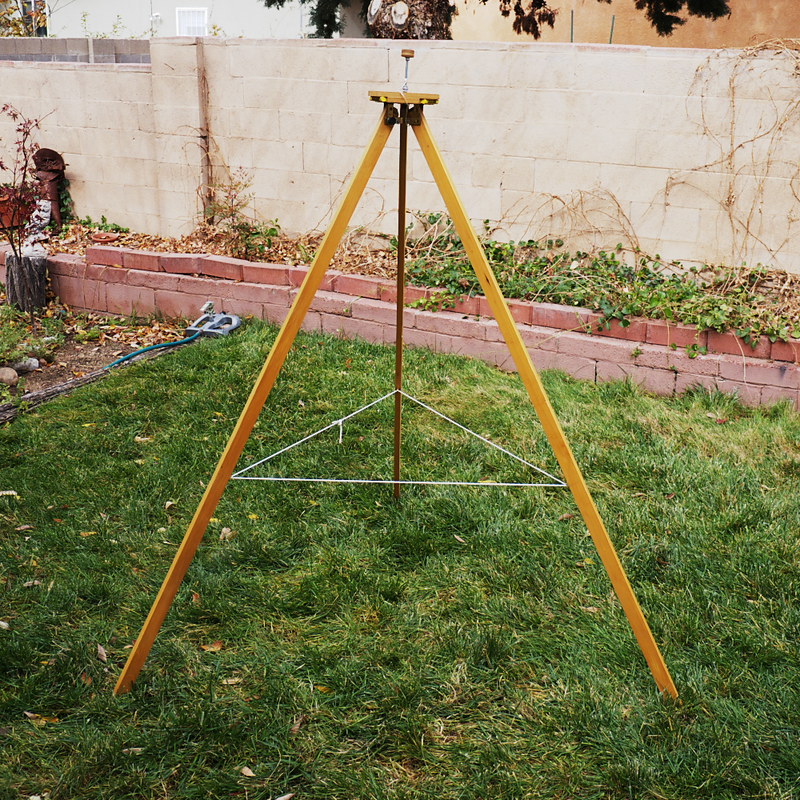
I first built an over-designed, heavier-than-needed tripod, where the legs were each built from two 1"x2" pieces screwed together to form a "T-beam" structure, with a massive hexagonal head, connected to the legs via brass door hinges. Despite my best intentions, and because of the slight slop in the door hinges, the result was that the larger box cameras were still too wobbly atop this nearly six foot-tall structure. So I put it aside for several years and instead tackled a much smaller, lighter tripod (described below).
However, I always had a nagging feeling in the back of my mind that I could do better with that large tripod, and so later I took it apart, lightened the legs (each now a single piece of 1"x2" spruce), and made a lighter top platform with angle brackets connecting the legs (similar to the smaller tripod, but with extra bracing). The result (see the photo above) is a unit over five feet tall that weighs in at only five pounds, yet can support the largest box camera in my inventory. Let's look at some of the details.
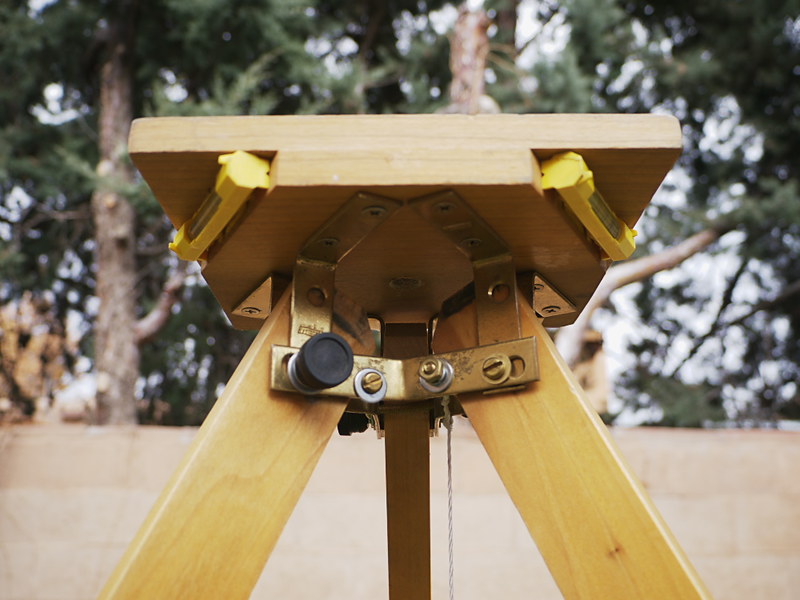
You'll notice that each leg is connected to the under side of the top plate with a pair of angle brackets, with bolts and knobs (for tension adjustment) connecting each leg to the brackets, plus three additional brackets, bent to 120 degrees, connecting each leg bracket to its neighbor for additional support. Notice too the pair of bubble levels included as an aid in leveling up the head.
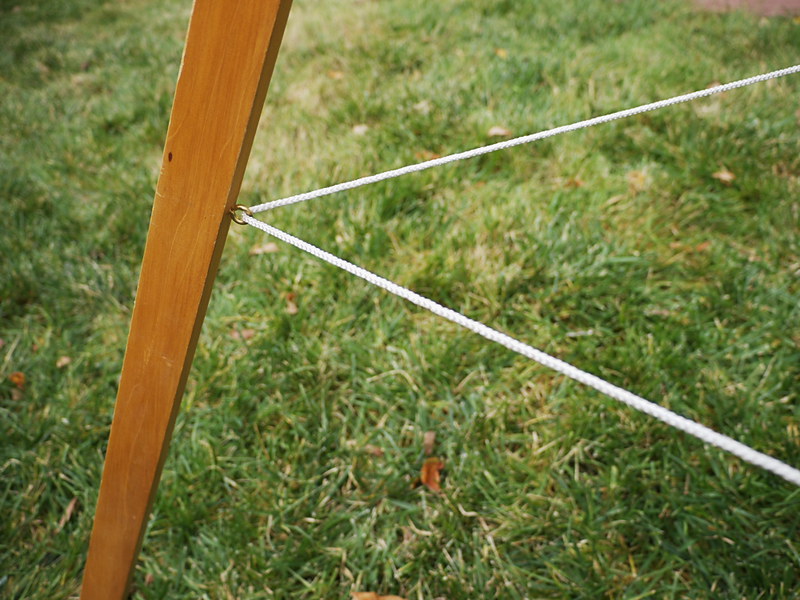
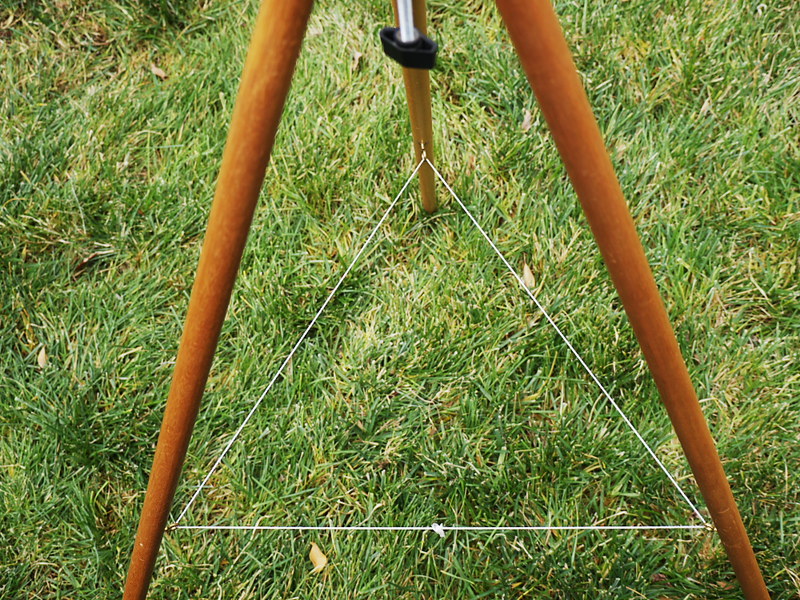
The single biggest design issue I faced was how to keep the legs spread out, yet stable, permitting minor adjustments to compensate for uneven ground. Merely tightening the knobs atop each leg would provide inadequate support, given the long leverage of each leg. The solution was a novel idea I call a "tensioning loop," that employs a loop of cord strung through three screw eyes attached to the inside surfaces of each leg. The loop is free to slip through each eyelet, while pulling the legs taught provides the tension necessary to keep them stable.
In principle, this design reminds me of Buckminster Fuller's concept of tensegrity, which relates to having discrete tension and compression members in a system, each optimized to do their job as efficiently as possible.
How well does it work? Due to the lack of play in the leg hinge points, the tripod is very stable and wobble-free with a large pinhole box camera mounted atop; while the load-bearing ability is amazing: witness my attempt, in the video, to hang all of my 200+ pounds from the tripod head, resulting in only a bit of creaking in the joints under load. Not bad for a five pound tripod.
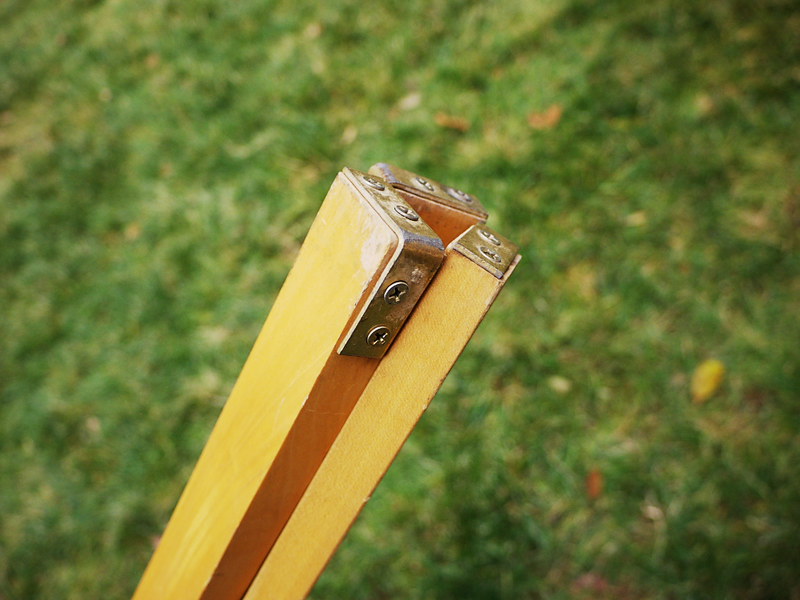
To protect the bottom of the legs from rotting and degradation through contact with the ground, I've attached metal brackets to the bottom corners, as such:
Small Tripod:
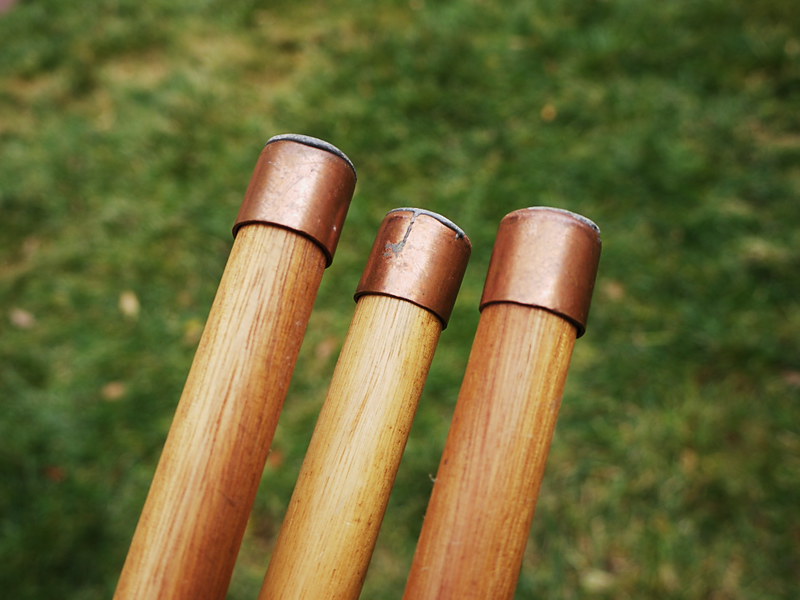
After the debacle of my first large tripod, I thought I'd start again with a much more modest design, one optimized for smaller box cameras. I'd developed this habit of building many of my projects from ready-made items found in hardware and craft stores. I would often wander through such a place, designing a project in my head right then and there as I saw what was available and figured out how it could be utilized. So one day, as I was wandering the aisles at the Home Depot hardware store, I came across these 48" long Brazilian hardwood dowels, 7/8" in diameter. These were much lighter and stronger than the typical pine dowels sold in craft stores, and much more resistant to warping. Then, wandering through the plumbing section, I came across these copper pipe caps that fit snugly on the bottom of the dowels, to serve as feet, whose bottom surface I subsequently slathered with JB Weld epoxy as a protectant.
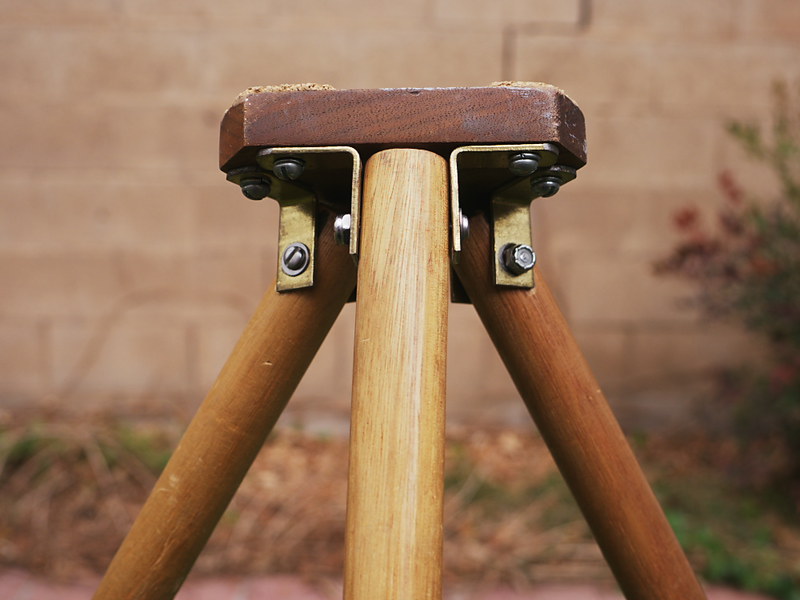
For the top plate, I already had a piece of 3/4" black walnut at home, which I cut into a truncated triangle, and attached to the legs via angle brackets and hardware. The machine screws hold the legs to the platform via nylon locking nuts, that can be adjusted for proper tension.
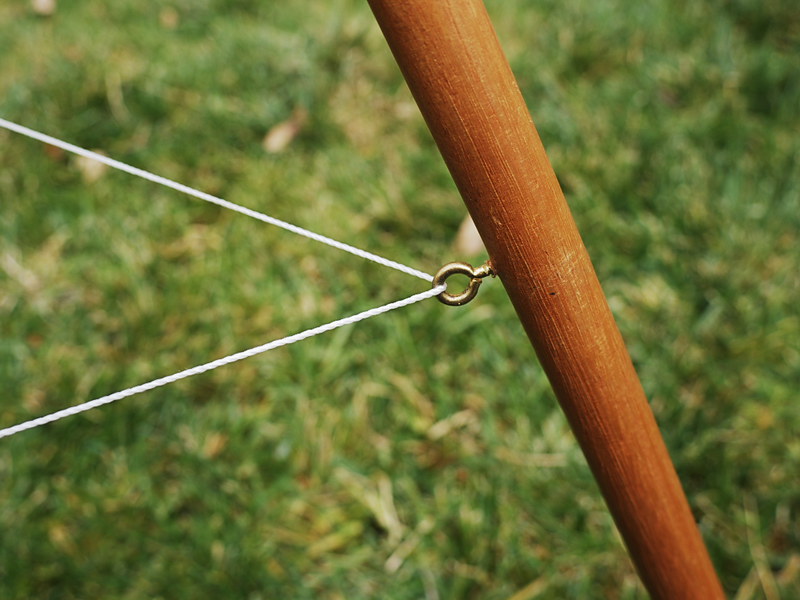
I also used the same system of a tension loop and screw eyes in the legs, which has proved to be very efficient and workable.
In practice, and as I demonstrate in the video, the leg positions can be adjusted to provide a slight degree of leveling of the tripod head. I typically point one leg forward, toward the subject, while the back two legs can be adjusted in a variety of ways and combinations to provide both horizontal and vertical movement of the head.
Another idea that works well with these tripods is to add a commercially-made ballhead to the top. This, of course, is limited by the size of the head's adapter plate and how much weight it can sustain, and also the size and weight of the camera itself. For example, my large 12"x12" oak falling plate camera (yet to be described herein) would be too heavy and bulky for the lightweight ballhead shown in the video, which has too small of an adapter plate to provide sufficient support against wobbling and vibration in the breeze. This is one reason why the large tripod has such a large top plate, to provide proper support to large boxes that would otherwise tend to be unstable.
I tried to answer in the video the question of Why build your own tripod, in this day and age where there's never been a better selection of tripods, using high-tech materials like carbon fiber and aluminum. The answer is twofold. First, there's the simple but profound satisfaction that comes from designing and making your own equipment, using your own head and hands. Second, despite their seemingly primitive appearance, such wooden tripods can still outperform the high-tech materials of today, such as carbon fiber. This is born out in weight comparisons between these two handmade tripods and two commercially made examples in my possession. The large tripod, over five feet tall, weighs only five pounds, while its commercial counterpart, a Bogen, weights nine pounds and costs hundreds of dollars, and can't support the same amount of load. The smaller wooden tripod weighs less than two pounds, which is much less than its lightweight Sunpak carbon fiber counterpart. In fact, adding the ballhead from the Sunpak tripod to the wooden version leaves the naked Sunpak unit still heavier than the wooden version.
In all fairness, these tripod designs of mine lack collapsible legs and fully articulating heads (though such heads can be added, as I indicated above). Yet in actual use, out in the field, I don't think they suffer accordingly, since in my experience with commercial collapsible-leg tripods I always keep them extended when in use with box cameras anyway. The only issue can be during transport; though the larger tripod might be a bit of a stretch hauling in my tiny Mazda 2, I usually go on such photo expeditions with a pickup truck, meaning that the size of these tripods just hasn't been a problem.
Though this is a less important issue, I have noticed the disparity between the appearance of an obviously handmade box camera sitting atop a commercially made tripod. But when mounted to a corresponding handmade wooden tripod, the combination seems to be made for each other, like camera and support were designed as a system, rather than cobbled together from discrete parts. It also can communicate to the public that you are especially intent on doing this for some specific reason, not just out of some haphazard experimentation, and that there are specific reasons why you chose to make these tools, rather than purchase ready-made.
As a way of encouraging you, the reader, to consider such a project for yourself, it is important for you to know that neither of these tripod designs require real "woodworking" skills. The 1"x2" spruce legs of the larger unit were purchased as finish-grade lumber, meaning I only had to cut to size, drill the mounting holes and apply a protective finish. Similarly, the top plate was also purchased as finish-grade; it only had to be cut to size, screwed and glued into another such piece to increase its thickness and rigidity, then have holes drilled for the angle brackets and center bolt. All of the mounting hardware was purchased ready-made, the only real modification being the 120-degree brackets between the legs of the large tripod were bent from ordinary angle brackets. So these tripods weren't so much built as assembled from premanufactured parts. You only need to know how to operate a saw and a drill, a paintbrush and a screwdriver. So give it a try, won't you?
Joe.
ReplyDeleteFar out. I've often thought about this but I was always stymied by the lack of extension and leveling.
I also share your experience of walking around with an extended tripod (it also acts sometimes as a sort of stealth cane). Sarah's always cautioning me to be careful not to whack some passing hiker with it.
The method of leveling and vertical pointing never occurred to me.
It looks like I may be involved in some workshops for teacher's next spring. Not having some movable support off the ground is always a limiting problem in workshops. There's never enough benches and planters in the right places. This solution would also be a way to infuse some more pinholiness to the experience.