Monday, March 7, 2016

One Hundred Prints

Bird001a

I've been trying to get back to the print; the idea that a photograph isn't a photograph until you have paper in hand. I can remember, maybe 25 years ago, when that was the only type of photograph available, either a color print from a local lab or a black & white darkroom print I made myself. The idea of an electronic image was only possible for the common person back then if you had videotaped some photos with your camcorder and were watching them on T.V.

In the intervening years, all that has changed. Digital cameras and cell phones are so well equipped to enable the creation of instant electronic images that we forget about prints in hand. I know that I've been guilty of this, despite the fact that I still maintain a (somewhat primitive) darkroom in my unheated garage.

In the last decade since I've been dabbling in digital photography, I've certainly become lazier. The idea of shooting a roll of black & white film, then processing it, isn't so bad; it's the idea of printing every image in the darkroom that sets me back. Part of it is because my darkroom facilities are still so primitive - a small space, now crowded with junk, unheated in the winter and hot in the summer, requiring hours of prep time in advance in order to condition the environment sufficiently for chemical processing. Not to mention the dust everywhere, that ruins the idea of pristine, glowing prints.

I've pretty much relegated myself to the idea that, for capturing images out in public venues, I'm going to be using a digital camera. But I still like landscape and still-life images on silver gelatin paper. Fortunately, I've developed a method that seems relatively trouble-free and efficient, that produces nice fiber paper, silver gelatin prints.

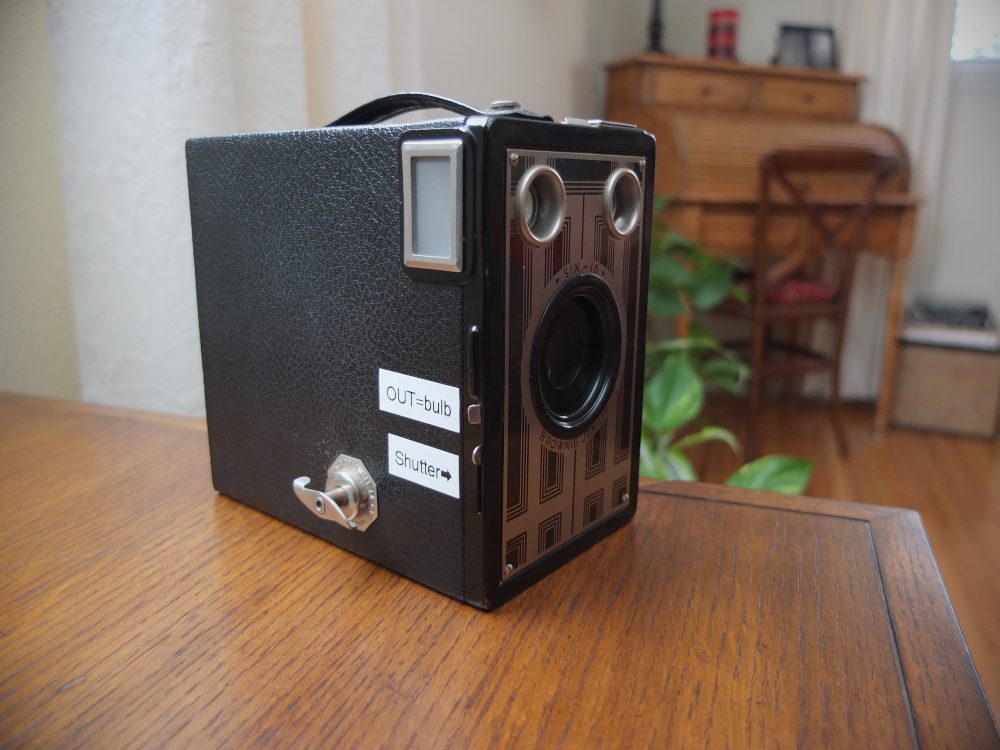
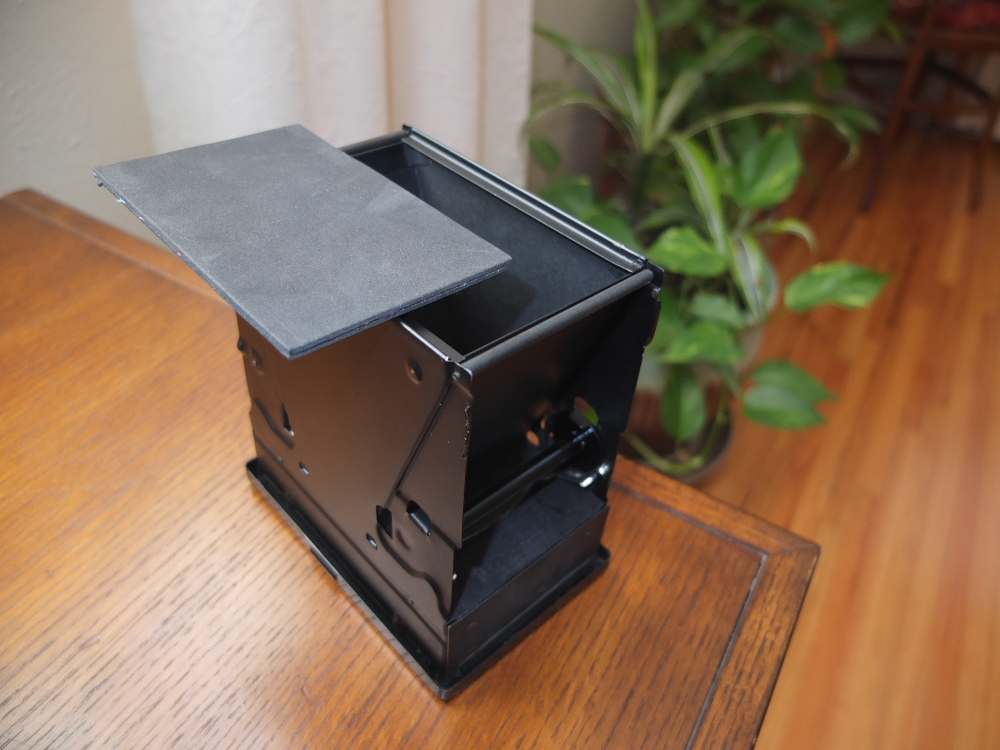
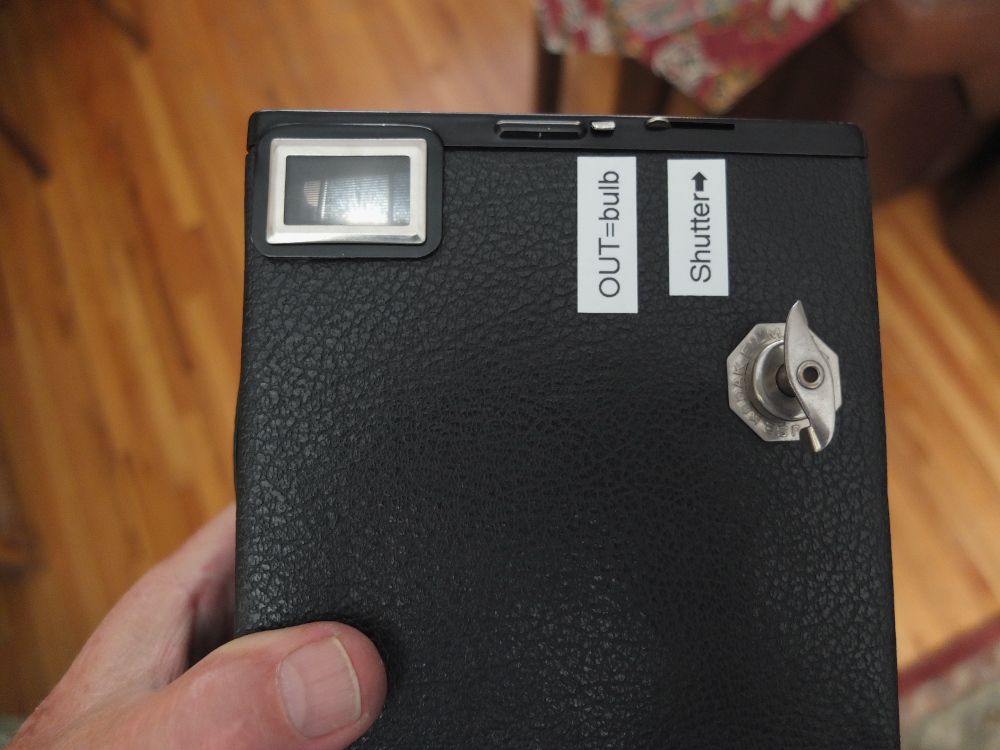
I load 4"-by-5" sized sheets of Harman Direct Positive paper into sheet film holders, expose them in either my Anniversary Speed Graphic or pinhole box cameras, then process them in the year-round convenience of my kitchen, via a Jobo print developing tank and rotary processing base. Once properly rinsed and superficially dried, I tape then to sheets of glass, using drafting tape, and permit them to dry in my film drying cabinet. After several hours, I have one-of-a-kind, fiber paper prints in hand.

Given the relative ease of this process, I can no longer afford to use the excuse that I don't have the time or energy to do this. So I've been trying, at least every week, to make some sort of image - any image, regardless of how mundane it might seem - using this process, as a means of exercising my processing skills and building a collection of these one-off prints.

Today's session was no less impromptu and spontaneous. The afternoon weather was balmy and warm, the winds calm, and so I set up tripod and Speed Graphic in my front courtyard and proceeded to load a sheet film holder with a pair of Harman prints. It's convenient that one sheet film holder holds two such prints, that can both be processed as a single batch in my day tank within the span of less than ten minutes.

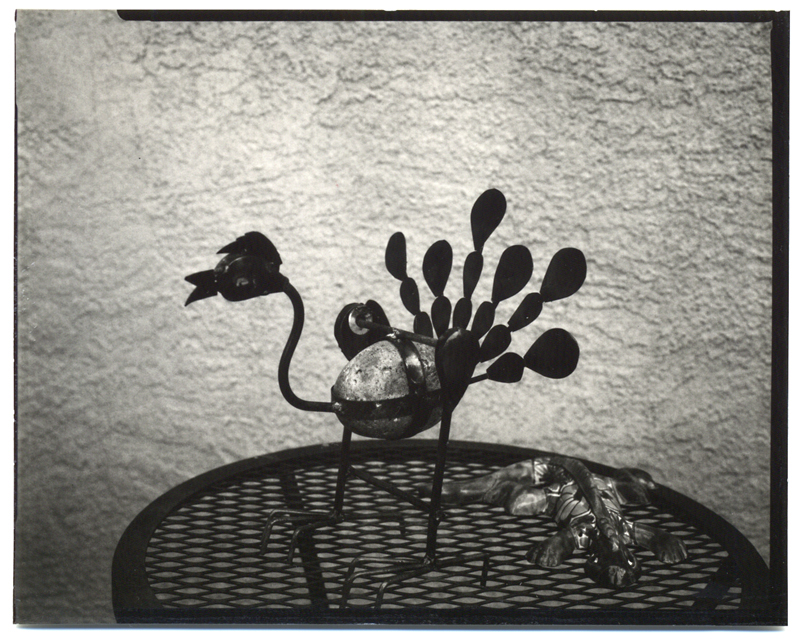
I thought this still-life of garden art sitting on a patio table was quirky enough to be representative of the kinds of spontaneous prints made possible by this process. And with the investment of just a bit more time, and a bit of gasoline, those two prints could have instead been exposed somewhere a bit more photogenic than merely around the house. But that's the beauty of this process - even if you don't feel like going far afield from home, you can still create these remarkable little prints, from scenes discovered just around one's own home.

What this really illustrates is the idea that it isn't all that hard to create two prints per week. That doesn't sound like an awful lot, does it? But two fiber paper, silver gelatin prints per week amounts to over a hundred prints in a year's time. All with the investment of just a few minutes time for loading the film holders, setting up the camera, making the exposure and processing the paper. Then a rinse - which I do under a tree in my yard, so as not to waste the water down the drain - and afterwards a few hours in the drying cabinet, while I'm off doing something else. Do that one time every week, and you'll have a hundred prints by the end of the year.

This process is made most convenient by the unique properties of the Harman Direct paper. While it does have some significant limitations that you have to get used to working around, such as contrast control, low sensitivity and spectral response, its main attribute is that you totally bypass the whole issue of processing film and the subsequent printing phase. What you're doing with the Harman paper is loading the finished print directly into your camera, then using a simple paper processing regimen. It really is a unique process, one that's also new, in the historic sense, given that such direct positive paper emulsions were unheard of in the formative years of photography. The irony is that this product has only come to market now, in the post-film era of ubiquitous digital imagery.

I would like to encourage you to embrace this process, experiment with it, and see what you can do. It's a great age we live in, where we have such a wide variety of choices available for our creative expression, including the choice of creating silver gelatin prints with such relative ease.

Wednesday, March 2, 2016

Harman Brownies

DSCF4588a

Today I had the urge to play with an old Kodak Brownie camera and Harman Direct Positive paper. The camera, a Kodak Six-16 Brownie Junior, had been sitting for a long time in my Man Cave shed, and also seemed to have been ignored, since the rest of my camera collection is in my office on a shelf; as if cameras had feelings (which we know they do).

Several issues needed resolving before I could attempt an exposure. First, I didn't know what the focal ratio of the shutter's two aperture settings were, so that would require partial disassembly of the front in order to get a set of calipers in close enough to measure. Second, while I was in there, one of the viewfinder mirrors had been dislodged, and would need to be secured back in place. Third, it was rather dusty, and the optics needed cleaning.

DSCF4583a

I removed the four small screws securing the front panel, then bent the end of the bulb/normal lever, in order to get it through the slot in the side of the front panel. Once that was done, it could be easily removed, giving access to the shutter, aperture plates and viewfinder areas.

Measuring the diameter of the two aperture settings and dividing those figures into the focal length yielded f-stops of f/20 and f/30; the online Kodak manual for this camera didn't actually have those values listed, as it was written (apparently) with the idea that you chose a certain type of film and a certain quality of light, or used photo flood lamps (it also lacks a flash trigger); none of those methods would do for us today without lots of experimentation, since we don't have access to the same kinds of film and accessories as one had back in the 1930s.

DSCF4586a

I secured the loose mirror with hot glue, and did my best to clean the lens, but there was some discoloration (more like a mottled film) on an inside surface I couldn't easily access. Still, it cleaned up pretty well.

For use with Harman's Direct Positive paper, I would be loading individual sheets into the camera at the film plane, which required the paper be trimmed down to 2-3/4" by 4-1/4". I also wanted the paper to sit as flat as possible against the film plane flange, and so I used a backing pad of two thicknesses of black adhesive craft felt, cut to size and stuck together. I also taped over the rear red film counter window with black gaffer's tape.

DSCF4587a

Now that I had a functional camera, purposefully modified for individual sheets of direct positive paper, it was time to figure out my exposure method. Based on my working exposure index of the Harman paper rated at ISO 8, bright sunny conditions would require a shutter speed between 1/4 and 1/2 second, much slower than its single speed of 1/125. However, shaded daylight exposures of f/20 for 2 seconds are possible, making it possible to be used as a portrait camera for the kinds of seated poses once made with wet plate cameras, involving a head brace so as to steady the subject.

Of course, once you begin thinking about issues of focus with portraiture - the camera is fixed focus, set approximately to the hyperfocal distance for its two apertures, you realize that, other than whole-body portraits, you can't do justice to a subject close-up without the accessory Kodak close-up filter, which hasn't been made since the 1940s. Good luck finding one. I suppose a person could fiddle with adapting SLR close-up filters and examining the results at the film plane with a makeshift ground glass, then work out a preset seating distance for your subject. But once you start going to that much trouble, you might as well be pulling out the Speed Graphic, which yields a bigger print, variable apertures and shutter speeds and focusing via a view-screen.

So really, this is a simple snapshot camera, we must remind ourselves. Go outside and frame up composition suited to its limitations.

I made three test exposures today, the first one in my front driveway, of the house brightly lit by the morning sun. Since the camera's single shutter speed was about five stops below what the meter recommended, I simply fixed the camera to a tripod (via an adapter plate and bungee cord - the camera lacks a tripod bushing despite it having a bulb shutter mode), and tripped the shutter five times. The result came out a bit under-exposed, but a usable image.

For the second exposure I metered the shade under my back porch and exposed the paper for 2 seconds at f/20, with a good result for the shaded part of the image but obviously over-exposed along the edges of the scene that were brightly lit.

The third image, posted below, is an uninspiring image of my backyard wall and the neighbor's trees. I used the f/30 aperture and flipped the shutter open and close as fast as I could, simulating a 1/2 second shutter speed. The result was the best of the three thus far. I could see, were I to pursue this further, taping a neutral density filter to the front, giving me more easily controllable shutter speeds in the 1-2 second range in bright daylight, sufficient for landscape images.
Harman Direct Positive, Kodak Six-16 Brownie Junior

The lens is adequately sharp for the contact prints it was intended to produce, but probably would be soft by today's standards for enlargements or scans.

It's too bad the shutter doesn't have a flash attachment, because this would open up other exposure possibilities; one must remind themselves that Kodak made a large lineup of different camera models back in its day, and this one was near the bottom of the model range. It's the case that one must choose carefully the type of antique to modify; sometimes you get a Corvette and other times a Vega - even though they're both old Chevys.

I used my stainless 35mm developing tank and hand-made rotary processing base for these prints. The first print, of the front of my house, had an unfortunate gash in the emulsion, right near the center of the image, caused by a sharp edge on the end of the radial bracing rods of the tank reel. So for the next two prints I removed the reels, and the print was long enough to stay bent along the inside periphery of the tank for the duration of the processing, without becoming dislodged. Going forward, I'm going to remember to remove the reels while processing other prints of sufficient length.

This was a fun evolution, but doesn't really result in sufficiently satisfying results, given the limitations of the camera. Still, it at least served for providing more experience with using a roll-film tank for rotary processing small direct positive prints, and metering and exposing the Harman paper in a variety of situations where the shutter speeds or apertures are limited in range. In the final analysis, it points toward a better camera, like my Speed Graphic with modern Fuji lens, as a way to make really satisfying work.