Wednesday, July 20, 2016

Recent Pinhole-Related Videos

P1000577a

This week I posted a two-part You Tube video that covers the complete process of Harman Direct Positive Paper in pinhole cameras, specifically using my set of nine film-canister pinhole cameras. The videos cover everything a person would need, from cutting the paper to size, loading the cameras, equipment needed in the field, aiming the cameras, determining exposure via a light meter, unloading the prints to a film developing tank and the entire method of rotary processing these small prints using a metal 35mm day tank.

I felt it necessary to make this two-part video because, even though many of these individual steps have been covered in previous videos, having them all in one production might make more sense to some people. My desire is to encourage more people to discover for themselves the simple joy it is of working with this remarkable medium, that yields exquisite little gem-like prints from a humble pinhole chamber and paper processed in a simple 3-part procedure.

We do live in a remarkable era, photographically speaking, because we have at our avail the most contemporary of digital imaging systems while also enjoying a resurgence of interest in historic photographic processes, along with unique products such as this direct positive paper.

Personally, I've been doing less digital photography in my free time, instead putting more time into various video projects, not only photographically related but also a series involving typewriters as the theme. Yet at the same time, I've begun to slowly shoot more black and white film, home processed and scanned, along with these direct positive pinhole prints. It's a satisfying mix of technologies, working within the medium of video while at the same time working with gelatin silver imagery, the best of the old and the new. Too, video and still photography work to tell stories and engage the viewer in differing ways; so I see these as complementary activities, rather than competitors.

This last week I finished a roll of Ilford HP5 Plus in my Minox GT-E, while I'm just now starting a roll of Ilford FP4 Plus in a Yashica T4 Super. I'm enjoying being able to put these various cameras from my collection through their paces, enjoying each of their respective unique attributes as film cameras, while also stretching my film-processing legs a bit more.

Here are the links to the two-part video series about the pinhole camera process. Enjoy.

Part One:


Part Two:

Tuesday, July 5, 2016

Returning to the Scene of the Crime

DSCF5013a

Slow and methodically I've been using up this latest round of Harman Direct Positive prints in my set of nine film-canister pinhole cameras. Every time I do so, it's been in quantities of three, enough to develop in one batch in the 35mm steel development tank. Three seems a good number; a triptych, in quantity if not in actual intention.

To do this, to make the creating of these little gem-like prints part of one's private life, means that there has to be a sense of balance between the desire to chuck it all, ignore family, friends and obligations for the obsessive pursuit of one's Arte, and maintaining peace in one's life and relationships. In the past, I've been much more apt to obsess over the pinhole photography process, each outing a mission dedicated to the One Big Objective of returning with some trophy-like images - or don't come home at all.

DSCF5019a

These days, I'm a bit more laid back. For one, I've eased back on my expectations, happy with one or two good prints, even if they are small enough to fit in the palm of one's hand. Also, the gear is small enough to easily carry, even with a modest tripod. I'll carry a small day pack, with tripod in hand, metal camera mounting plate attached. Once I find a promising scene I'll get the tripod set, meter the scene and then pull out of its storage box one of these little cameras. The typical scene might only take all of a minute to set up, meter and expose. Quick, and expeditious. Then, I can get back to the business of whatever the day requires. No day-long pinhole expeditions, no choosing between creativity and life's responsibilities. Just fit it into those interstitial moments that have so much to do with whether a day has been successful and rewarding, or not.

Honestly, if I could be satisfied with a short, handheld tripod and the restrictive compositions it might limit me to, this whole process would be that much less obtrusive.

Last week, I made a visit to the Green Jeans Market in Albuquerque, a cluster of cafes and shops made from metal shipping containers, situated in a bit of land adjacent to Interstate 40, and made a few pinhole exposures; today, I returned to the scene of the crime, prints in hand along with a digital camera, fountain pen and notepad, to document these thoughts, while having a bite of lunch.

Now, since constant improvement (or, at least, spurious innovation) has been a continual part of my photographic journey, I've been thinking about the possibility of a combination pinhole camera and developing tank. Since I have several spare 35mm steel processing tanks, the thought came to me that, were I to drill a hole in the side of one of these tanks, then outfit it with some sort of liquid-proof pinhole/shutter mechanism, that I could expose and process a single, larger Harman Direct Positive print in said tank. I can imagine carrying a little box of small containers of processing chemicals, along with my little rotary base.

I can imagine a scenario like this: I visit some photogenic locale, such as this Green Jeans Market area, and expose one image. Then I retire to the cool comfort of Santa Fe Brewery's upstairs seating area, burger and brew at hand, and proceed to process said pinhole print at my table, between mouthfuls of greasy burger, washed down by a cool beverage that might resemble, were it not for the carbonation's bubbles, a glass of expired developer; best not to get the two confused. The result being - what? - a wet print that still requires a lengthy archival wash, then taped to a sheet of glass to dry for an hour or two in a drying cabinet?

DSCF5020a

This is where the needle scratches the record, where the whole idea falls flat on its face and I all too easily express my frustration that Harman/Ilford refuses to make an RC paper version of this wonderful positive photographic medium. For with a resin-coated, direct positive paper, the possibility remains of having finished, dry, one-of-a-kind positive pinhole prints in-hand at said brewery table, after a brief water rinse, squeegee and air dry, again between mouthfuls of greasy burger, washed down by cold brew. Which opens up the possibility of being able to create portraits on-location, reminiscent of those street portraitists of old, who would prowl the dark nightclubs of the 20th century in search of couples who wished to document their nocturnal encounters.

For now, the dream remains but a dream, and I have to be satisfied to return home to process these prints to completion. Yet I continue to dream these dreams, incessantly, never giving up hope for the things that could be, for that is what the joy in life is made of.

Monday, June 20, 2016

Words and Pictures

P1000645a

Words and pictures. Images both literary and visual. These have been considered so similar that the verbiage used to describe them seem to be synonymous. Word pictures. A picture is worth a thousand words. Terms almost interchangeable. It should come as no surprise then that the devices we've made to construct words and images together seem to operate so similarly. Today, digital images and text files seem virtually the same, mere data, slung around networks of optic fibers and copper wires.

Looking backwards is often required to see forward. So it is when combining gelatin silver paper prints and typewriters; or, gelatin silver prints of typewriters, two technologies that seem so like-minded.

A few years ago, when I was delving deep into the world of paper negative photography - employing silver paper as a form of in-camera, black & white "film" - I began looking for alternative methods of displaying these as positive images. Two obvious ways were contact printing them, in the darkroom, onto other sheets of silver paper; or scanning the negatives to produce digital files, to be inverted later via software into positive images. Both methods have their benefits. The first produces a physical print, while the second is intrinsically software-based.

But then I came up with a third method, similar to digital scanning, but employing a handheld digital camera; placing the paper negative into some setting or scene, perhaps related to the original image, and often outdoors; photographing the paper negative within the larger scenic context; then inverting the tones of the image afterwards, to produce a positive monochrome image set inside an otherworldly appearing scene, a shifted color palette of negative tones, a reversed world where the real is imaginary and the imaginary real.

Since that time, I've been working more regularly with Harman Direct Positive paper, that produces a positive image requiring no tonal reversal afterward. But the idea of digitizing these prints, by photographing them in some larger context using a handheld digital camera, persists to this day. So it was that, after making this small study of my Hermes 3000 "Nekkid-Riter" chopped typewriter, using small squares of the Harman paper in my film canister pinhole cameras, it seemed obvious that sharing these prints online might be more interesting done this way than by merely scanning.

P1000646a

The process I use to make these prints, now that I've worked toward refining it, is so simple as to almost be silly. Give the paper a brief pre-flash of even light in the darkroom, then load into the film canisters. Rate the paper at an exposure index of 10, and the pinhole cameras at F/128. Meter the scene, make the exposure based on the metered reading. Load paper into a steel film developing tank, minus the reels, using loops of drafting tape on the backsides. Three such prints can easily be processed simultaneously. Mix Ilford MG paper developer, diluted at 1 + 15, to a volume of 100mL. Use continuous rotary processing, using the film tank on its side, for 3 minutes. Stop, fix and rinse as normal. Dry for an hour or two on a sheet of glass, taped down on the edges with more drafting tape. Done. Beautiful, individually unique gelatin silver positive prints.

P1000647a

I might say that the typewriters themselves, though each are as unique as the Harman positive prints, are a bit more complex. They aren't being manufactured, and spare parts are only to be found from other, donor, machines. Platen rollers can be resurfaced, and new ribbons are easily available, however. But the machines themselves are to be found online, at local thrift stores, Craigslist ads or estate sales. They almost always need some kind of service in order to be functional; at the very least, a thorough cleaning, degreasing and relubrication, then often some adjustments have to be made. Lots of hands-on fiddling, but also very satisfying when the typewriter collector/user also becomes a typewriter technician.

Typewriters also have a functional use, which is to mechanically print letters neatly onto paper. They're like film cameras in this regard, made to do but one thing, to lay down images of the literary kind. Which brings us back to where we started, with words and pictures.

Tuesday, June 14, 2016

Film Canister Pinhole Camera Project Update


P1000583a
Three new prints from the film canister pinhole camera project

It's been a few weeks since I began delving into this film canister pinhole camera project, and along the way I've made a few improvements and changes, which I'll share with you today. As you might recall, I was having issues with the black tape used as the shutter on these small cameras, because being adhesive, as you peel off the tape it's very easy to move the camera, resulting in a blurry image. Also, because the canisters are made of soft plastic, they shouldn't be gripped too tightly, which might cause their caps to pop off and fog the paper inside.

So I had to find an alternative, more mechanical, form of a shutter device. I had some ideas, but was also helped by readers of this blog and viewers of my You Tube video. I ended up making plastic sleeves that fit snugly around the periphery of the cameras, that slide up and down to control the exposure. These were made from the black plastic dark slide sheets that get ejected from the Fujifilm Instax Wide instant film cassettes, which I've been saving for a purpose such as this.

P1000574a
Fujfilm Instax Wide empty cassette and dark slide

I trimmed the edges of these dark slides so they were square, then into 18mm wide strips, that were then taped to the canisters using gaffers tape. They weren't quite long enough to extend all the way around the periphery of each canister, thus I used a thin piece of gaffers tape mounted backwards on the middle section of each piece of gaffers tape to prevent the tape from binding on the body of the film canister. Because the canisters are slightly tapered, the shutters fit snugly in place, and can be easily raised up into the exposed position without moving the canister on its magnetic mount. Once the exposure is complete they push back down into the closed position easily.

P1000576a
Shutter in closed position

P1000575a
Shutter in open position

I also made a change to my exposure method. I usually set the meter to the Harman Direct Positive paper's ISO (I use a value of 8), then reference the exposure time recommended by the meter opposite f/128 and apply a correction factor to account for the difference between the cameras' focal ratio and the f/128 metered value. For these cameras, whose focal ratios were around f/120, that correction factor was about 0.94. What I did this week was to artificially rate the paper's ISO at 10, instead of 8, and directly reference the exposure time for f/128, without applying any correction factor. This enables me to arrive at the correct exposure times without having to resort to the use of a calculator, which streamlines the process when out in the field.

Another problem I'd been having were intermittent scratches or gouges in the prints, revealed as small white marks, which turned out to be caused by the sharp edges of the radial struts of the steel film reels. As you might recall, I process these small prints, rotary-style, using a steel 35mm film developing tank employed as a makeshift rotary drum. I'd place the prints in the gap between the reels and the inside surface of the tank, emulsion side facing inward. What I did this week was to entirely remove the reels and instead apply a small loop of drafting tape on the reverse side of each print, to assist in adhering them to the inside surface of the tank while processing; the tape is sticky enough so the prints don't come loose while processing, yet are easily removed afterwards without harming the paper or leaving residue.

As you might recall from previous videos, I process the Harman Direct Positive paper for three minutes, rotary style, using Ilford Multigrade or Universal paper developer diluted 1 + 15, for a volume of 100mL.

P1000578a
P1000577a
Two of the prints, right after the tank has been opened post-processing

Because these prints are so small, they don't stay immersed in the rinse bath, since they have a larger edge length-to-surface area ratio. Therefore I made these weighted cable-tie loops, within which each print is curled, taco-style. The prints are bent along their natural curve axis. They stay nicely immersed in my rinse tank; which I take outdoors and, using a garden hose under my tree, water my landscaping instead of wasting the rinse water down the drain - I do live in an arid climate, where fresh drinking water is precious.

P1000579a
Paper rinsing clips in the rinse tank

I use the same drafting tape mentioned earlier to mount the prints on a sheet of glass, where they dry inside my film drying cabinet and end up very flat; while afterwards the tape is easily removed without damage to the emulsion.

P1000580a
Prints drying on a sheet of glass in the drying cabinet

I tested this new methodology with three of the canister cameras, the results which you can see in the top photo. Going forward, this is going to be a very fun kit to employ in creating these miniature photographic gems.

Wednesday, June 8, 2016

Thoughts on a Forensic Documentary Photography

P1000495a

To tell the story of a place is to tell the story of its people. Yet, a cursory, mere superficial visit might not reveal that underlying character of a place, if all we have to go by are surface appearances, without decyphering those cryptic clues revealed as the built environment, cluttered and stained by the detritus of human existence.

Walking the streets, sidewalks and alleys of a place, we are archeologists sifting the clues of a hidden civilization. A piece of rubbish in the gutter tells a story, however incomplete, as do the piles of clothes in the alley a block away, scant evidence of a human tragedy unfolding.

We might wish instead to seek out the form of the human visage, as a more comforting and familiar representation of a place. But that can be deceiving, because personal appearances are often mediated through the dictates of post-modern, ironic fashion statements masquerading as anti-fashion, blended together styles appropriated from the furthest reaches of culture.

Clothes, we soon find out, function just as much as costume and concealment devices as they do protection from the elements and clues as to one's cultural origins.

To more fully understand a place, perhaps we need a more forensic approach to the art of documentary photography; seeking, through a variety of clues left by human activity, an understanding less mediated and more transparent.

In the last seven years that I've prowled the streets of my city, camera in hand, I've periodically found myself feeling insufficient in the role of street photographer, since my images mostly lack the direct presence of people.

I sincerely believe that a person should pursue the kinds of subject matter that they most naturally gravitate toward, regardless of genres and tropes defined by others. Originality and individuality count much more than adherance to someone else's perceptions.

Rather than consider my body of work to be some insufficient example of "street" photography, I'm coming around to the understanding that it actually represents something else entirely, closer to that idea of a forensic documentary style, sifting clues as an urban archeologist might.

There's more than mere symbolism at work here, for in a very real sense the culture we seek evidence of is continually passing away; given the fact of a constantly evolving civilization, any artifacts found are intrinsically from the past, even if it's from a mere hour ago.

Walking the alleyways of Albuquerque's student ghetto area near UNM, for example, is a rich experience in urban archeology, as the detritus of an evolving culture are represented in piles of refuse and debris; meanwhile, the people themselves remain cloaked in the costumes of fashion and popular culture, revealing less about themselves than do their trail of artifacts.

I trudge through the dusty emptiness of an abandoned gas station property across Central Avenue from UNM, devoid of any signs of commerce or prosperity, and this too represents a more accurate weathervane of the local economy than the mere choice of fashion or dress; even the street people, panhandling visitors for change, are deceiving in their attire, with their fresh, clean shoes, unstained by the sidewalks of life; these same faces I've seen repeatedly, these professionals masquerading as homeless. Things are not what them seem from superficial appearances. Deeper thinking, a more critical eye, is warranted.

The kinds of questions posed by the cultural anthropologist might be necessary to gaining a more critical understanding. How people get by, their economic survival modes, are key to understanding a place. These are the kinds of questions of which we need to be seeking answers.

A healthy suspicion of photography's veracity is equally essential to understanding how best to document a place. The process of limiting the viewer's perspective to a particular framing defined by the image's edges, frozen in some specifically chosen moment in time, is fundamentally an editorial decision; in truth, there is no objective photography. All photographs are lies, told however convincingly by their appearance of faithfulness to the laws of optical perspective, color and tone.

The challenge for the photographer as documentarian is to impart as little additional untruth as possible; or, at the least, to understand what level of truth is being pursued - superficial visual reality or something deeper.

In seeking to delve below the level of the mere superficial, monochrome imagery often is more effective than some more realistic color rendering in bringing the viewer to that deeper level; telling a superficial lie (in that visual reality is more than monochrome) to arrive at some underlying perception that color might obscure.

P1000508a
P1000506a
P1000502a
P1000499a
P1000497a
P1000487a
P1000486a
P1000504a
P1000494a
P1000481a

Tuesday, May 31, 2016

Film Canister Pinhole Camera Project

DSCF4967a
An exquisite little jewel of a print that fits in the palm of your hand

Last week, after a long, long hiatus from much of any pinhole or gelatin silver photographic work, I embarked, in a sudden fit of inspiration, on a mad rush to build a set of nine pinhole cameras from black 35mm film canisters. Why the sudden inspiration, after all this time of little creative photographic output? Hmm. Best not to question the Muse, but rather to strike while the iron's hot; there'll be plenty of time, down the road, to ponder the whys.

My intention was for this set of small cameras to use Harman's Direct Positive paper, cut down to 1.75" square, which after a standard processing in black & white chemistry produces one-of-a-kind, fiber paper prints. Think "wet Polaroids" and you get the general idea.

DSCF4970a
Camera number one, with black tape shutter removed. The red dot on the cap indicates the direction of the pinhole.

My previous experience with this paper in pinhole cameras has shown that it doesn't tolerate lengthy exposures in cameras sporting hefty focal-ratios, since I rate its "exposure index" (the fancy term for the paper's "film ISO") at a value of 8 - much, much slower than what one might expect in a modern digital camera, for example. Given the paper's slow "speed" and the minute apertures found in bigger pinhole cameras (whose focal ratios often extend in the 100s), a smaller-sized camera, with a shorter focal length, would have a more reasonable f-number, yielding exposures short enough to be practical. In the case of these cameras, their f-numbers come in at around f/120 or so. I say "or so" because all nine of the pinholes were made by hand, and thus might not be exactly identical; but they're close enough.

I made the pinhole into 2-mil (i.e. 0.002" thick; NOT 2 millimeters) sheet brass, using a sewing needle and 600-grit emery paper. I've made a video to demonstrate my pinhole making technique, linked below.


Making Pinhole Camera Apertures

After doing a fairly good job at making the cameras themselves, and their little storage box, I had to decide how to use them with a tripod. After over-thinking it with ideas of pipe clamps and whatnot, I finally hit on the simply elegant idea of using the power of magnets, like Jessie Pinkman in the AMC series "Breaking Bad." Yea! Magnets, b*tch! (If you don't understand the reference, Google is your friend.) I installed magnets on the caps of each camera, which mate with a metal plate, screwed to a wooden base with tripod fitting underneath. I can place multiple cameras atop the metal plate, and the attractive force is strong enough to keep the cameras secure in almost any position.

DSCF4971a
Camera number one atop the magnetic tripod head

This morning, I took these little cameras out into my front and back yards, to make a series of test images. My standard metering and exposure technique is to use a Gossen Luna Pro F meter, set to the paper's exposure index of 8, using either reflective or incident metering (I used both during today's tests); reference the exposure time recommended for f/128, then apply the correction factor for the cameras' focal ratio. Since these cameras were about f/120, and the correction factor was about 0.9, I ended up just using the f/128 reading itself for about half of these shots; close enough for the tolerances of the process. This also represents a convenience factor, since I can use the meter reading directly without having to pull out a calculator to do the conversion.

All the cameras worked as expected, no light leaks noted, and the exposures were all pretty good; there was one image, of irises whose leaves were in bright sun but background was heavily shaded, where I metered the leaves themselves, and ended up with them being around medium-gray in tone, with the background almost completely black. Again, as one would expect; for a better image I should have added a +1 compensation to the exposure to brighten those leaves. I also did not do any pre-flashing of these prints, as I normally do with Harman Direct Positive paper (and also paper negatives), as I wanted to see the images straight away as the cameras record them, without any additional compensation.

Another image was taken in shade, with an exposure time of 55 seconds, the longest of the session, and it came out fine, with a good tonal range (as one would expect of this paper in shaded light), further proof as to the accuracy of my pinhole measuring technique.

In actual use, I keep the cameras in the box with their lids facing downward, the bottoms of each canister having a clearly visible number label affixed via double-sided tape. I start with camera #9. After its exposure, it goes back in the box cap-side up, so its number is no longer visible; so then, the highest numbered camera is 8, telling me that I have 8 exposures left. Simple but effective, and keeping me from getting confused, while out in the field.

DSCF4968a
The set of nine pinhole cameras in their carrying box

For shutters on the cameras, I've gone with the simple but elegant method of using black electrical tape. Best not to over-engineer what should be a very simple camera.

I've made another video documenting this project.


Film Canister Pinhole Camera Project

As I indicate at the end of that video, my desire is for this to be the start of some "serious" pinhole work, and not merely another camera-building project. I've built countless pinhole cameras over the last few decades, but much less have I seriously employed them in the service of some long-term documentary project. I hope this marks the start of a long stretch of productive pinhole creativity.

For those of you technically-minded, the pinholes were about 0.2mm in diameter, with the nominal focal length about 27mm (the curved film plane in the canisters ranges from 25mm at the center to 30mm near the edges). I expose the Harman paper using an exposure index of 8, then process them in a makeshift rotary drum (a standard metal 35mm tank laid on its side) for 3 minutes in a 100mL volume of Ilford Multigrade paper developer at a concentration of 1 + 15, followed by standard stop bath, fixing and rinsing.

Tuesday, May 24, 2016

Jumping Back In

Ken001a

I've had these three rolls of film sitting around in my office for so long that I couldn't even remember what year they'd been exposed. I knew they were exposed because the film leaders were retracted in their cassettes, but that was about all. They were all Ilford FP4 Plus, medium speed black and white film.

My "analog" (gosh how I hate that term) photographic activity has been essentially dormant for a year, when I last was working with the instant box camera project and paper negatives; and before that it's been virtually exclusively paper negatives or Harman's Direct Positive paper, for a number of years. But film? Nada. Oh, maybe a few rolls of color, sent off to my local lab. But black and white? Nope, not even.

This is almost a sin. Having a darkroom at home, capable of processing and printing every kind of black and white film, from 35mm to 8"-by"10" formats, and prints up to 11"-by-14" in size. Two enlargers. A film drying cabinet of my own design. A hobbyist darkroom any photo student would be envious of. And what has it used for, these last few years? To store my darkroom equipment, that's about it. And Christmas and birthday gifts (but don't tell the grand-kids, okay?).

I'd been eyeing those rolls of film in my office for some time now. They'd been sitting in a green glass candy dish up on one shelf of my bookcase. I'd occasionally take them down, open up their containers and eye them suspiciously. After thinking about processing them, "one of these days," I'd put them back in the dish.

Noah003a

Last week I finally decided to tackle one of the rolls. I figured it was safe to start off with just one roll, since my skills were rusty and thus there'd be less to lose if something went awry. I also was suspicious of the quality of several bottles of developer sitting out in the darkroom. Getting up the nerve, I finally decided to give it a go.

I collected all the bits I'd need. Jobo processing tank? Check. Mixing containers? Check. Changing bag? Check ... but not until after a lengthy search revealed the bag to have been stored away, high up in the loft. Thermometer? Check. Fixer? Check. Scissors? Check. Can opener? Nope. I'd have to improvise. Stop bath? Nope. I'd have to use white vinegar. White vinegar? Nope. I'd have to use apple cider vinegar. More improvisation. Hopefully it wouldn't leave some funky residue on the film.

Developer? I checked the bottle of HC-110 concentrate, but crystallization along the inside of the bottle ruled that out. Oh, well, more wasted money. Agfa Rodinal? Yep, a used bottle, only 1/3 full. Should I use it? My better judgement said no, despite Internet wisdom on its longevity. Finally I found a newer bottle of R09, a Rodinal-like substitute, that appeared in good condition, no crystals or other funkiness. Time to get busy.

I decided on a more standard dilution of 1 + 25, with regular agitation, despite more Internet suggestions of excess grain with Rodinal and I should be doing semi-stand development, for improved granularity, yadda-yadda-yadda. Sometimes you have to shut your ears to all the online experts and go with your gut feel. I'd had bad experiences, years ago, with used developer and development procedures I'd only read about and not experienced personally. Best to be safe. Don't jump in the deep end too soon.

I had less issues loading the roll of film than I expected. Sometimes these plastic film reels can be finicky, and other times they can be wonderfully easy. It's all a crap shoot. But this time I did something a bit more deliberate, which was to trim the two front corners of the leader, like what's suggested for loading old film cameras, and this helped a lot, keeping those otherwise sharp corners from snagging in the plastic reel as it's being threaded.

Not wanting to give any negative results an excuse, I was careful with the chemical mixing and also ensuring proper temperatures were employed. The data sheet on the bottle of R09 suggested 8 minutes development time, which I stuck to, while opting for agitation every 30 seconds, using my normal method of several medium speed inversions while the tank is being constantly rotated along its axis. I suppose it's like riding a bike, you never forget.

Past experience with issues of residue and dust taught me to use for the final rinse Kodak Photoflo surfactant diluted 1 + 200 into distilled water, which I measured accurately and mixed thoroughly. In the past, I'd been sloppy enough to just slop a bit of Photoflo into tap water without so much as any measurement at all, resulting in either a film residue left on the film after drying, from too much Photoflo, or water spots from not enough.

Whereas I used to hang the film in a bathroom shower whose cleanliness was questionable, this time I had the convenience of a film drying cabinet, that I built some years ago and used for drying prints but never until now had actually hung any film inside. Its 100 watt heat lamp and HEPA-filtered laminar airflow seems to work wonders in drying film with little or no dust spots, because my scans afterwards were virtually spot-free; hardly any clone-stamping work needed to be done in Photoshop.

Fry's001a

My results were promising enough that I tackled the other two rolls yesterday. This time I used white vinegar for stop bath, but otherwise everything was done the same, with the exception of agitation every minute instead of every 30 seconds. The results were also very good.

Christmas_Family006a

Afterwards, I found a roll of Ilford HP5 that had been exposed last December, and I again processed it with no issues. The roll hasn't yet been scanned, but initial inspection suggests good results.

Some years ago I bought a brick of the HP5 film from a local camera store, used some of it, but still had a number of rolls left. So this afternoon, buoyed by my recent processing success, I unearthed my Minolta X700, purchased last year from KEH Camera (and that's only seen several rolls of color film since), and loaded up a roll, with a yellow filter over the lens. I've yet to make any exposures, but I figure it's "almost free," since the film's been long payed for, as have the camera, chemicals and post-processing scanner and software. So it's almost the same as digital, except the added fun of processing and scanning. But working with manual focus film cameras is so enjoyable, and inexpensive, as to truly be a valid alternative to expensive digital systems for monochrome photography.

I don't know if this is just a soon passing fad, or if I'll stick with shooting more film. I hope it's the latter. The Minolta X700 deserves to be used more, as does my darkroom. I also have a Soviet-era Zorki IV and Kodak Retina IIIC rangefinder cameras that also need to be used more. And if I get enough good negatives, perhaps even a session of wet-printing onto gelatin silver paper might be in order. If so, I'll update you here.

I think the lesson here is never sell off your darkroom equipment just because you're currently not using it; nor should you tear down your darkroom, if you can at all help it, because film and printing paper are still readily available, as are all those wonderful old film cameras. Now's the time to take the leap, before economic considerations threaten the future of this marvelous medium.

Tuesday, May 10, 2016

Camera (Not So) Obscure: Learning to See

DSCF4958a

Yes, it's been almost two months since this blog has been updated, and in the meantime my callous disregard of my millions of readers has resulted in much hand-wringing and sleepless nights around the globe, I am certain. Please, let's do nothing rash and the global panic will subside.

Though I've managed a few mediocre digital snapshots since then, I have experienced a complete lack of motivation or interest in gelatin silver photography. Part of this is due to the majority of my time and creative energy being spent on typewriter-related projects, such as my Hermes 3000 "Nekkid-Riter" and custom storage box, which has been covered in my other blog.

DSCF4944a

But within the last week I've had an interest in camera obscuras, most notably the small, handheld kind, that an artist might use as a tool for painting and drawing, rather than the room-sized, walk-in variety.

Camera obscuras can employ either a pinhole or refractive lens as the image-forming device, and as such fall into a larger category of related optical devices that I've dabbled with over the years, such as the "fauxtographic" viewing frame and the pixellator camera (and its cousin, the light pipe array), all of which I've employed as live-viewing devices, and would be appropriate subject matter for future blog articles.

Though I've also fashioned over the years innumerable pinhole and refractive-lensed picture-recording cameras, yesterday's project was the first time I've built a glass-lensed camera obscura as a dedicated viewing-only device.

DSCF4959a

I've come to believe that, in this image-saturated culture where most everyone carries on their person a picture-recording camera device of some sort, the very act of direct observation has been lost to the immediacy of constant recording. Billions of such images are now recorded every year, yet it seems as if the subtle nuances of the real world, from which these myriads of images have their origin, are lost to our present consciousness. We blindly go about our business of constant picture-taking while simultaneously being entirely unconscious to the reality of that which we're recording - or so it seems.

I'm beginning to suspect that what is needed in my personal photography is first an increased awareness of the visual world. My present modus operandi seems to be a hurried rush through some public area, blindly blasting away with my AK-47 of a camera while paying little attention to what's happening around me; as if I were more relying for success upon some happenstance, chance encounter with good fortune, rather than there being a purpose-felt dialog of exploration in a continual spirit of curiosity.

I'm feeling like I've been blind, having not yet learned to see.

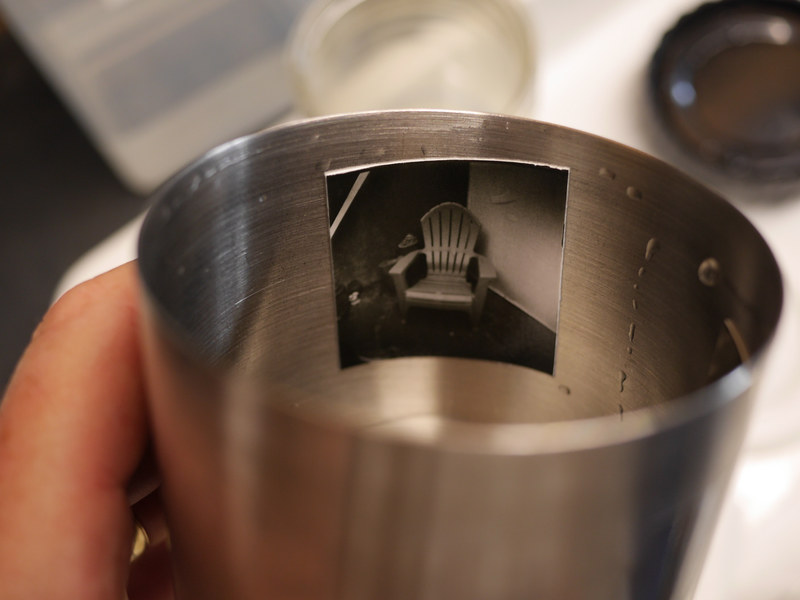
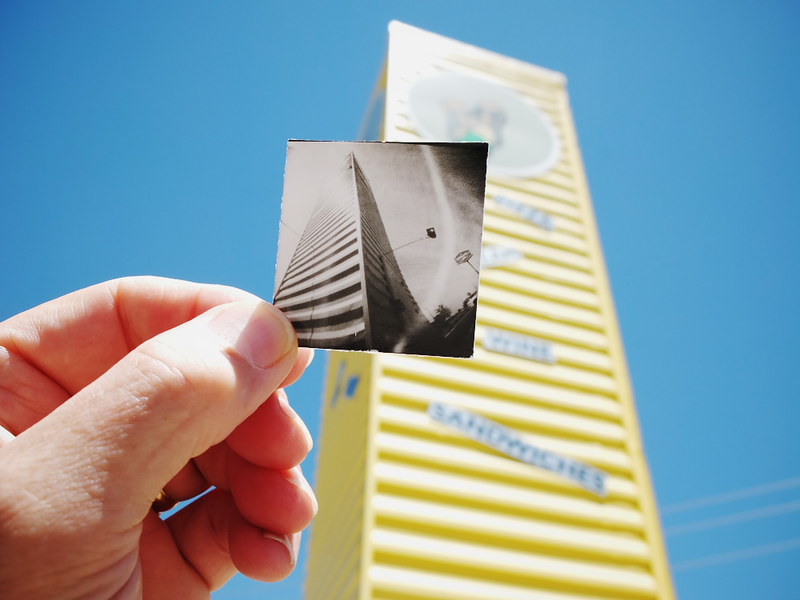
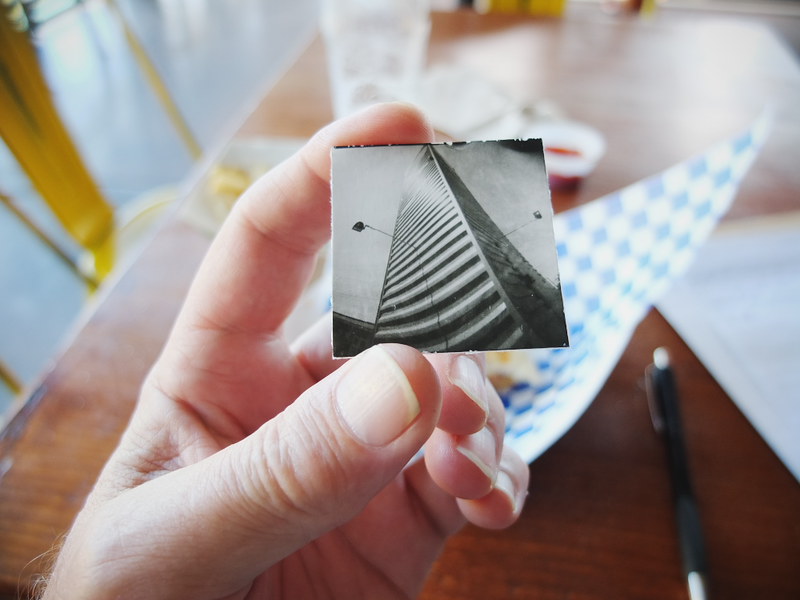
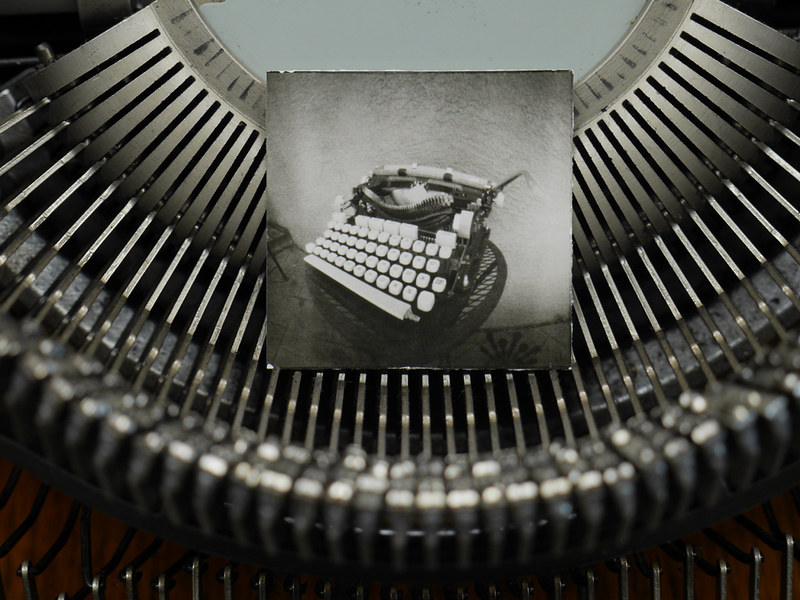
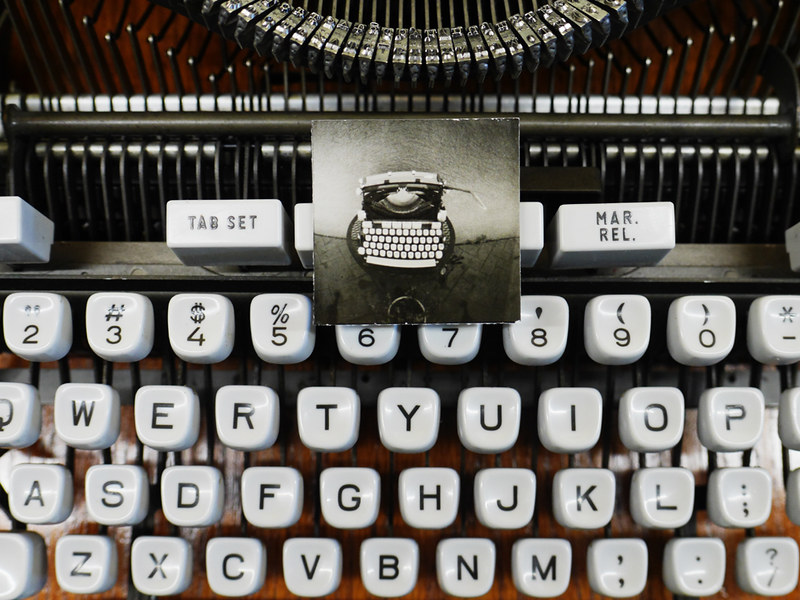
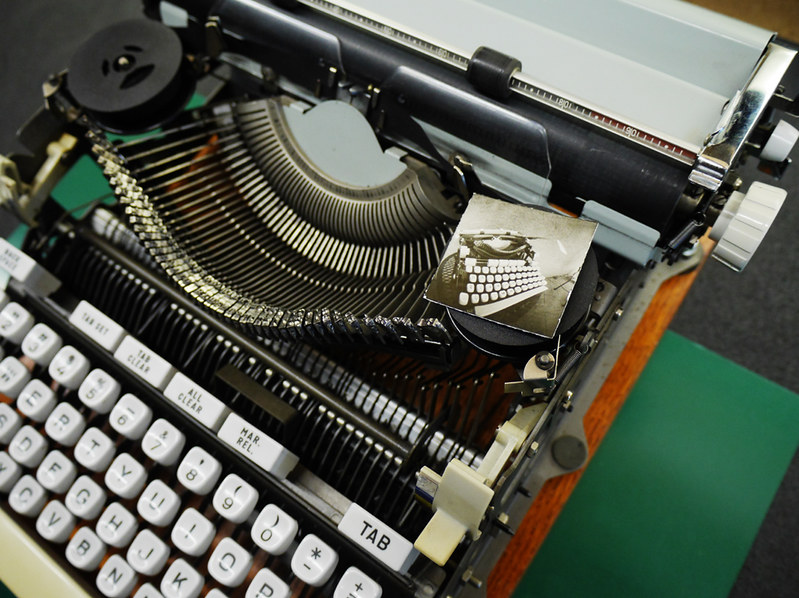
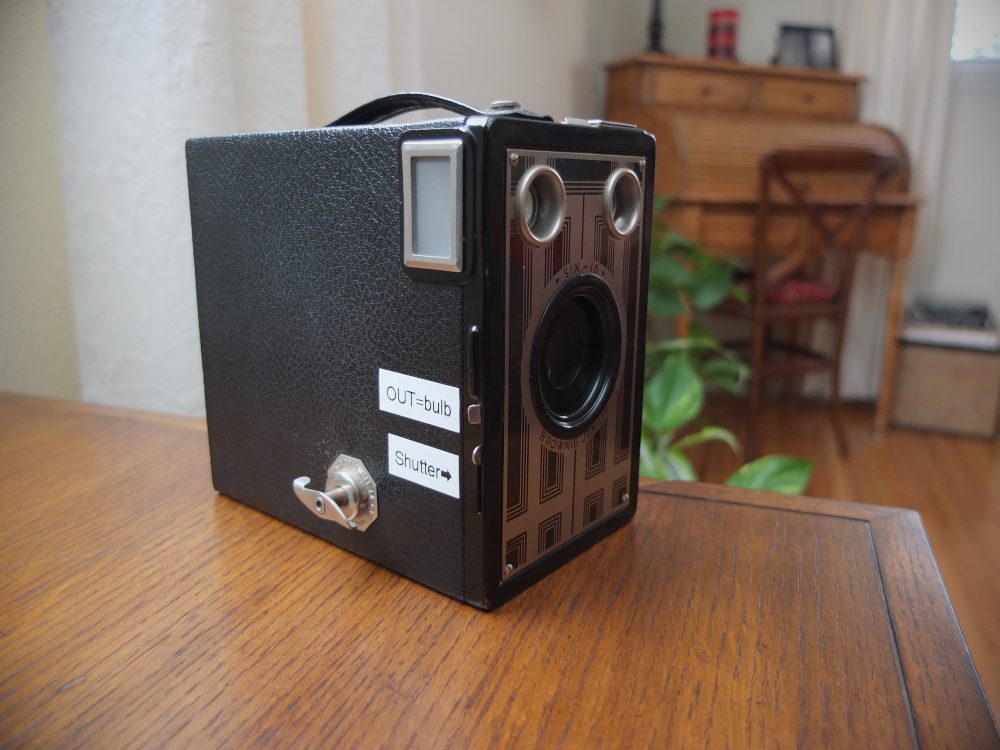
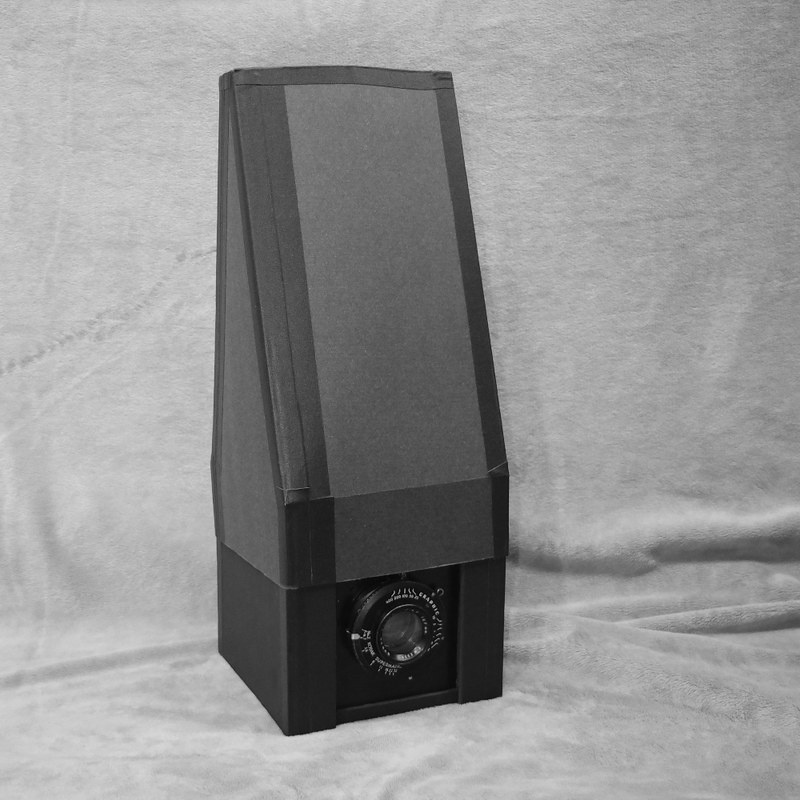
I've built this little handheld camera obscura as a device to gaze into, in order to learn to see more completely round about me. Peering down into its viewing hood at the five-inch-square screen below, what's presented is a live, full-color moving picture of the world in front of me, compressed down into a flat, two-dimensional image, complete with the optical effects of its lens, whose point of sharpest focus can be set upon objects far distant or close up, to within several feet even; much like looking into a twin lens reflex camera.

My intention is to use the camera obscura as a means for meditatively watching, rather than habitually recording. There will be no memory card or film holder full of the detritus of purposeless recording; rather, the images will reside in "wet-ware" as memories and recollections upon which to ponder.

TECHNICAL DETAILS:

DSCF4943a
DSCF4942a

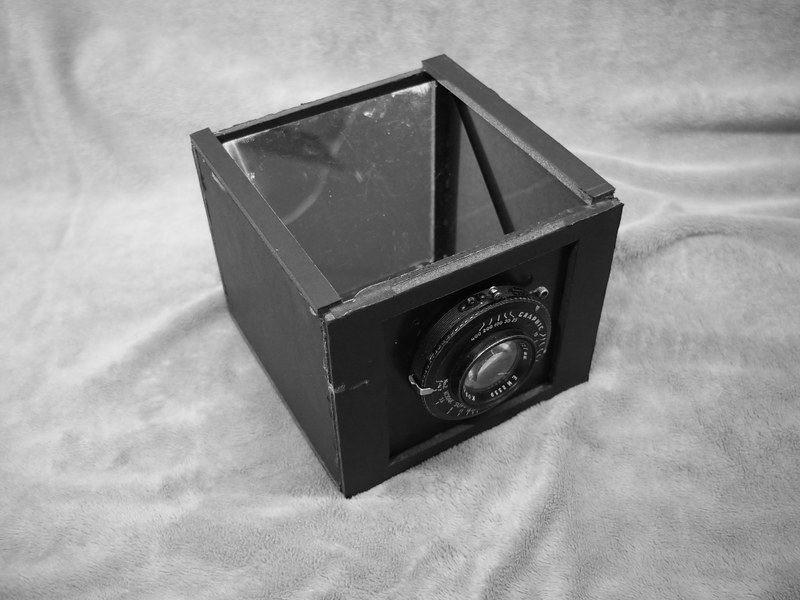
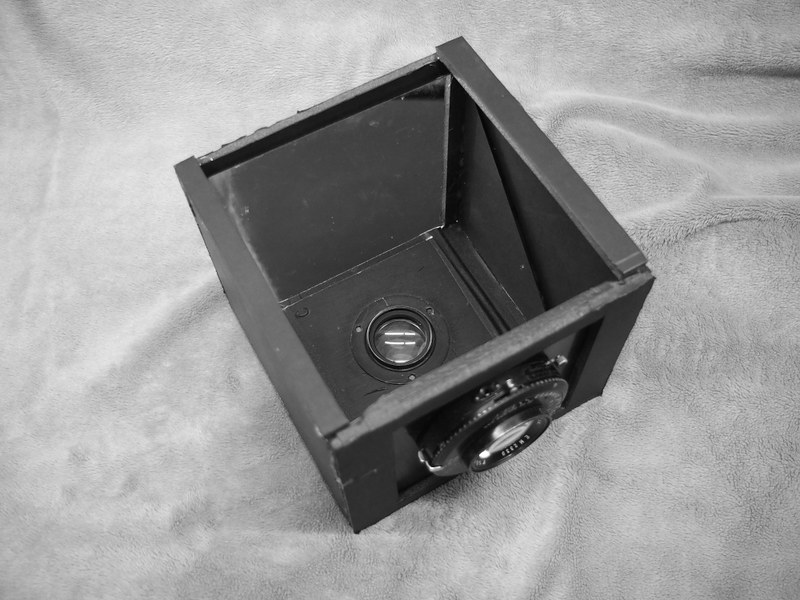
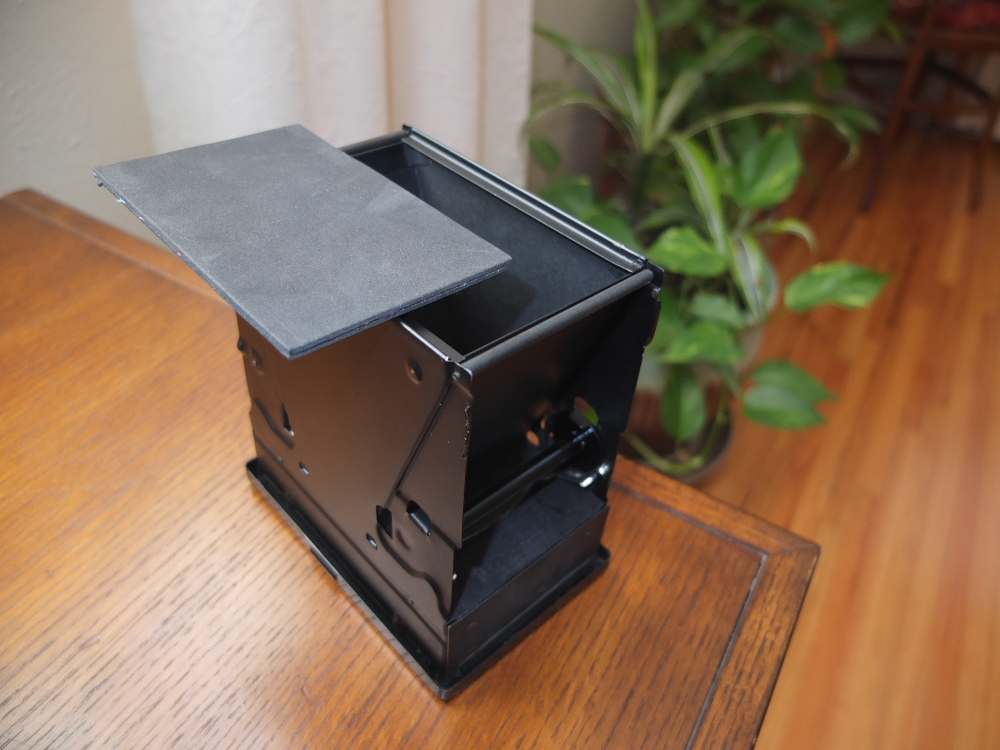
I've had in my possession for the last several decades a front-surfaced mirror, salvaged from an old projection television; which serves, along with a Kodak Ektar 127mm, f/4.7 lens, taken from a Graflex Speed Graphic camera, as the heart of the system. The viewing screen was made from a thin sheet of Lexan plastic, one side of which was ground down using fine emery paper on a random orbital sander. The body of the camera obscura is made from black foam core board, hot glue and gaffer's tape - the basic tools of the pinhole photographer.

A bit crude in appearance, perhaps. But with the application of some adhesive counter-top laminate or shelf liner material it could be made more presentable and weather-resistant.

It does remind me of that old Graflex SLR camera used by famed photographer Margaret Bourke-White, with its tall, chimney-like viewing hood.

There remains an acute similarity between the traditional camera obscura device such as this and the recent fad of "TTV" - Through The Viewfinder photography - where the view through a waist-level screen of a twin lens reflex film camera is rephotographed digitally.

OPERATION:

DSCF4965a

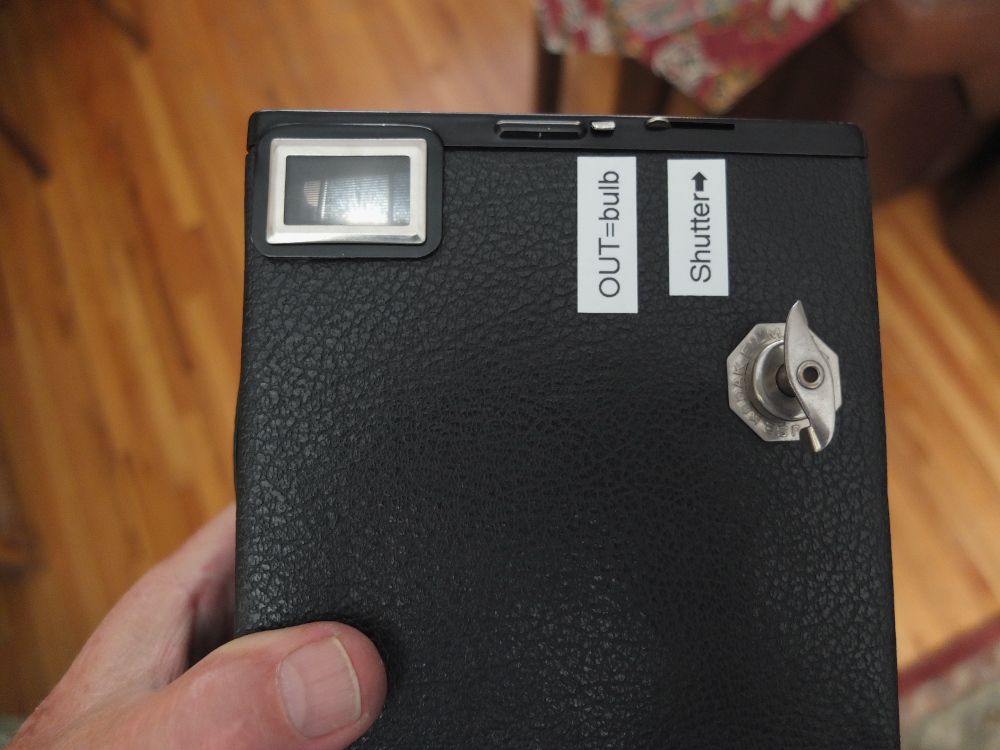
In use, the long hood places one's view conveniently located with the camera comfortably held at waist level, helping to eliminate most of the daylight glare. Though the handmade plastic view-screen serves quite well, it's not as bright as a commercially-made ground glass.

With the camera supported from underneath, the upper half of the camera, including view-screen and hood, can be easily adjusted vertically to selectively focus the image. Its default focus position, when fully down, is at infinity focus, with enough travel to permit a close-focus to within a few feet before ambient light spills in under the view-screen and washes out the scene.

I use the Kodak Ektar lens with its aperture fully open to f/4.7, and thus there is evident in the projected image some artifacts of narrow depth-of-focus. Thus, using the camera obscura as a viewing/observation tool, one sees the world as a camera lens would see it, rather than the way human vision collages together multiple points of focus to synthesize visual reality.

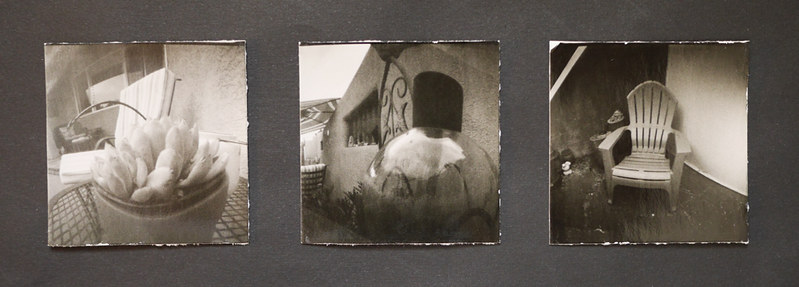
Standing in my backyard, gazing down into the camera obscura, I'm able to selectively focus upon either the garden trellis in the foreground or neighbor's trees in the background, racking focus back and forth with gentle up and down movements of the viewing screen/hood assembly; almost cinemagraphically.

Though these simple elements that make up the camera obscura - lens, mirror and view-screen - are essentially the same as found on many photographic recording cameras, the experience is different from the typical large format view camera, because the image remains right-side-up (though reversed left-to-right), essentially the same experience as using a twin lens reflex camera but with the luxury of a much larger (5" square) image.

FURTHER REFLECTIONS:

P1110747a

In taking the camera obscura out to a public setting, I'd expect much the same kind of curiosity and reaction as one would with employing a recording camera, though others' reactions might be less pronounced were I to be found employing the device in the more innocuous activity of sketching, rather than merely observing.

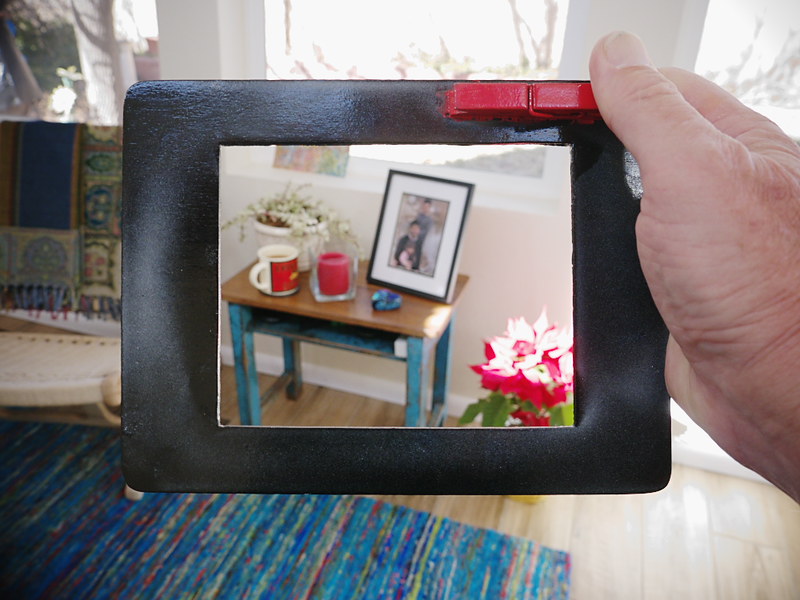
Which gets to the point of a similar kind of device, mentioned earlier, what I call a "fauxtographic" viewing frame, very similar to the kinds of viewing aids employed by large format photographers and film makers in photographic previsualization, but with the added feature of a clothes pin clicker device that serves to mark the "decisive moment" by simulating the firing of a camera's shutter.

I had independently co-invented the viewing frame, not for the purposes of aiding photographic composition (though it does serve that purpose admirably) but as an instrument of public performance art, as a kind of social commentary, or even protest, in counter-reaction to post-9/11 America's documented phobias over the act of public photography.

I was curious to deconstruct this phenomenon. Was it the mere act of human observation that was deemed objectionable, or the more specifically photographic act of placing borders around a specific point of view, then isolating it in time with the click of a shutter?

Skeptics might argue that there's no deeply-thought-out conspiracy at work against the philosophy of public photography; that in these times of heightened tensions and increasing concern over "security issues" one can never be too careful - just go with the flow, keep your head down, pay your taxes and just you no never mind. It's a small price to pay to be safe. Whose side are you on, anyway? Say, you're not one of them there Elk Hiders, now are you ... ?

No, I'm not one of them there Elk Hiders. But I do think about the act of photography, at its most fundamental level, as being a literal extension of the act of seeing. A photograph most essentially represents a simple human gaze, frozen in time.

And so, any objection to public photography is really an objection to direct human observation itself, disguised under the rubric of "security". It's not enough that we shouldn't photograph in public; what's really being asked/insinuated/demanded of us is that we not pay any attention at all to what's really happening. Keep your head down, your eyes averted and your mouth shut. And don't think too much, it'll just get you in trouble; not what would be required of responsible citizens in a (supposed) democracy, since (in theory) self-governance requires continual observation of the elected by the electorate.

With the portable camera obscura, however, it's not a device easy to carry or conceal, like the fauxtographic viewing frame. It's big, black and draws attention to itself. More importantly, it's not an instrument intended for social commentary, but a tool for a very personal kind of visual exploration, a device for learning to see all over again.

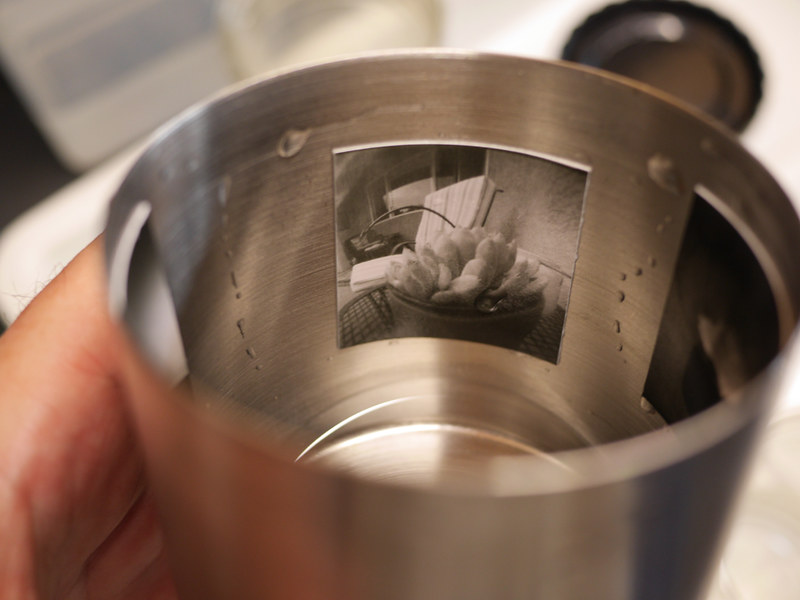
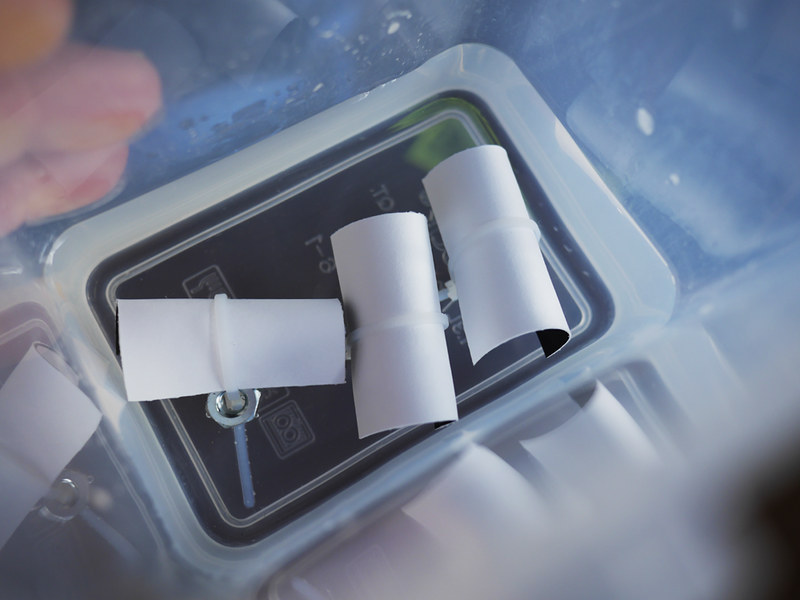
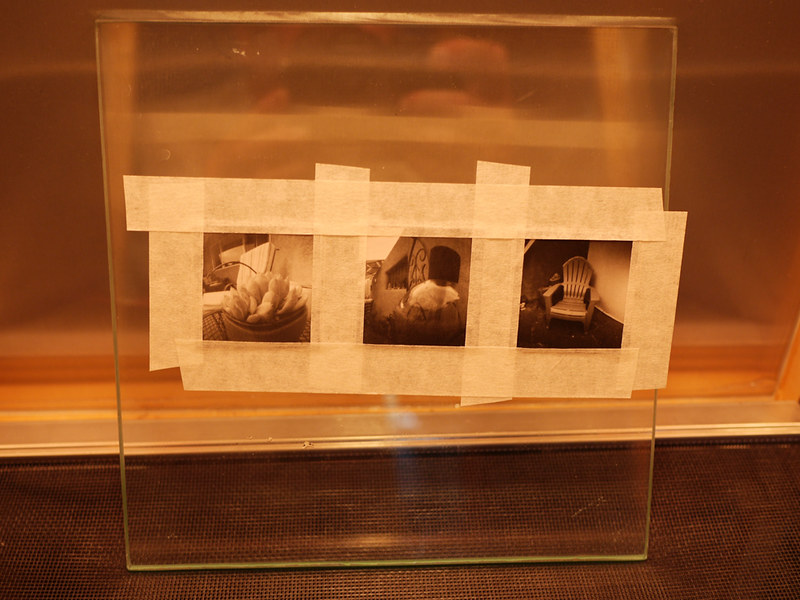
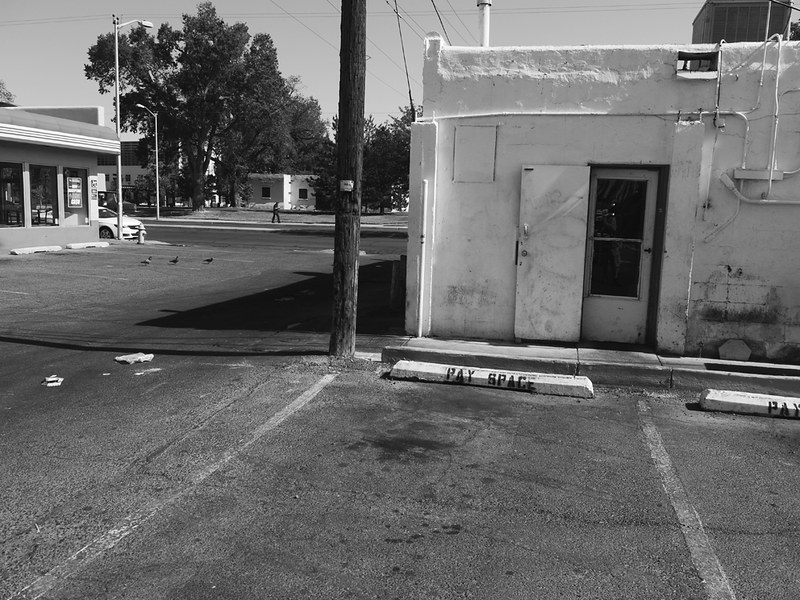
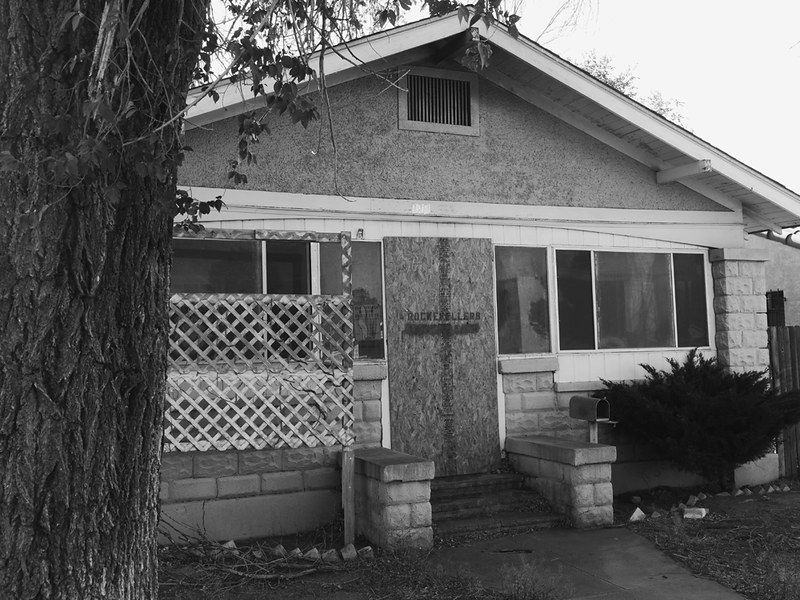
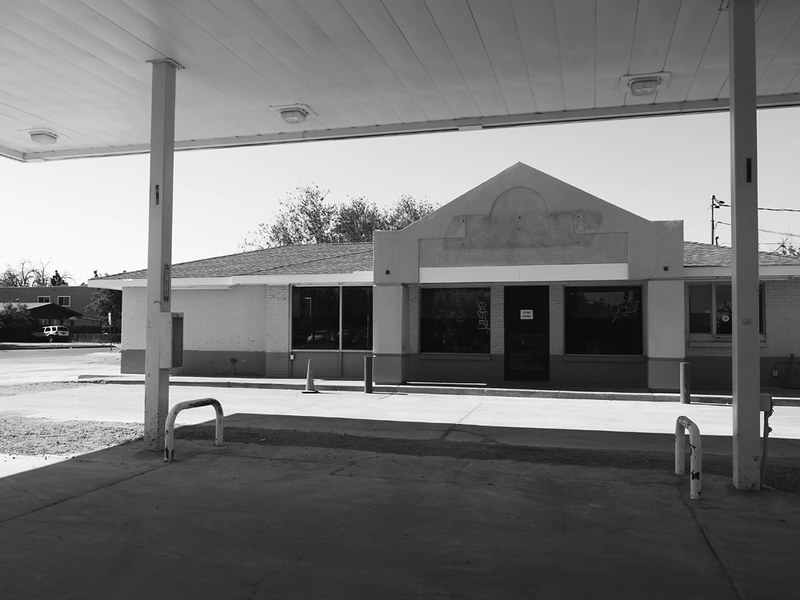
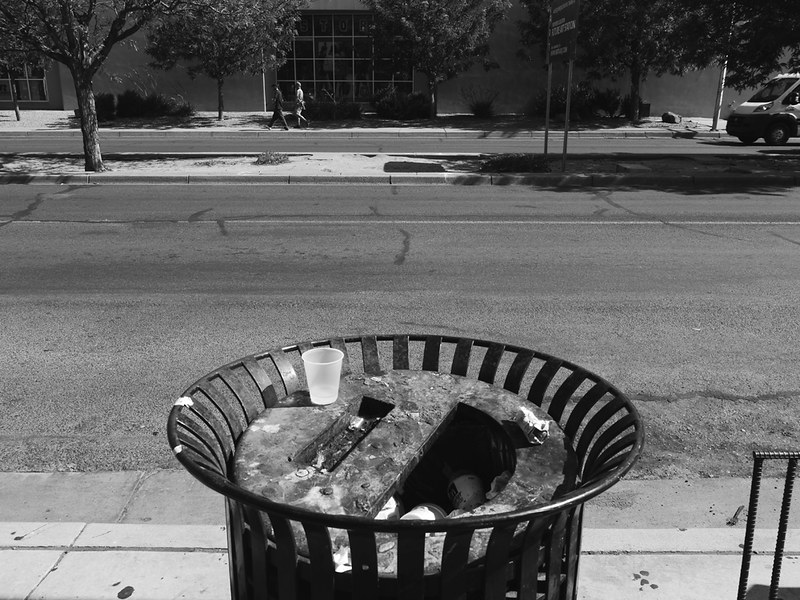
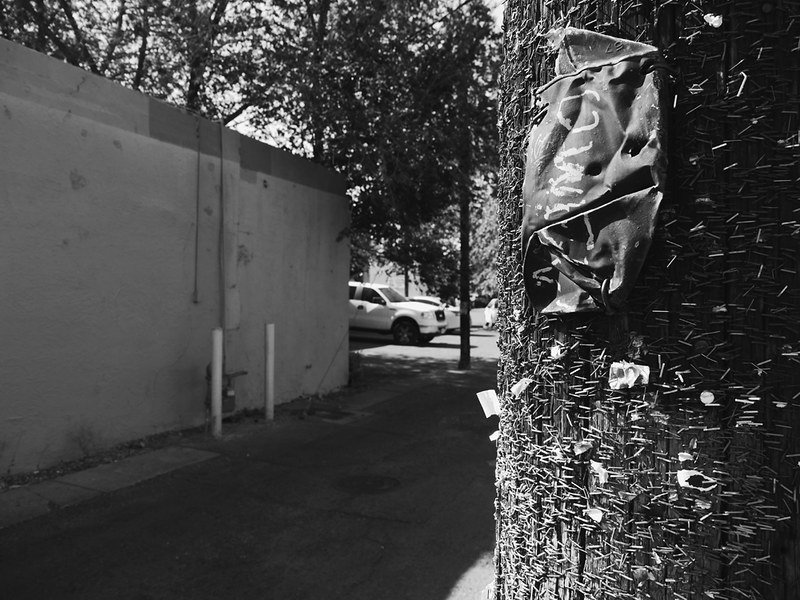
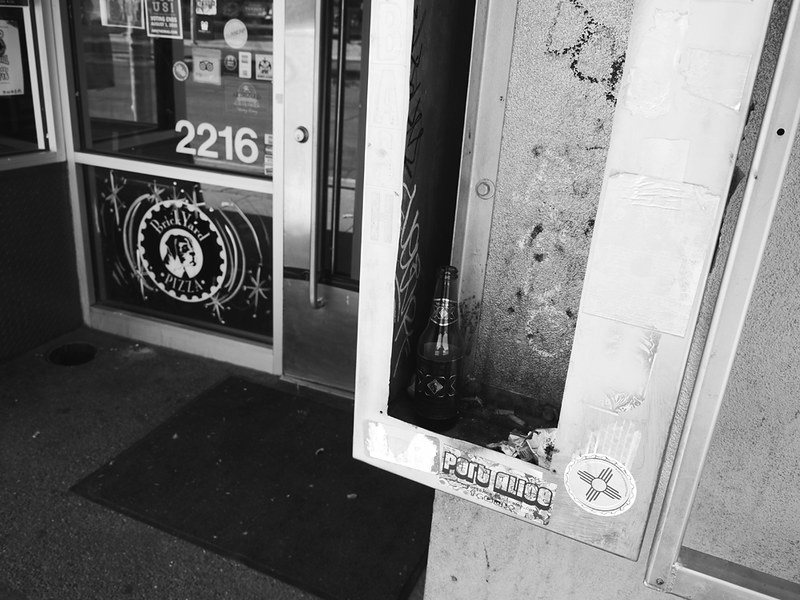
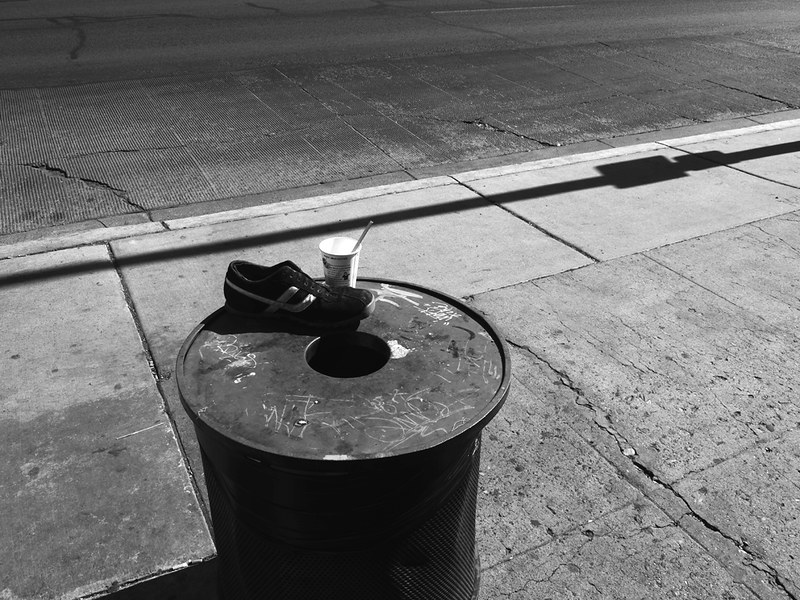
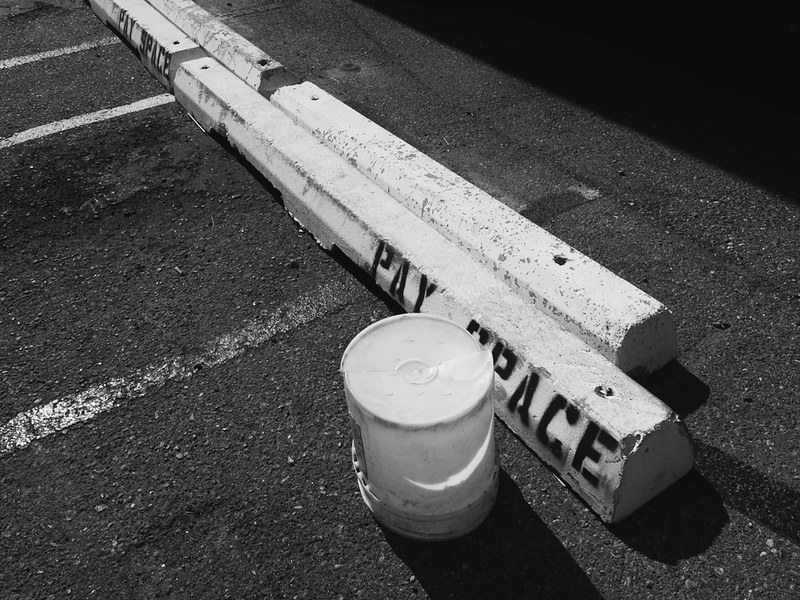
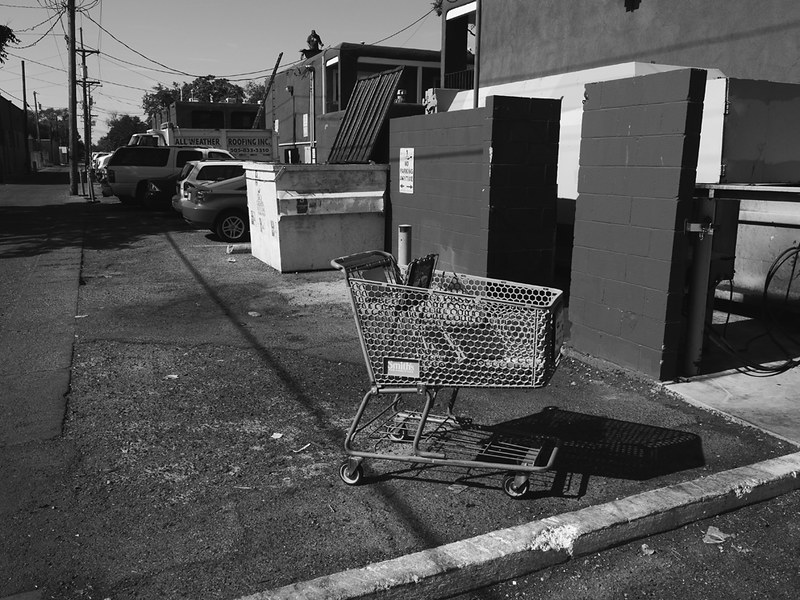
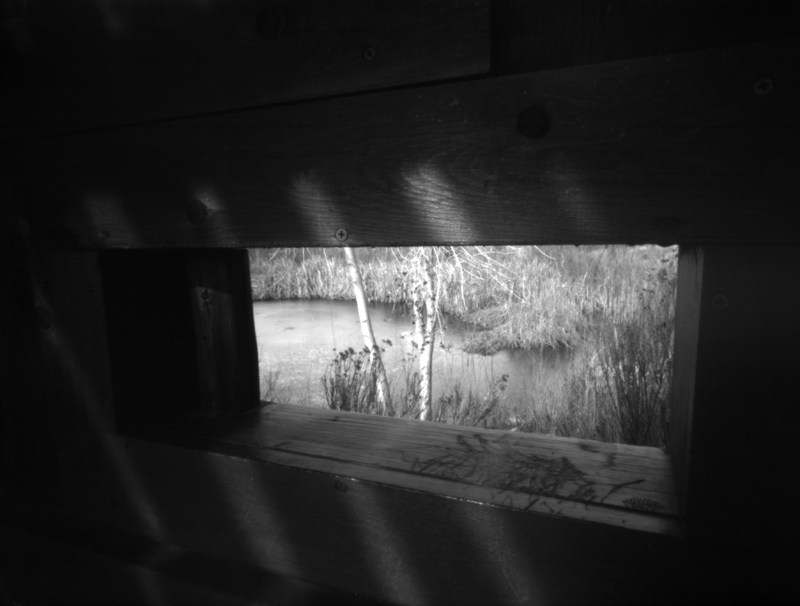
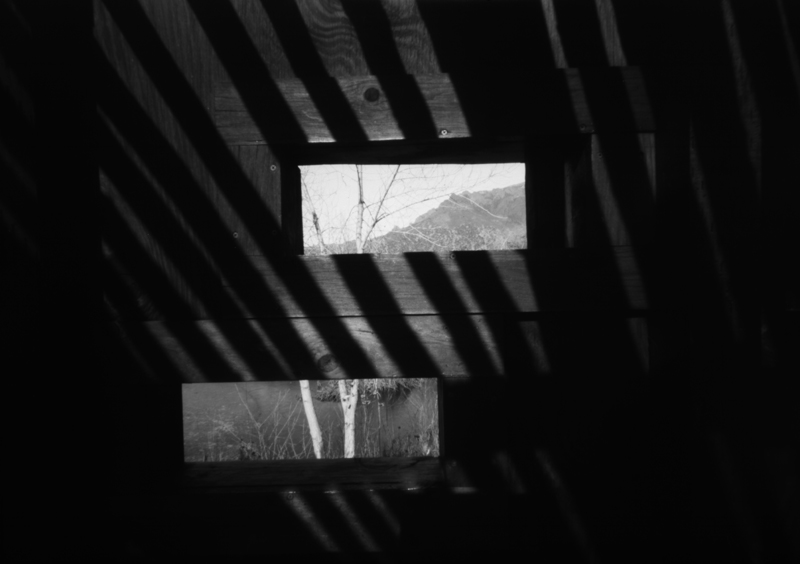
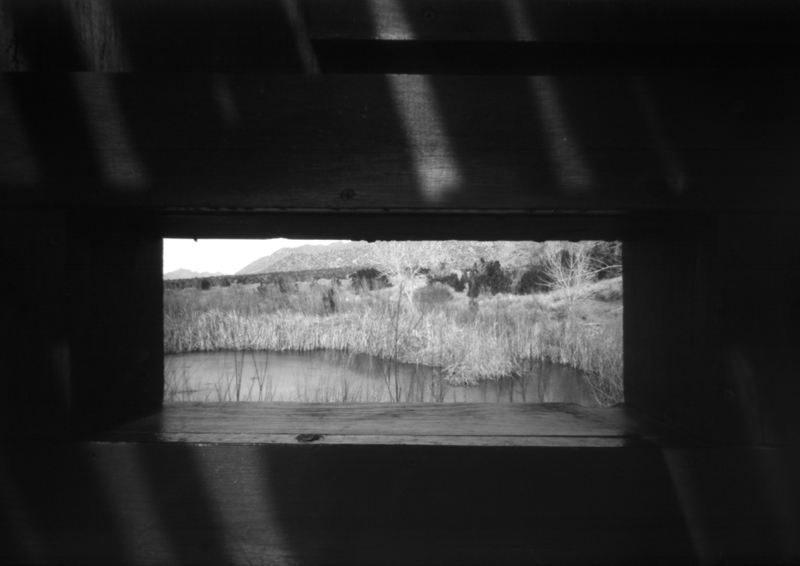
Post-Script: Though I've included three digital snapshots of the camera obscura's view-screen as an illustration of the kind of image it makes, it in no way is convenient or practical to do so, given my ready availability to other, better-suited photographic devices. I see these example images as the photographic equivalent of typecasting a manually typed page - it provides the viewer a reasonable facsimile of the original, but in no way is intended as a substitute for the live, physical artifact.

An even simpler version of the camera obscura is possible, if an upside-down image were of little consequence, that being to dispense with the front-surfaced mirror and project the image onto the back of the box. This opens up the possibility of cobbling together such devices from commonly accessible materials, such as magnifying lenses, plastic sheets and any sort of box-like enclosure. And gaffer's tape. Don't forget the gaffer's tape.

Monday, March 7, 2016

One Hundred Prints

Bird001a

I've been trying to get back to the print; the idea that a photograph isn't a photograph until you have paper in hand. I can remember, maybe 25 years ago, when that was the only type of photograph available, either a color print from a local lab or a black & white darkroom print I made myself. The idea of an electronic image was only possible for the common person back then if you had videotaped some photos with your camcorder and were watching them on T.V.

In the intervening years, all that has changed. Digital cameras and cell phones are so well equipped to enable the creation of instant electronic images that we forget about prints in hand. I know that I've been guilty of this, despite the fact that I still maintain a (somewhat primitive) darkroom in my unheated garage.

In the last decade since I've been dabbling in digital photography, I've certainly become lazier. The idea of shooting a roll of black & white film, then processing it, isn't so bad; it's the idea of printing every image in the darkroom that sets me back. Part of it is because my darkroom facilities are still so primitive - a small space, now crowded with junk, unheated in the winter and hot in the summer, requiring hours of prep time in advance in order to condition the environment sufficiently for chemical processing. Not to mention the dust everywhere, that ruins the idea of pristine, glowing prints.

I've pretty much relegated myself to the idea that, for capturing images out in public venues, I'm going to be using a digital camera. But I still like landscape and still-life images on silver gelatin paper. Fortunately, I've developed a method that seems relatively trouble-free and efficient, that produces nice fiber paper, silver gelatin prints.

I load 4"-by-5" sized sheets of Harman Direct Positive paper into sheet film holders, expose them in either my Anniversary Speed Graphic or pinhole box cameras, then process them in the year-round convenience of my kitchen, via a Jobo print developing tank and rotary processing base. Once properly rinsed and superficially dried, I tape then to sheets of glass, using drafting tape, and permit them to dry in my film drying cabinet. After several hours, I have one-of-a-kind, fiber paper prints in hand.

Given the relative ease of this process, I can no longer afford to use the excuse that I don't have the time or energy to do this. So I've been trying, at least every week, to make some sort of image - any image, regardless of how mundane it might seem - using this process, as a means of exercising my processing skills and building a collection of these one-off prints.

Today's session was no less impromptu and spontaneous. The afternoon weather was balmy and warm, the winds calm, and so I set up tripod and Speed Graphic in my front courtyard and proceeded to load a sheet film holder with a pair of Harman prints. It's convenient that one sheet film holder holds two such prints, that can both be processed as a single batch in my day tank within the span of less than ten minutes.

I thought this still-life of garden art sitting on a patio table was quirky enough to be representative of the kinds of spontaneous prints made possible by this process. And with the investment of just a bit more time, and a bit of gasoline, those two prints could have instead been exposed somewhere a bit more photogenic than merely around the house. But that's the beauty of this process - even if you don't feel like going far afield from home, you can still create these remarkable little prints, from scenes discovered just around one's own home.

What this really illustrates is the idea that it isn't all that hard to create two prints per week. That doesn't sound like an awful lot, does it? But two fiber paper, silver gelatin prints per week amounts to over a hundred prints in a year's time. All with the investment of just a few minutes time for loading the film holders, setting up the camera, making the exposure and processing the paper. Then a rinse - which I do under a tree in my yard, so as not to waste the water down the drain - and afterwards a few hours in the drying cabinet, while I'm off doing something else. Do that one time every week, and you'll have a hundred prints by the end of the year.

This process is made most convenient by the unique properties of the Harman Direct paper. While it does have some significant limitations that you have to get used to working around, such as contrast control, low sensitivity and spectral response, its main attribute is that you totally bypass the whole issue of processing film and the subsequent printing phase. What you're doing with the Harman paper is loading the finished print directly into your camera, then using a simple paper processing regimen. It really is a unique process, one that's also new, in the historic sense, given that such direct positive paper emulsions were unheard of in the formative years of photography. The irony is that this product has only come to market now, in the post-film era of ubiquitous digital imagery.

I would like to encourage you to embrace this process, experiment with it, and see what you can do. It's a great age we live in, where we have such a wide variety of choices available for our creative expression, including the choice of creating silver gelatin prints with such relative ease.

Wednesday, March 2, 2016

Harman Brownies

DSCF4588a

Today I had the urge to play with an old Kodak Brownie camera and Harman Direct Positive paper. The camera, a Kodak Six-16 Brownie Junior, had been sitting for a long time in my Man Cave shed, and also seemed to have been ignored, since the rest of my camera collection is in my office on a shelf; as if cameras had feelings (which we know they do).

Several issues needed resolving before I could attempt an exposure. First, I didn't know what the focal ratio of the shutter's two aperture settings were, so that would require partial disassembly of the front in order to get a set of calipers in close enough to measure. Second, while I was in there, one of the viewfinder mirrors had been dislodged, and would need to be secured back in place. Third, it was rather dusty, and the optics needed cleaning.

DSCF4583a

I removed the four small screws securing the front panel, then bent the end of the bulb/normal lever, in order to get it through the slot in the side of the front panel. Once that was done, it could be easily removed, giving access to the shutter, aperture plates and viewfinder areas.

Measuring the diameter of the two aperture settings and dividing those figures into the focal length yielded f-stops of f/20 and f/30; the online Kodak manual for this camera didn't actually have those values listed, as it was written (apparently) with the idea that you chose a certain type of film and a certain quality of light, or used photo flood lamps (it also lacks a flash trigger); none of those methods would do for us today without lots of experimentation, since we don't have access to the same kinds of film and accessories as one had back in the 1930s.

DSCF4586a

I secured the loose mirror with hot glue, and did my best to clean the lens, but there was some discoloration (more like a mottled film) on an inside surface I couldn't easily access. Still, it cleaned up pretty well.

For use with Harman's Direct Positive paper, I would be loading individual sheets into the camera at the film plane, which required the paper be trimmed down to 2-3/4" by 4-1/4". I also wanted the paper to sit as flat as possible against the film plane flange, and so I used a backing pad of two thicknesses of black adhesive craft felt, cut to size and stuck together. I also taped over the rear red film counter window with black gaffer's tape.

DSCF4587a

Now that I had a functional camera, purposefully modified for individual sheets of direct positive paper, it was time to figure out my exposure method. Based on my working exposure index of the Harman paper rated at ISO 8, bright sunny conditions would require a shutter speed between 1/4 and 1/2 second, much slower than its single speed of 1/125. However, shaded daylight exposures of f/20 for 2 seconds are possible, making it possible to be used as a portrait camera for the kinds of seated poses once made with wet plate cameras, involving a head brace so as to steady the subject.

Of course, once you begin thinking about issues of focus with portraiture - the camera is fixed focus, set approximately to the hyperfocal distance for its two apertures, you realize that, other than whole-body portraits, you can't do justice to a subject close-up without the accessory Kodak close-up filter, which hasn't been made since the 1940s. Good luck finding one. I suppose a person could fiddle with adapting SLR close-up filters and examining the results at the film plane with a makeshift ground glass, then work out a preset seating distance for your subject. But once you start going to that much trouble, you might as well be pulling out the Speed Graphic, which yields a bigger print, variable apertures and shutter speeds and focusing via a view-screen.

So really, this is a simple snapshot camera, we must remind ourselves. Go outside and frame up composition suited to its limitations.

I made three test exposures today, the first one in my front driveway, of the house brightly lit by the morning sun. Since the camera's single shutter speed was about five stops below what the meter recommended, I simply fixed the camera to a tripod (via an adapter plate and bungee cord - the camera lacks a tripod bushing despite it having a bulb shutter mode), and tripped the shutter five times. The result came out a bit under-exposed, but a usable image.

For the second exposure I metered the shade under my back porch and exposed the paper for 2 seconds at f/20, with a good result for the shaded part of the image but obviously over-exposed along the edges of the scene that were brightly lit.

The third image, posted below, is an uninspiring image of my backyard wall and the neighbor's trees. I used the f/30 aperture and flipped the shutter open and close as fast as I could, simulating a 1/2 second shutter speed. The result was the best of the three thus far. I could see, were I to pursue this further, taping a neutral density filter to the front, giving me more easily controllable shutter speeds in the 1-2 second range in bright daylight, sufficient for landscape images.
Harman Direct Positive, Kodak Six-16 Brownie Junior

The lens is adequately sharp for the contact prints it was intended to produce, but probably would be soft by today's standards for enlargements or scans.

It's too bad the shutter doesn't have a flash attachment, because this would open up other exposure possibilities; one must remind themselves that Kodak made a large lineup of different camera models back in its day, and this one was near the bottom of the model range. It's the case that one must choose carefully the type of antique to modify; sometimes you get a Corvette and other times a Vega - even though they're both old Chevys.

I used my stainless 35mm developing tank and hand-made rotary processing base for these prints. The first print, of the front of my house, had an unfortunate gash in the emulsion, right near the center of the image, caused by a sharp edge on the end of the radial bracing rods of the tank reel. So for the next two prints I removed the reels, and the print was long enough to stay bent along the inside periphery of the tank for the duration of the processing, without becoming dislodged. Going forward, I'm going to remember to remove the reels while processing other prints of sufficient length.

This was a fun evolution, but doesn't really result in sufficiently satisfying results, given the limitations of the camera. Still, it at least served for providing more experience with using a roll-film tank for rotary processing small direct positive prints, and metering and exposing the Harman paper in a variety of situations where the shutter speeds or apertures are limited in range. In the final analysis, it points toward a better camera, like my Speed Graphic with modern Fuji lens, as a way to make really satisfying work.

Sunday, February 28, 2016

Pinhole Photography at Kiwanis Overlook

Trap Window001a

One of my favorite destinations, when I feel like an outdoor hike but don't want to drive too far from home, is the Elena Gallegos Open Space area, part of the City of Albuquerque's Parks & Recreation program. The Elena Gallegos was once part of a Spanish land grant, dating as far back as 1694, that encompassed much of what would later be the north and east portions of the Albuquerque metropolitan area. The current open space area is along the foothills of the Sandia mountains, and includes numerous hiking trails, along with picnic areas that can be reserved for private parties.

One of my favorite parts of the Elena Gallegos is the Kiwanis Overlook, a wooden structure, built by the Kiwanis organization, that serves as an observation area for a small wetlands pond that is a favored destination for birders.

There are several trails one can hike to arrive at the Kiwanis Overlook, the longer trail starting from the eastern-most parking area and winding its way east and north, across a natural arroyo, while a shorter hike starts from a nearby parking lot on the northwest corner of the park.

I've visited this area repeatedly over the years, for the purposes of both hiking and photography. Although I'm not a birder, I've noted in the middle of the day, when the light is sufficient for pinhole photography, the absence of birds in the wetlands pond. Too, the visitation hours of the area, as managed by the city, precludes bird observation in the early morning and late evening, unless special arrangements are made ahead of time. Still, despite the apparent lack of wildlife, daytime visits are a special occasion for me, as the open air and scenic vistas are both calming and inspirational.

The observation blind structure itself is constructed with numerous window-like openings, revealing various views of the wetlands area beyond, each an ideal vantage point from which to aim a camera. After frequent return trips to the area, I began to notice how these window openings themselves began to resemble picture frames, even being constructed of wood, serving to frame a specific vista beyond, each one unique in aspect ratio and view, as if they were but a collage of paintings hung on some wall.

Window Pair001a

And so I began a series of photographic studies involving the wooden structure itself, its observation viewing ports and the vistas beyond. At the right time of day, sufficient light is available to render visible the textured details of the wooden planks, even with the limited sensitivity of paper negatives employed in pinhole cameras.

Single Window001a

It requires a meditative-like concentration to successfully employ these box cameras as a means for creating landscape images, and thus the presence of other visitors to the area can often be a hindrance. It is for this reason that I prefer to plan my visits for the week days, when the majority of people might be busily employed elsewhere. There's also the further advantage that the parking fee on week days is only a dollar, compared to the two dollar weekend fee.

Over the years I have employed both paper negatives and Harman's Direct Positive paper, in both pinhole and glass-lensed large format cameras, with which to study this area, and find myself returning yet again, in search of something I know not what, except that this wildlife observation area is a perfect metaphor for the act of seeing that is uniquely photographic.