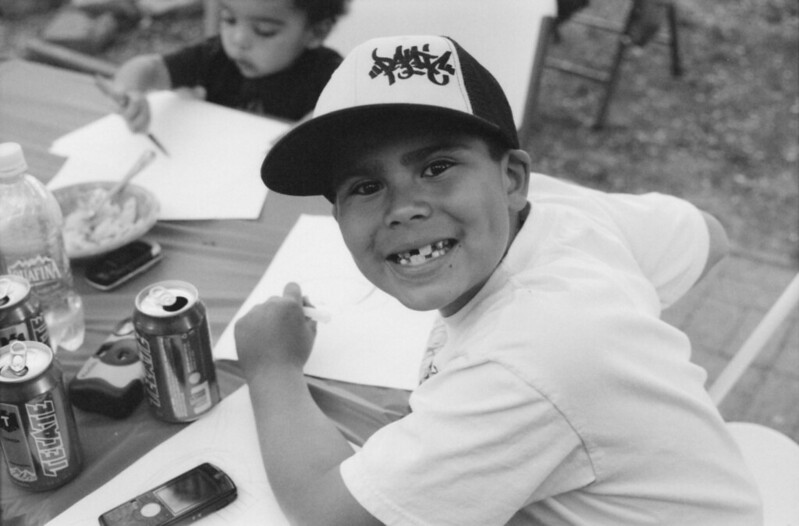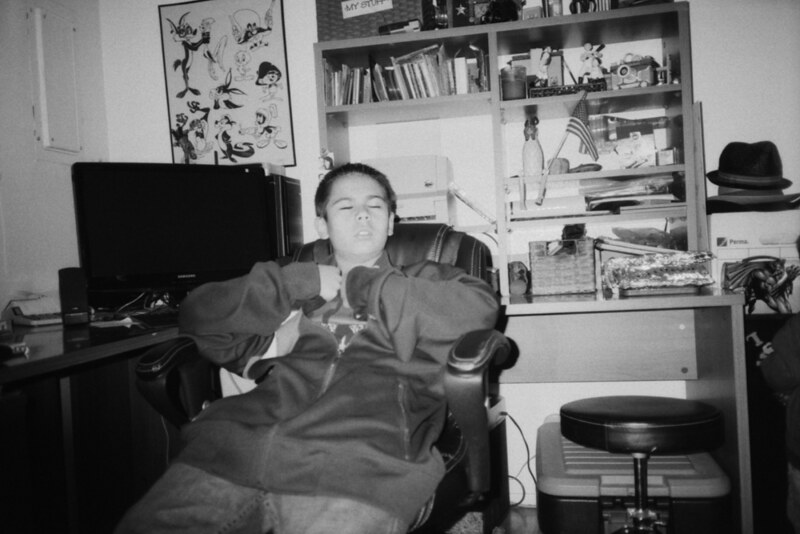
Showing posts with label paper negative. Show all posts

Monday, June 20, 2016

Words and Pictures

P1000645a

Words and pictures. Images both literary and visual. These have been considered so similar that the verbiage used to describe them seem to be synonymous. Word pictures. A picture is worth a thousand words. Terms almost interchangeable. It should come as no surprise then that the devices we've made to construct words and images together seem to operate so similarly. Today, digital images and text files seem virtually the same, mere data, slung around networks of optic fibers and copper wires.

Looking backwards is often required to see forward. So it is when combining gelatin silver paper prints and typewriters; or, gelatin silver prints of typewriters, two technologies that seem so like-minded.

A few years ago, when I was delving deep into the world of paper negative photography - employing silver paper as a form of in-camera, black & white "film" - I began looking for alternative methods of displaying these as positive images. Two obvious ways were contact printing them, in the darkroom, onto other sheets of silver paper; or scanning the negatives to produce digital files, to be inverted later via software into positive images. Both methods have their benefits. The first produces a physical print, while the second is intrinsically software-based.

But then I came up with a third method, similar to digital scanning, but employing a handheld digital camera; placing the paper negative into some setting or scene, perhaps related to the original image, and often outdoors; photographing the paper negative within the larger scenic context; then inverting the tones of the image afterwards, to produce a positive monochrome image set inside an otherworldly appearing scene, a shifted color palette of negative tones, a reversed world where the real is imaginary and the imaginary real.

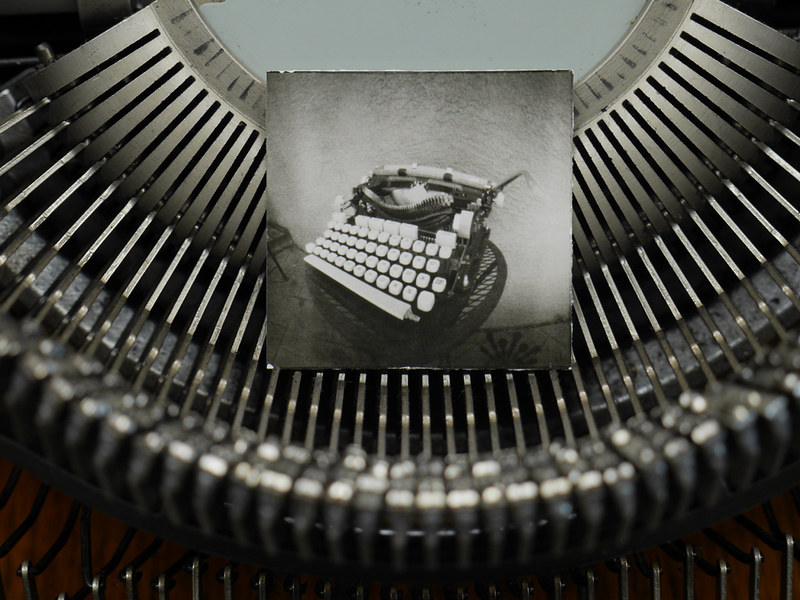
Since that time, I've been working more regularly with Harman Direct Positive paper, that produces a positive image requiring no tonal reversal afterward. But the idea of digitizing these prints, by photographing them in some larger context using a handheld digital camera, persists to this day. So it was that, after making this small study of my Hermes 3000 "Nekkid-Riter" chopped typewriter, using small squares of the Harman paper in my film canister pinhole cameras, it seemed obvious that sharing these prints online might be more interesting done this way than by merely scanning.

P1000646a

The process I use to make these prints, now that I've worked toward refining it, is so simple as to almost be silly. Give the paper a brief pre-flash of even light in the darkroom, then load into the film canisters. Rate the paper at an exposure index of 10, and the pinhole cameras at F/128. Meter the scene, make the exposure based on the metered reading. Load paper into a steel film developing tank, minus the reels, using loops of drafting tape on the backsides. Three such prints can easily be processed simultaneously. Mix Ilford MG paper developer, diluted at 1 + 15, to a volume of 100mL. Use continuous rotary processing, using the film tank on its side, for 3 minutes. Stop, fix and rinse as normal. Dry for an hour or two on a sheet of glass, taped down on the edges with more drafting tape. Done. Beautiful, individually unique gelatin silver positive prints.
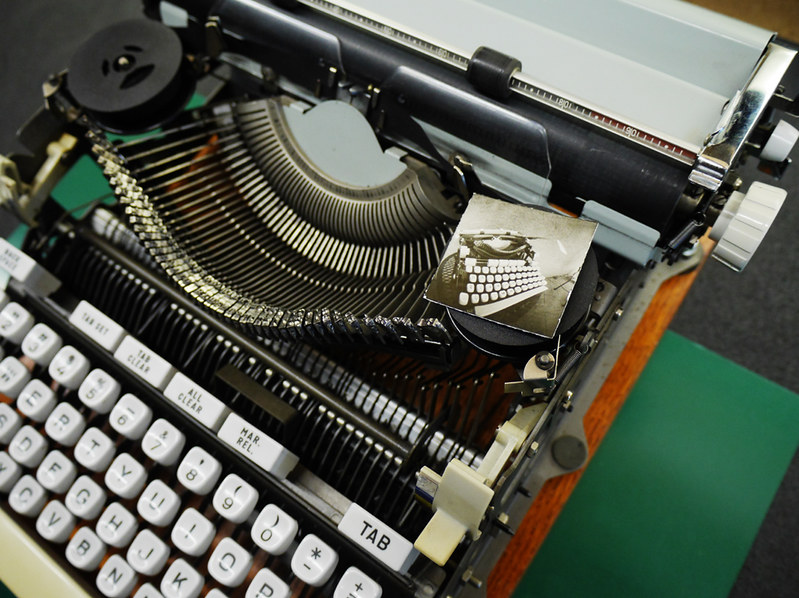
P1000647a

I might say that the typewriters themselves, though each are as unique as the Harman positive prints, are a bit more complex. They aren't being manufactured, and spare parts are only to be found from other, donor, machines. Platen rollers can be resurfaced, and new ribbons are easily available, however. But the machines themselves are to be found online, at local thrift stores, Craigslist ads or estate sales. They almost always need some kind of service in order to be functional; at the very least, a thorough cleaning, degreasing and relubrication, then often some adjustments have to be made. Lots of hands-on fiddling, but also very satisfying when the typewriter collector/user also becomes a typewriter technician.

Typewriters also have a functional use, which is to mechanically print letters neatly onto paper. They're like film cameras in this regard, made to do but one thing, to lay down images of the literary kind. Which brings us back to where we started, with words and pictures.

Tuesday, May 24, 2016

Jumping Back In

Ken001a

I've had these three rolls of film sitting around in my office for so long that I couldn't even remember what year they'd been exposed. I knew they were exposed because the film leaders were retracted in their cassettes, but that was about all. They were all Ilford FP4 Plus, medium speed black and white film.

My "analog" (gosh how I hate that term) photographic activity has been essentially dormant for a year, when I last was working with the instant box camera project and paper negatives; and before that it's been virtually exclusively paper negatives or Harman's Direct Positive paper, for a number of years. But film? Nada. Oh, maybe a few rolls of color, sent off to my local lab. But black and white? Nope, not even.

This is almost a sin. Having a darkroom at home, capable of processing and printing every kind of black and white film, from 35mm to 8"-by"10" formats, and prints up to 11"-by-14" in size. Two enlargers. A film drying cabinet of my own design. A hobbyist darkroom any photo student would be envious of. And what has it used for, these last few years? To store my darkroom equipment, that's about it. And Christmas and birthday gifts (but don't tell the grand-kids, okay?).

I'd been eyeing those rolls of film in my office for some time now. They'd been sitting in a green glass candy dish up on one shelf of my bookcase. I'd occasionally take them down, open up their containers and eye them suspiciously. After thinking about processing them, "one of these days," I'd put them back in the dish.

Noah003a

Last week I finally decided to tackle one of the rolls. I figured it was safe to start off with just one roll, since my skills were rusty and thus there'd be less to lose if something went awry. I also was suspicious of the quality of several bottles of developer sitting out in the darkroom. Getting up the nerve, I finally decided to give it a go.

I collected all the bits I'd need. Jobo processing tank? Check. Mixing containers? Check. Changing bag? Check ... but not until after a lengthy search revealed the bag to have been stored away, high up in the loft. Thermometer? Check. Fixer? Check. Scissors? Check. Can opener? Nope. I'd have to improvise. Stop bath? Nope. I'd have to use white vinegar. White vinegar? Nope. I'd have to use apple cider vinegar. More improvisation. Hopefully it wouldn't leave some funky residue on the film.

Developer? I checked the bottle of HC-110 concentrate, but crystallization along the inside of the bottle ruled that out. Oh, well, more wasted money. Agfa Rodinal? Yep, a used bottle, only 1/3 full. Should I use it? My better judgement said no, despite Internet wisdom on its longevity. Finally I found a newer bottle of R09, a Rodinal-like substitute, that appeared in good condition, no crystals or other funkiness. Time to get busy.

I decided on a more standard dilution of 1 + 25, with regular agitation, despite more Internet suggestions of excess grain with Rodinal and I should be doing semi-stand development, for improved granularity, yadda-yadda-yadda. Sometimes you have to shut your ears to all the online experts and go with your gut feel. I'd had bad experiences, years ago, with used developer and development procedures I'd only read about and not experienced personally. Best to be safe. Don't jump in the deep end too soon.

I had less issues loading the roll of film than I expected. Sometimes these plastic film reels can be finicky, and other times they can be wonderfully easy. It's all a crap shoot. But this time I did something a bit more deliberate, which was to trim the two front corners of the leader, like what's suggested for loading old film cameras, and this helped a lot, keeping those otherwise sharp corners from snagging in the plastic reel as it's being threaded.

Not wanting to give any negative results an excuse, I was careful with the chemical mixing and also ensuring proper temperatures were employed. The data sheet on the bottle of R09 suggested 8 minutes development time, which I stuck to, while opting for agitation every 30 seconds, using my normal method of several medium speed inversions while the tank is being constantly rotated along its axis. I suppose it's like riding a bike, you never forget.

Past experience with issues of residue and dust taught me to use for the final rinse Kodak Photoflo surfactant diluted 1 + 200 into distilled water, which I measured accurately and mixed thoroughly. In the past, I'd been sloppy enough to just slop a bit of Photoflo into tap water without so much as any measurement at all, resulting in either a film residue left on the film after drying, from too much Photoflo, or water spots from not enough.

Whereas I used to hang the film in a bathroom shower whose cleanliness was questionable, this time I had the convenience of a film drying cabinet, that I built some years ago and used for drying prints but never until now had actually hung any film inside. Its 100 watt heat lamp and HEPA-filtered laminar airflow seems to work wonders in drying film with little or no dust spots, because my scans afterwards were virtually spot-free; hardly any clone-stamping work needed to be done in Photoshop.

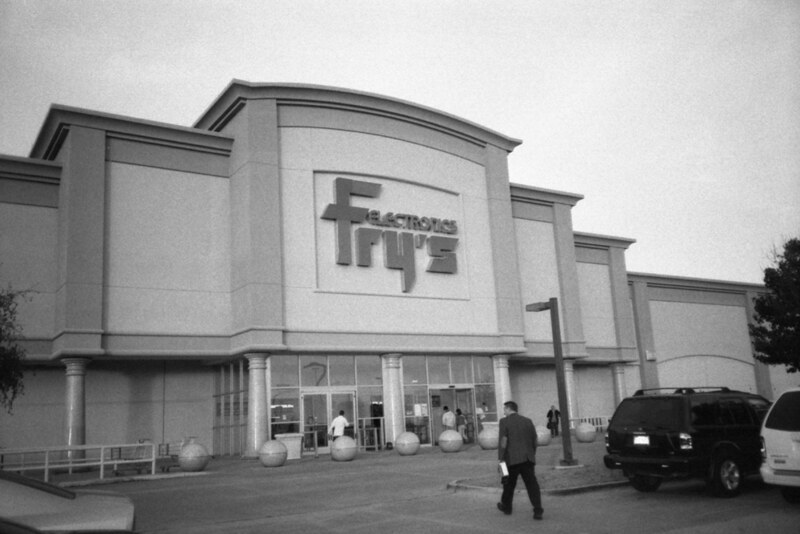
Fry's001a

My results were promising enough that I tackled the other two rolls yesterday. This time I used white vinegar for stop bath, but otherwise everything was done the same, with the exception of agitation every minute instead of every 30 seconds. The results were also very good.

Christmas_Family006a

Afterwards, I found a roll of Ilford HP5 that had been exposed last December, and I again processed it with no issues. The roll hasn't yet been scanned, but initial inspection suggests good results.

Some years ago I bought a brick of the HP5 film from a local camera store, used some of it, but still had a number of rolls left. So this afternoon, buoyed by my recent processing success, I unearthed my Minolta X700, purchased last year from KEH Camera (and that's only seen several rolls of color film since), and loaded up a roll, with a yellow filter over the lens. I've yet to make any exposures, but I figure it's "almost free," since the film's been long payed for, as have the camera, chemicals and post-processing scanner and software. So it's almost the same as digital, except the added fun of processing and scanning. But working with manual focus film cameras is so enjoyable, and inexpensive, as to truly be a valid alternative to expensive digital systems for monochrome photography.

I don't know if this is just a soon passing fad, or if I'll stick with shooting more film. I hope it's the latter. The Minolta X700 deserves to be used more, as does my darkroom. I also have a Soviet-era Zorki IV and Kodak Retina IIIC rangefinder cameras that also need to be used more. And if I get enough good negatives, perhaps even a session of wet-printing onto gelatin silver paper might be in order. If so, I'll update you here.

I think the lesson here is never sell off your darkroom equipment just because you're currently not using it; nor should you tear down your darkroom, if you can at all help it, because film and printing paper are still readily available, as are all those wonderful old film cameras. Now's the time to take the leap, before economic considerations threaten the future of this marvelous medium.

Sunday, February 28, 2016

Pinhole Photography at Kiwanis Overlook

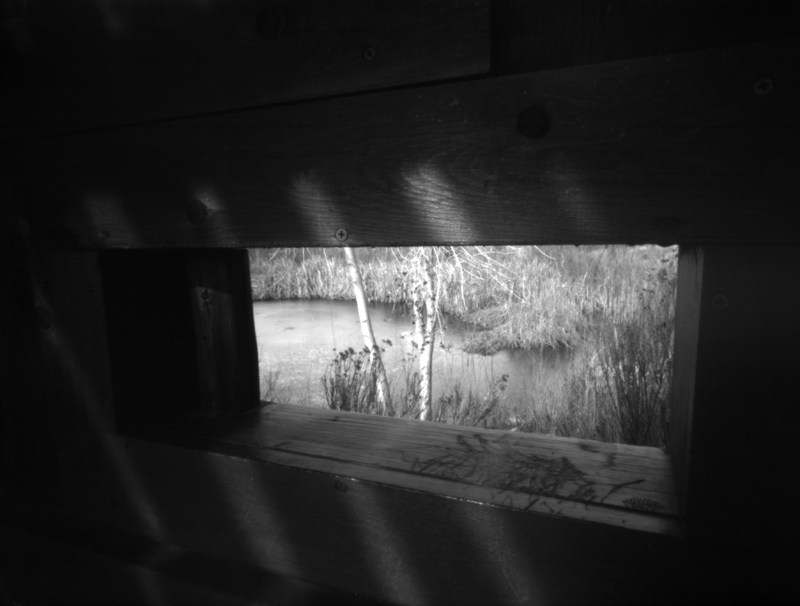
Trap Window001a

One of my favorite destinations, when I feel like an outdoor hike but don't want to drive too far from home, is the Elena Gallegos Open Space area, part of the City of Albuquerque's Parks & Recreation program. The Elena Gallegos was once part of a Spanish land grant, dating as far back as 1694, that encompassed much of what would later be the north and east portions of the Albuquerque metropolitan area. The current open space area is along the foothills of the Sandia mountains, and includes numerous hiking trails, along with picnic areas that can be reserved for private parties.

One of my favorite parts of the Elena Gallegos is the Kiwanis Overlook, a wooden structure, built by the Kiwanis organization, that serves as an observation area for a small wetlands pond that is a favored destination for birders.

There are several trails one can hike to arrive at the Kiwanis Overlook, the longer trail starting from the eastern-most parking area and winding its way east and north, across a natural arroyo, while a shorter hike starts from a nearby parking lot on the northwest corner of the park.

I've visited this area repeatedly over the years, for the purposes of both hiking and photography. Although I'm not a birder, I've noted in the middle of the day, when the light is sufficient for pinhole photography, the absence of birds in the wetlands pond. Too, the visitation hours of the area, as managed by the city, precludes bird observation in the early morning and late evening, unless special arrangements are made ahead of time. Still, despite the apparent lack of wildlife, daytime visits are a special occasion for me, as the open air and scenic vistas are both calming and inspirational.

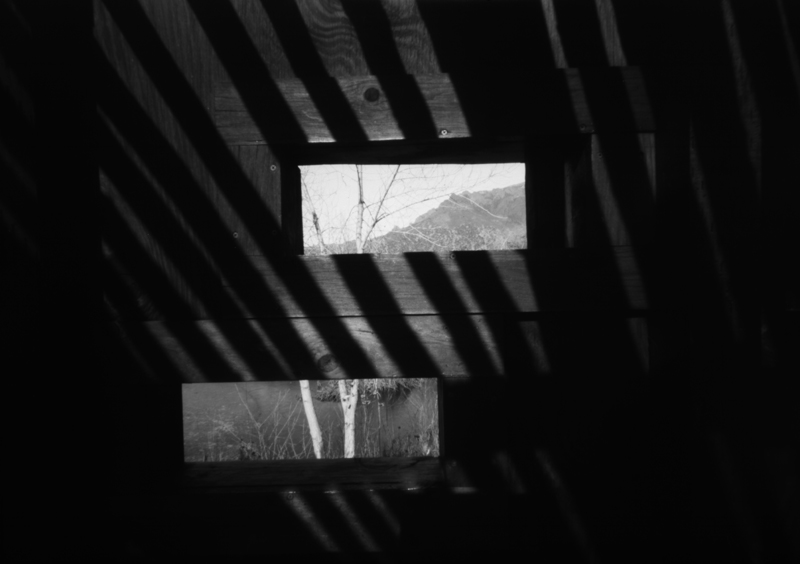
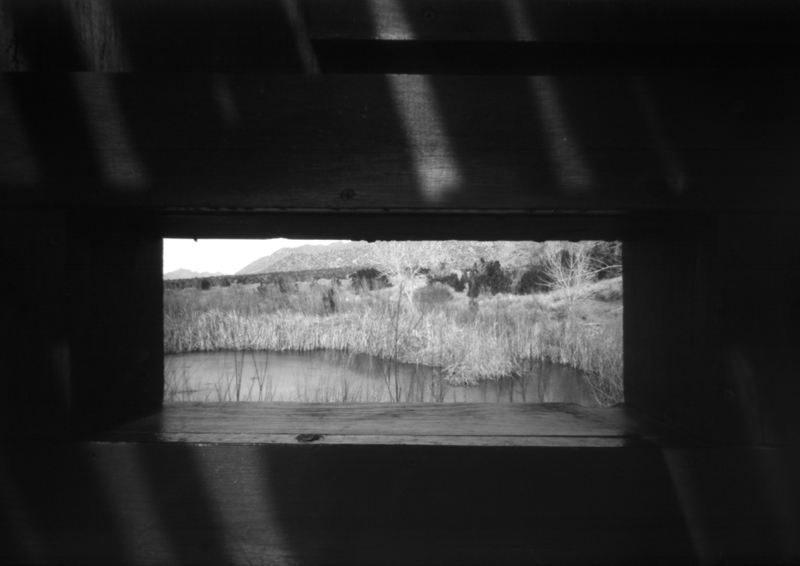
The observation blind structure itself is constructed with numerous window-like openings, revealing various views of the wetlands area beyond, each an ideal vantage point from which to aim a camera. After frequent return trips to the area, I began to notice how these window openings themselves began to resemble picture frames, even being constructed of wood, serving to frame a specific vista beyond, each one unique in aspect ratio and view, as if they were but a collage of paintings hung on some wall.

Window Pair001a

And so I began a series of photographic studies involving the wooden structure itself, its observation viewing ports and the vistas beyond. At the right time of day, sufficient light is available to render visible the textured details of the wooden planks, even with the limited sensitivity of paper negatives employed in pinhole cameras.

Single Window001a

It requires a meditative-like concentration to successfully employ these box cameras as a means for creating landscape images, and thus the presence of other visitors to the area can often be a hindrance. It is for this reason that I prefer to plan my visits for the week days, when the majority of people might be busily employed elsewhere. There's also the further advantage that the parking fee on week days is only a dollar, compared to the two dollar weekend fee.

Over the years I have employed both paper negatives and Harman's Direct Positive paper, in both pinhole and glass-lensed large format cameras, with which to study this area, and find myself returning yet again, in search of something I know not what, except that this wildlife observation area is a perfect metaphor for the act of seeing that is uniquely photographic.

Sunday, January 17, 2016

Photo Storage Box Pinhole Cameras


I've covered in past articles a number of different box camera designs, and today I'd like to discuss making pinhole cameras from photo storage boxes. As background, there are times when I've built pinhole cameras entirely from scratch, while other times I will notice a box or container in a store with some feature that presents itself as being a likely candidate for conversion into a pinhole camera.

Craft stores are a likely place to find such boxes, and one of the most common and least expensive are these cardboard storage boxes for photos and videos. These come in a variety of colors and surface finishes, but the ones that initially piqued my interest were finished in black felt, including along the inside edge of the lid, implying that they came already light-tight.

Some years ago, out of curiosity, I purchased one of these boxes in order to experiment with it, with the thinking that if it didn't work out as a camera then I could always use it for its original intended purpose, as storage. The first thing I noticed was that, although on its long side it could fit an 8" x 10" sheet of photo paper, it was too narrow on its short side; unless the paper were curved to fit, or trimmed to size.

Once converted to a camera, I initially made some test shots with the paper mounted curved inside the box, but movement of the paper while the camera was pointed downward caused some of the corners to be blurry, and so I subsequently converted it to hold the sheet of paper, trimmed to fit, instead flat against the inside of the box, using a cardboard holder piece, with gaffer tape handles for easy removal.

While deciding how to convert the box to a camera, I had to decide how best to orient the paper relative to the lid. While it might be easier to insert and remove photo paper into the shallow lid of the box, having the film located there would mean a higher chance of it being fogged by light-leaks from the nearby lid opening. Therefore I instead located the film into the bottom of the box; light leaking inward from around the lid would have to reflect off the inside surface of the lid and then into the box, before it could fog the paper; spray painting the inside surfaces flat black considerably reduced the possibility of such reflections.

So the pinhole and shutter are located in the lid of the box. A square hole is cut in the lid, lined with gaffer tape and the brass pinhole plate mounted over the hole, from the inside, with more tape. The shutter is a thin piece of masonite board that pivots on a screw - easy enough that anyone can make one.

Mounting the box to a tripod required a bit of thought. Since these boxes are essentially thin cardboard, they're too flimsy to directly install a 1/4-20 tripod bushing. Instead, I made a heavy plywood mounting plate with tripod bushing, to be mounted atop a tripod, big enough for the box to easily sit upon, and equipped with screw eyes for the attachment of bungee cords, that serve to hold the box securely upon the platform while allowing easy removal when needed.

This first photo storage box camera ended up being enough of a success that I went and bought a second identical box and made another camera, this one having a focal ratio of F/300, a bit sharper than the F/275 of the first.

In practice, I trim, pre-flash and load the paper negatives into both cameras while in the darkroom, then carry them around in one of those reusable shopping bags, along with a tripod, mounting plate and light meter. But that only gives me the possibility of two images, unless I also bring a changing bag and box of additional sheets of photo paper.

Because of this limitation, I later began thinking of ways to provide for more images while out and about with such a camera. One idea is to simply carry more one-shot boxes; but this can be ungainly and impractical. Another idea is to have a shallow compartment behind the film plane where several additional sheets of paper can be stored, to be swapped out within a changing bag. Though this would work, it also makes the focal length of the box even shorter, the angle of view even more severely wide. Although I could have then extended the focal length by moving the pinhole/shutter further from the paper, with the addition of an extension box atop the lid, in the end I decided on a different configuration entirely.

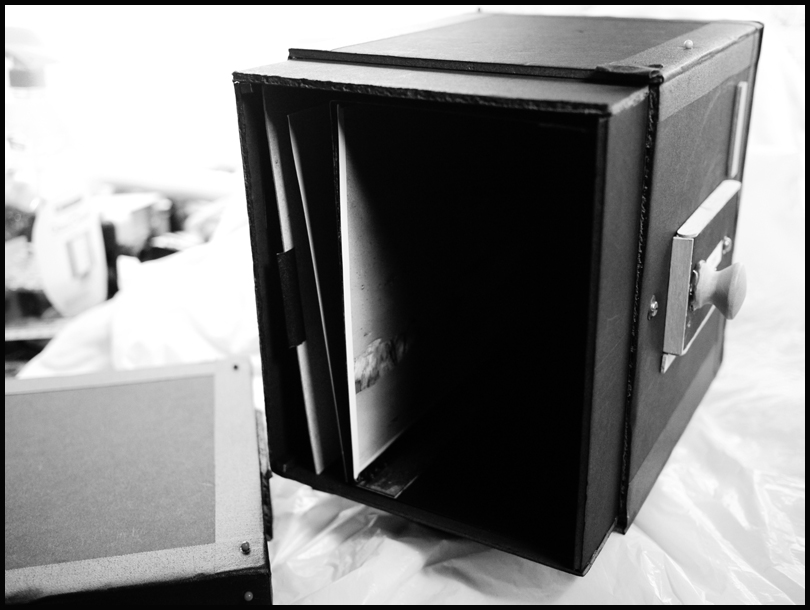
Instead of the near 8" x 10" image size, I decided that 5" x 7" would be a sufficiently large format while permitting the installation of a two-slot paper storage compartment inside the box. So I went back to the craft store and bought another photo storage box. Although I couldn't find the felt-covered boxes (they seemed to have been in stock for only a few seasons), I did find a box already colored flat black inside and out.

This new camera ended up being oriented vertically, with the storage compartment in the bottom half, the camera chamber in the top and the lid along the front side. A heavy plywood mounting plate, with tripod bushing, is permanently bolted to the bottom side of the box, providing for a stable support and low center of gravity.

The internal paper storage box is made from foam core board, cardboard and gaffer tape, and is installed in the camera such that its open end is oriented opposite the camera chamber, pointing down, to prevent stray pinhole light from fogging the paper stored within.

In use, the camera is removed from the tripod and zipped up inside a changing bag, then the elastic bands securing the lid are removed, along with the lid itself. The storage compartment is then flipped around so its slots are pointing up, and the paper changed out; there's enough capacity in the storage container for several hundred sheets of paper. A piece of cardboard is used as a bracket upon which the negative is mounted via a loop of drafting tape, providing for easy removal and installation.

The shutter and pinhole assembly are very similar to that of the other one-shot box design, mounted in the box lid but instead mounted off-center, so as to be located directly over the camera-chamber-half of the box.

I've made a video about these two kinds of photo storage box cameras; the embedded You Tube link is at the top of this article.

This is not the first storage-slot type of pinhole camera I've built; I believe the last four or five have employed this design, all requiring the use of a changing bag within which to swap out the paper between shots. While this method does indeed provide for a practically unlimited number of exposures, that practicality is offset by the inconvenience of having to, after every exposure, remove camera from tripod, zip up into changing bag, swap out paper, unzip from changing bag and remount to tripod. It also implies that some sort of makeshift seating area needs to be found every time.

One possible alternative that I keep kicking around is to build a light-tight arm sleeve into the back of a box camera, permitting the paper to be changed out while it remains mounted upon the tripod, needing only one hand to operate; but that's a project for another day.

Post-script: A sampling of images created with both the F/275 and F/300 one-shot photo storage box pinhole cameras, using pre-flashed grade 2 RC paper negatives.

PhotoBox_300_005aa
PhotoBox_300_004aa
PhotoBox_300_003aa
PhotoBox_300_002aa
PhotoBox_300_001aa
PhotoBox_275_004aa
PhotoBox_275_002aa
PhotoBox_300_006aa

Thursday, December 31, 2015

Mechanical Shutter Experiments


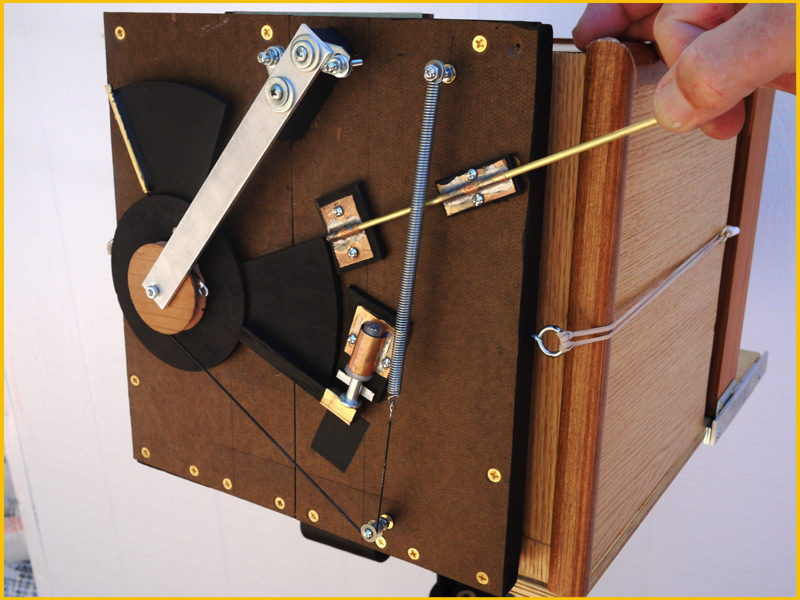
Earlier this week I created another photography video, this time about the experimental shutter I built, some years ago, for the 8" x 10" box camera.

The genesis of this project was having used paper negatives in improvised lens cameras and finding that, due to the speed of the paper (I rate Freestyle Photo's Arista grade 2 RC paper at an exposure index of 12), I'd have to stop down the lens to a very small (2-3mm) aperture, in order to make the shutter speed long enough (>1 second) to accurately and repeatedly time by a hand-operated shutter, in bright daylight landscape conditions.

Under dimmer kinds of light, like window light, I've made a number of satisfying indoor still-life exposures in the daytime, where these improvised lenses, operating at wider apertures, display some interesting optical effects that make the resulting images rather special. But under bright daylight they have to be stopped down so much, in order for their exposures to be timed by hand, that they come to resemble hybrid pinhole/lens optics, lacking those optical aberrations I've come to appreciate from adapted optics, like binocular objectives and meniscus lenses.

So it seemed that I'd need some kind of shutter mechanism. But how?

I spent a long time cogitating about simple mechanical shutters, and ended up making a series of proof-of-concept sketches over several years, trying to find some design that might prove workable. In the end, I felt that I just had to start building something, and so it became a design-as-you-build kind of project, using scrap bits of hardware I'd collected over the years; my motto being something along the lines of never throw anything away, you might use it someday.

What I was trying for was a shutter whose speed could be varied over some practical speed range, to account for differences in exposure. Many of the early designs I considered were simple slit shutters, operated by spring tension and moving either horizontally or vertically, with the width of the slit accounting for the variation in exposure. But I soon realized that with a fixed spring tension a variable slit shutter operating up front at the lens would only yield a small range of speed variations.

After some time I realized that I could make the traveling slit camera into a rotary blade camera, and by altering the angle between the blades the timing could be adjusted. However, my initial idea was much more grand: by slowing down the speed of rotation, I could have a wider range of speeds, from multi-seconds long to fractions of a second, perfect for paper negative media.

P1080490a
But I never got far enough along with this design to build a practical mechanism for slowing down the rotation while making its speed reliable and repeatable. The one big idea I had for this was based on a mechanism I'd seen years earlier, while repairing a Technics audio cassette deck, which was the method used to dampen the speed of the cassette door when it was ejected. Most cassette players used a simple plastic dash-pot mechanism, a piston and cylinder, with an o-ring and some grease, so that as the spring tension tries to slam the door open, the air in the piston is released in a controlled fashion through a small opening, allowing instead the door to slowly and smoothly open. The problem with this design is when the grease hardens up over time, and the cassette door slams open uncontrollably.

Panasonic's method was different. They used a small brass whirligig, a 4-vane rotating piece that was driven to rotate by a drawstring band attached to the door mechanism. As the spring tries to forcefully slam open the door, the band rapidly spins the whirligig, the resulting air pressure slowing down and regulating the speed of the door into a smooth motion. The best part of this design was its reliability, as there were no lubricants to harden over the years.

So my idea for the shutter was to employ this whirligig mechanism, in a small but rapidly turning pulley with vanes, that the shutter cord would spin as the shutter was moving, helping to keep the speed constant. In theory, it sounds plausible; but I never got to the point of implementing it with this shutter.

As you note from the video, the problem with this shutter is that the three speed adjustments, that alter the angle between the blades, don't really offer much variation in speed; and there's too much friction in the mechanism, caused by the way I designed for compensating for light leaks.

The sad thing about this project is that it's sat dormant for some years, as I just couldn't find the motivation to get back to improving it. But now, with these You Tube videos and this blog, perhaps I've painted myself into a corner whereby now I'm forcing myself to get back and finish these projects. And that's a good thing.

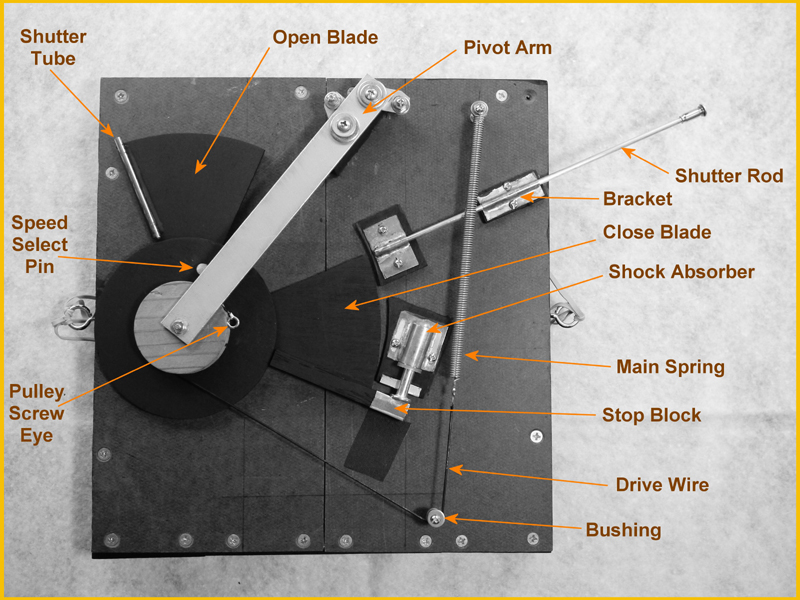
Here is a detailed photo of the shutter with the parts labelled, made a few years back; note that I've more recently changed the draw cord from a thin black to thick white cord.

P1080477b
This video was the first of two parts; next week I hope to take the camera out, with shutter attached, and make some usable images. Stay tuned.

Sunday, December 27, 2015

Pueblo Bonito, Chaco Canyon

Chaco_Canyon001a
I first became aware of Chaco Canyon from the PBS documentary "The Sun Dagger," narrated by actor Robert Redford, from back in 1982, and since then have made a handful of day trips to this National Historic Park and UNESCO World Heritage Site.

Despite it being relatively well-known, and managed by the United States National Park Service, Chaco Canyon is located in a desolate part of northwestern New Mexico, requiring the lengthy traversing of dirt roads to gain access, which can be treacherous in inclement weather. Yet I've made the trek a handful of times over the last 30 years, and always came away from the experience with a renewed sense of appreciation for the native peoples who managed to build these structures, over a millennium ago, with their high walls of stone and alignment to the celestial sphere, far from the relative conveniences of their home settlements, where finding sources of food and even fresh water would be a challenge.

There is evidence that, over the centuries, thousands of people traveled tremendous distances to spend time here at Chaco, for what purpose we are not entirely certain, perhaps ceremonial; but archaeological evidence suggests visitors came from as far away as central Mexico. I get this sense of a connection with the past when I stop to consider that I, too, am one of those many visitors, not entirely certain of what I'm expecting to find, but drawn nonetheless.

Though this area has been studied more thoroughly than virtually any other archaeological site in North America, it remains an ever-present mystery; which is part of its appeal.

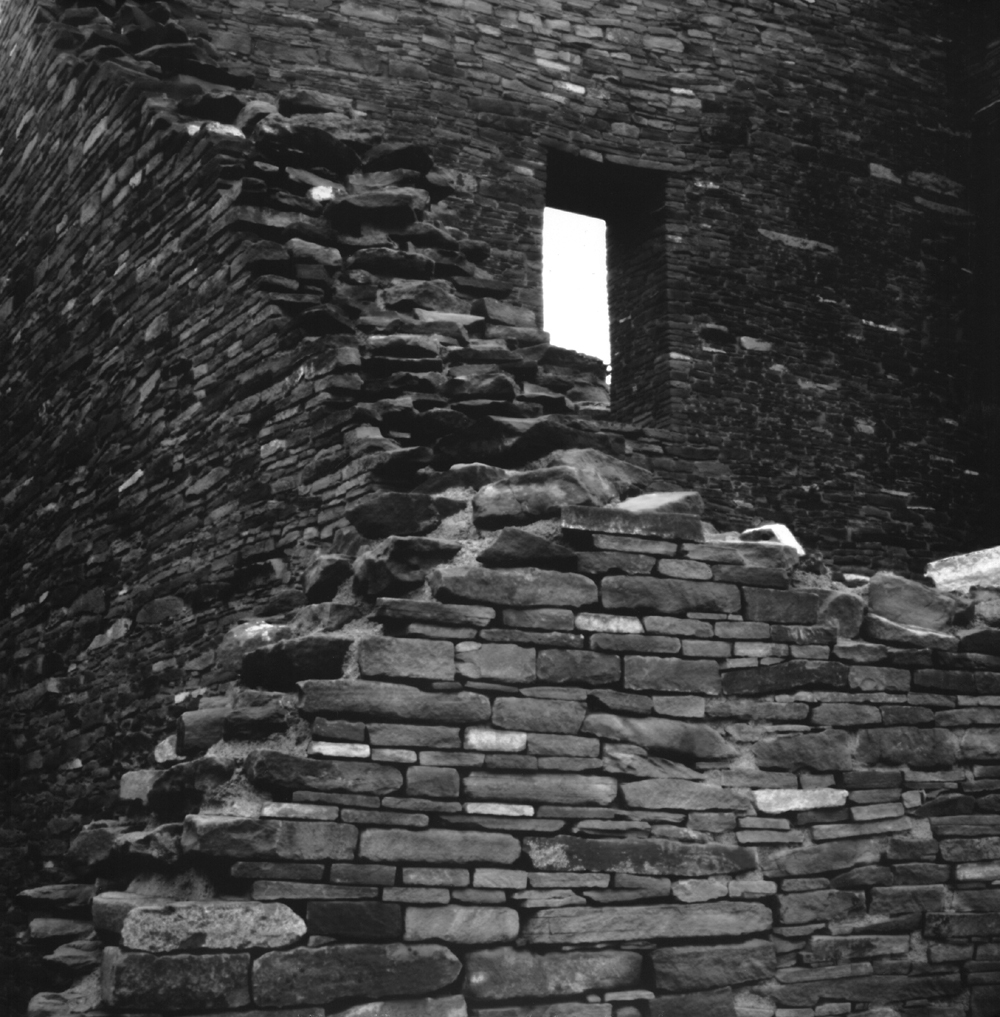
On this day in 1997 I came equipped with my 8" x 8" format falling plate pinhole box camera, loaded with paper negatives, and spent several hours exploring the various ruins at the main site. It was at Pueblo Bonito, the largest of the remaining structures, that I created this image, a window-like opening high up on the wall of the ruins. Though I had a general sense of what I hoped to capture in the composition, I was pleasantly surprised at the results. A contact print of this negative has since graced my living room wall for years.

It's been years since I've been back to Chaco Canyon, the last time being in company with an out-of-state work colleague, where we spent time exploring and shooting video. This image is by no means the definitive representation of Chaco Canyon, but for me it's satisfied my curiosity by providing something tangible to hang my memories upon, while still maintaining that sense of mystery that will always be part of the Chaco experience.

Sunday, December 20, 2015

Box Camera Afield at Fiery Furnace

FieryFurnaceView001a
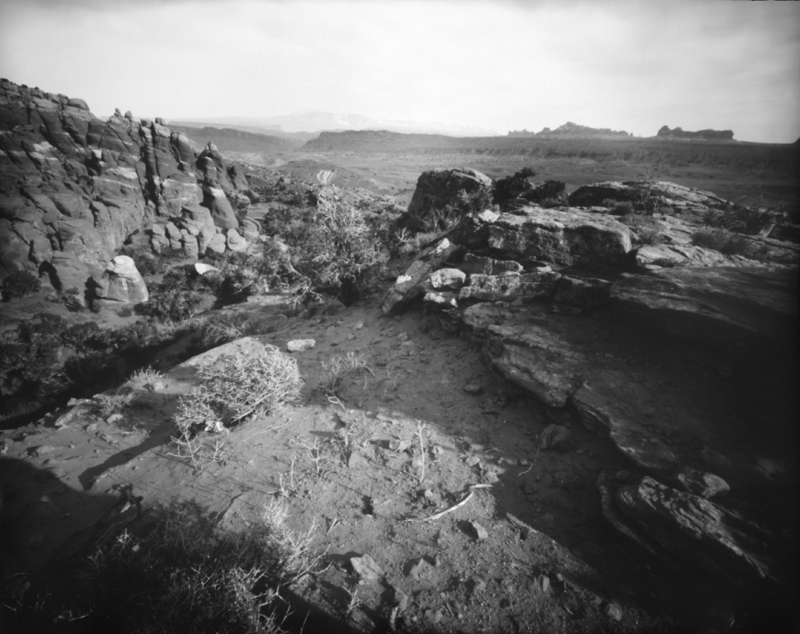
It was almost five years ago when we made this visit to Arches National Park in eastern Utah. It was early April, a time when we typically go on some short, regional vacation in celebration of our anniversary, but that can often present unpredictable weather, especially in the higher regions of the American west.

The drive from Albuquerque brings us through the desolate northwest quadrant of the state along highway 550 to Bloomfield, then through Farmington and over to Shiprock, then up the highway to Cortez, where we pass through the very southwest corner of Colorado, through Dove Creek and on into Utah, making a turn northward at Monticello and up to Moab.

P1100814a

I had been experimenting with a newly built pinhole camera, made from black foamcore board and gaffer's tape, and mounted to a thick slab of wood, providing for a sturdy base, tripod socket and low center of gravity. The principal feature of this camera was once again, like the falling plate cameras of before, an attempt to answer the question of how to make multiple exposures while out in the field, far from home and the convenience of one's darkroom. In the case of this new camera, it employs a side-opening lid gaining access to the camera chamber proper, with a storage compartment behind for exposed and unexposed paper negatives.

Like the falling plate cameras I'd previously built, one has to pause between exposures to change negatives. But whereas before it was a simple matter of tilting the camera forward and releasing the front-most film plate, this camera requires one to find a place to sit down, so as to form a lap upon which to set out one's changing bag, into which the camera is zipped up; then the side door is removed, the exposed paper removed from the film plane and stored in its compartment, after which a fresh sheet is loaded up and the door reinstalled.

There are downsides to this new camera's film changing process. It's slower to recycle between exposures, especially out in the boonies where there might not be a convenient place to sit down. I've been known to crouch down with my back against a boulder, tree or fence post, so as to form that needed table-like lap surface upon which to deploy the changing bag. There's the time required to take off backpack, remove changing bag, sit down, place camera into bag, zip up both closures, insert arms, fiddle with the camera, remove arms, unzip camera, restow changing bag and don backpack once again; then it's off to another spot with tripod over one shoulder and box camera under the other.

The advantages of this new camera, that in many ways outweigh the disadvantages, are several-fold. First, the storage slots in the back of the camera are each wide enough to hold upwards of 100 sheets of paper. That's enough paper for several weeks'-worth of shooting, without ever having to reload film holders in one's car or hotel room; perfect for extended vacations. Second, the camera doesn't have to be lugged around with sheet film holders; four such 8-by-10 holders (permitting only 8 images) are as heavy as the entire camera. Third, unlike the alternatives of a falling plate camera or sheet film holders, virtually unlimited numbers of images can be made out afield in remote areas without running out of film. Fourth, this camera is much less sensitive to be jostled and handled afield, unlike the more delicate falling plate camera designs.

The introductory article to this blog included an image made using this camera atop Delicate Arch. As I recall, I employed the services of my wife to carry the tripod, as we hiked up the long slick-rock mountain slope to the arch. While I carried the backpack on my shoulders and box camera under one arm, this gave us each a free hand in case we slipped or stumbled during out trek upward. I stopped repeatedly to load the camera, make an exposure and reload, all the while fellow hikers would either pass us in silence or pause briefly to inquire if that's a homemade pinhole box camera (I've always been amused by such questions, considering how crude the construction can appear). I found the sloping rock cliffs along the trail a convenient place to sit against to reload the camera, and again did so repeatedly during our time atop the mountain.

P1110837a

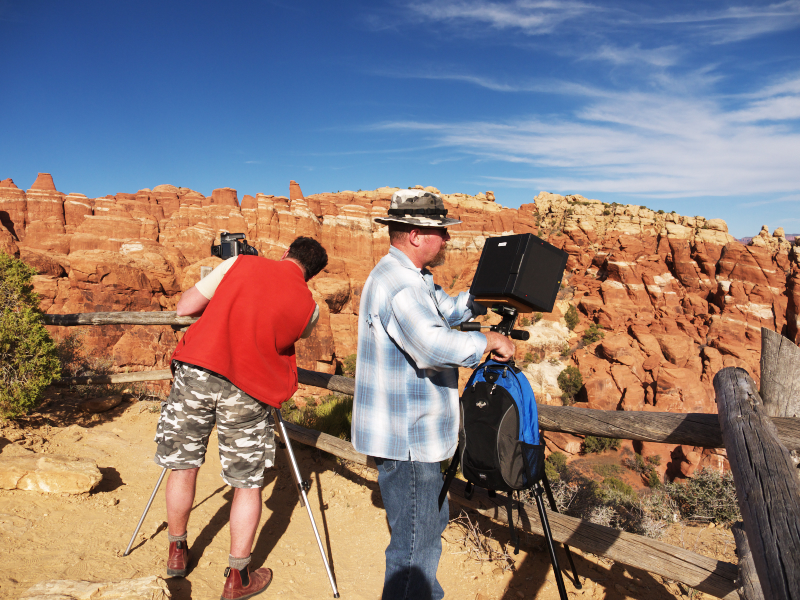
The layout of Arches makes it convenient to drive the paved loop road from one hiking site to another. The top photo was created at the Fiery Furnace overlook. I remember it well, because the overlook was crowded with a group of photographers engaged in a workshop, each employing high-end medium-format digital cameras (I'm talking cameras each as expensive as the Subaru we were driving), all of whom were trying, I'm assuming, to find some unique photographic opportunity whilst standing virtually side-by-side, with the same cameras and lenses. Myself, I must admit that I took on an air of smugness, as I shouldered my way up to the railing, deployed Bogen tripod and proceeded to carefully aim the obviously crude camera by means of the viewing dots affixed to the sides and top of the box (and a surprisingly accurate method of framing one's image), me in my grungy work shirt and sweat-crusted boonie hat.

By the time this image was made, I'd been well practiced in the art of pre-flashing paper negatives, a technique that yields a better dynamic range, especially in the shadows, than otherwise. You might want to contrast the tonal rendition of this image with those of the previous several articles, which were made a decade prior and without the pre-flashing technique. I'll cover the details of pre-flashing in another article.

This camera represents a significant evolutionary step in my camera designs, that of large-format boxes simple in design and light in weight (by means of foam core and gaffer's tape construction) yet rigid and stable (due to the heavy wooden base), offering extended operation in remote areas by means of the storage compartment behind the film plane. It's main downside is the need to remove box from tripod between every shot, find a place to sit, and utilize a changing bag. A further evolution, which I've yet to employ, is a camera with its own light-tight, black fabric arm sleeve permanently attached, enabling camera to be reloaded whilst atop its own tripod. One of these days...

Monday, December 14, 2015

Tent Rocks Reprise

Tent_Rocks001a
The last several articles have had us revisiting a day trip I made to Tent Rocks National Monument in north-central New Mexico, back in 1998, equipped with the 8"x8" falling plate pinhole camera loaded with paper negatives, and a large wooden tripod.

Because of the size and weight of the equipment, my agility was rather restricted, and thus I could only progress so far up the increasingly steep trail before I felt I had to turn back.

The image posted in the previous article shows the entrance to a narrow and winding slot canyon that, while spectacularly scenic, was so restricting that I could barely manage getting through without incurring damage to either box camera or tripod. In addition, because of the narrow passage I could not manage to find adequate footing for the large tripod, else I would have tried an exposure in the shaded gloom between high canyon walls; which would have required several minute's exposure time.

Then there was the matter that this is a public National Monument and there were other people on the trail that day, and attempting such a lengthy exposure, even if I could have managed it, would have meant either blocking their passage or them interfering with the camera gear. So even though I had wanted to try my hand at a pinhole image of the slot canyon, I knew I couldn't. It is personally disappointing when you can sense there is such a powerful subject matter almost within your grasp, but forces outside your control conspire to prevent success.

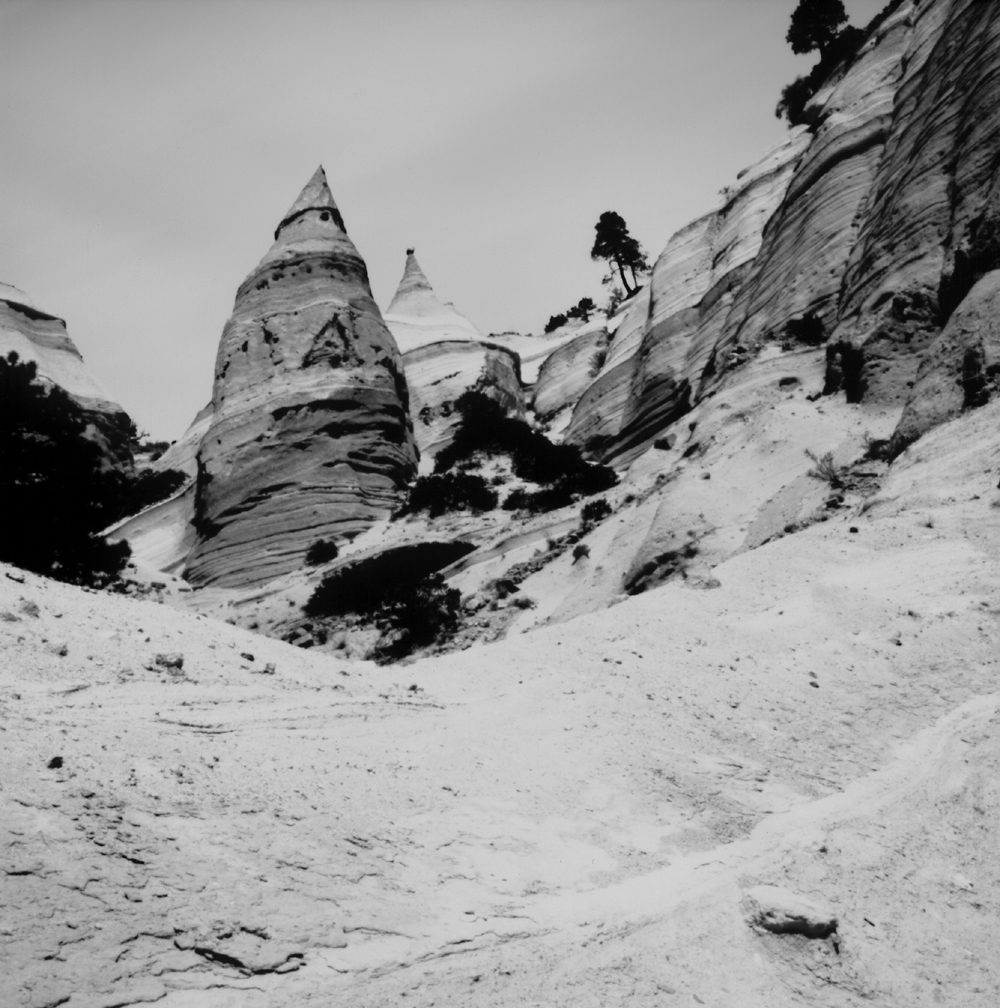
It was with this sense of temporary disappointment that I proceeded forward, yet remained hopeful that something fortunate might present itself up ahead. After more bends in the trail, as it climbed higher and higher, I suddenly came across this scene and knew immediately that this was what I'd been hoping for.

The trail widens as it makes a bend to the left, in a relatively open area that's a marked change from the confines of the slot canyon now behind us. Though the terrain is steep and sloped, there's plenty of room for fellow hikers to pass, while my tripod's legs can find adequate footing. The challenge will be managing to tilt the camera up toward the conical formations while keeping the tripod from toppling over. I use to advantage the upward sloping terrain on the far side of the trail, where I can adjust the legs' splay to tilt the camera up while the terrain's contour serves to stabilize the center of gravity.

Knowing that this scene was directly exposed to the bright sun, and very light in tone and thus more reflective than other, redder geologies, I opted to shorten the exposure time a bit, so as not to over-expose the landscape.

With exposure complete and film plate properly dropped into the camera's lower storage area, I contemplated continuing ahead, but could already see that the trail only gets narrower and steeper up ahead. I decided that this was a good way to end my day, with several hopeful images yet to develop once back home.

I've returned numerous times to Tent Rocks since then, and every time I do it is with the memory from this day that serves to remind me of the lessens learned, of perseverance and overcoming challenges, of not ceding one's hopes to temporary disappointment but always looking further up the trail for more opportunity.

Friday, December 11, 2015

Tent Rocks Slot Canyon

Tent_Rocks003a
In the precious article we are back in 1998 and are visiting Tent Rocks National Monument in north-central New Mexico, equipped with the 8" x 8" falling plate pinhole camera and large wooden tripod.

Carrying the camera atop tripod over one's shoulder, the path starts out from the parking area fairly gentle and wide, but as we progress into the canyon it gets steeper and narrower, with frequent stops to consider a potential composition.

The great thing about Tent Rocks is that the further inward and upward one hikes the more spectacular the scenery. But the limitation this day will be the massiveness of the box camera and the length of the tripod, because there is a narrow slot canyon one has to thread in order to get a view of the higher terrain and the spectacular conical formations up ahead that give the site its name. Parts of the canyon are so narrow that one can't progress further without leaning against the canyon's walls and struggling to get the box and tripod through without damage.

And get through I did, but not before first stopping to make this image of the rock striations and the dark fissure-like opening to the slot canyon itself, through whose passage we will find even greater vistas up ahead.

It is sites like this that challenge the whole concept of large format photography, where just being able to gain access to a particular vantage point represents a significant logistical challenge, given the weight and bulk of the gear, especially these box cameras that don't collapse down into a package small enough to fit into one's backpack.

In the next article we will examine my favorite image made with a pinhole camera at Tent Rocks, but couldn't have been made had we not been able to progress through this slot canyon.

Tuesday, December 8, 2015

The Power of Tenacity

Tent_Rocks002a
It is 1998 and I have worked out enough of the bugs in the large wooden falling plate pinhole camera, and accompanying wooden tripod, that I've begun going afield, exploring what it might be capable of creating.

Every time I go afield with this bulky contraption I can't help but think of the formative years of photography, in the 19th century, when adventurous explorers, much braver than I, spent weeks or months in the wilderness capturing on photographic plates for the first time the wonders of this new continent. I'm no explorer, for certain, merely walking in the footsteps of giants.

Though the advantage I hold today is that of mechanized transport via automobile, and commercially manufactured films and papers rather than hand-coated on site, it still comes down to having to lug camera, tripod and accessories by hand, absent the portage once provided by pack mule. Today, I'm my own mule.

One drives north from Albuquerque along Interstate 25, then exit at mile marker 264, at the base of La Bajada Hill just south of Santa Fe, heading toward the town of Cochiti Pueblo. Directly adjacent to the massive earthen Cochiti Dam a left turn takes one out along what was then a rough, dirt road to the Kasha-Katuwe Tent Rocks National Monument.

I had learned how to carry the large box camera, mounted atop its tripod, over my shoulder in such a way so as to keep the film plates from becoming dislodged, but I still had to be very careful as I hiked up into the slot canyon at Tent Rocks, in search of photographic possibilities, which I soon discovered to be all around me.

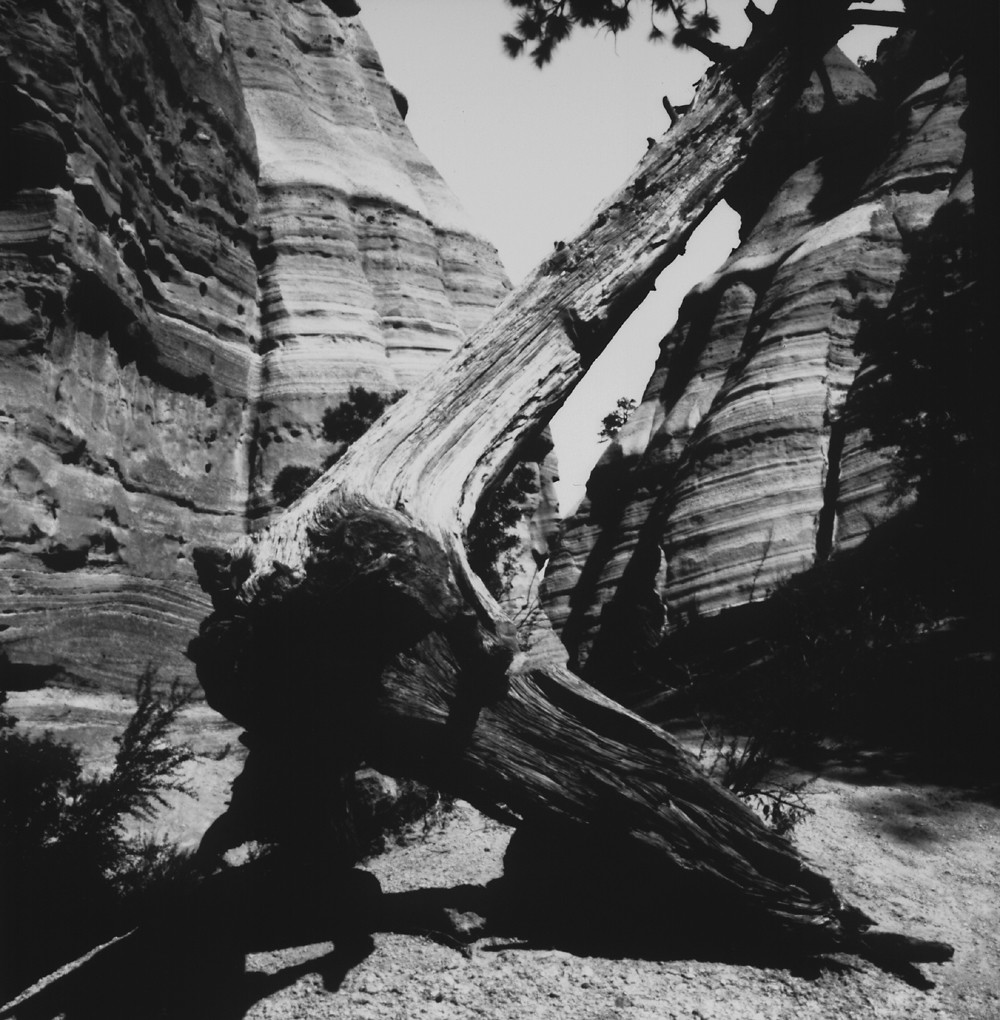
I soon found the main limitation to my handmade tripod was the lack of an articulating head, which limited how far from straight horizontal I could aim the pinhole; this is a canyon, after all. Yet I was able to come away with a number of decent images, among which is this portrayal of a tree which has been partially toppled over by flood waters and whose root system has been exposed by erosion.

Interestingly, I visited Tent Rocks again just this past summer, some 17 years later, and this same tree yet remains in its same precarious position, testimony to the power of tenacity.

Because of the bulk and weight of the camera and tripod, I turned back before entering the steeper parts of the hike through Tent Rocks, but not before recording a few more images, which I will share in subsequent articles.

If there's anything this project has taught me it's reliance upon adequate preparation beforehand, and tenacity to stick with one's intention to fruition, like that tree that yet clings to life in the harsh environment of the New Mexico badlands.

Saturday, December 5, 2015

Sandia Mountains, 1994

Sandias002a
It was way back in 1994 when I had built this large format pinhole camera and was first experimenting with using paper negatives. I had a few years of darkroom experience under my belt, but there were no Internet discussion forums within which to share one's experience and gain from others' knowledge, and so a person had to do things on their own, study the results and learn from their mistakes.

I remember driving off of Tramway road onto a dirt road, now covered in snow, trying to get as close as I could to the mountain without too much distracting foreground clutter. I ended up with this image, whose principal foreground feature is the tire tracks in the snow. This camera has all along lacked any kind of viewfinding device, even viewing dots, and thus framing up a shot requires a certain amount of luck and serendipity. There is the fact of leveling the tripod head, which helps in getting the horizon straight (unless the terrain is sloped). Perhaps in the future, should I decide to start using it again, I can upgrade it with viewing dots.

What's most striking to me about this whole series of images are the dense shadows, caused by the fact that, in 1994, I had yet to discover the magic of pre-flashing paper negatives, which will be a topic in an upcoming article.

Sandias001a
This second image was made during this same outing. Examining the paper negative itself, it appears very much under-exposed. But what detail there is comes to life when reversed into "normal" tones, as I lucked out in getting this image of Sandia Crest, atop which you can just make out the frost-covered antennae. I had to hike a fair bit from the truck, in the snow, and ended up planting the tripod up against this treeline.

Sunday, November 29, 2015

Beginning to See

Ojito_Mesa001a
(F/300, 5"x8" falling plate pinhole camera, pre-flashed grade 2 paper negative.)

With premeditated intention I packed my truck with pinhole box camera, handmade wooden tripod and light meter, on that day back in November of 2005 - ten years ago - the goal being a familiar location in the Ojito Wilderness, only to find the unexpected along the way.

I find myself often heading out to some photogenic locale with my imagination preset to what I expect to find, so mentally focused on my intended destination that I become less observant to the world round about me along the way. The problem with being stuck in this tunnel-vision mode is missing out on all the fresh discoveries that are vital to a continually renewed creativity; one returns home to find nothing of substance has been gained for all that effort.

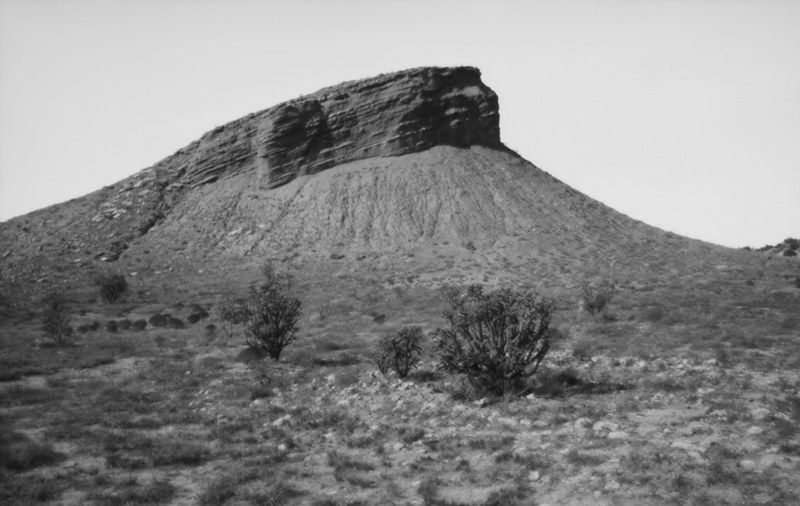
But on this day, something bade me to stop, pull over and explore this butte that I'd passed many times previously on my drives out on Cabezon Road through the Ojito.

This was one of the regular landmarks I'd learned to recognize from my previous trips; how the road makes a bend to the left, then the right, then a long, winding stretch toward the west that passes this butte, then up and down several swales and on past a large cattle pond, and onward.

It's the journey along the way, at least as much as the destination, that's most important. I am reminded of this truism every time I see this image, a kind of Note to Self: Drop all pretense, open your eyes and begin to see the world anew.

Sunday, November 22, 2015

Sandia Foothills Boulders

Boulders001a
Albuquerque is a city that abuts the Sandia Mountain range on its eastern edge, along whose foothills are numerous opportunities for hiking, supported by convenient parking areas maintained by the City. This destination represents an opportune subject matter, when the desire to go out-and-about with a pinhole camera suddenly hits, as it did on this day, back in November of 2004.

I grew up in the eastern part of the city, literally in the shadow of the Sandia Mountains. Like many of my peers, we were used to telling directions by the massive presence of the mountain to our east, a lodestone of sorts, directing our inner compasses. Put me in some other town or city absent such a striking landmark and I'd be lost to tell which direction is which. But not in Albuquerque.

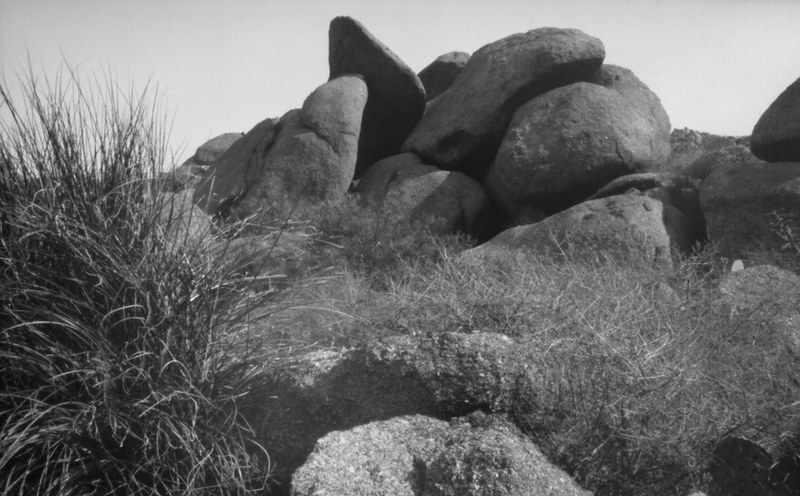
Long before I was born, my dad as a young man would hike many miles, from what is now downtown, up through the east mesa to the mountains, often accompanied by his buddies - back when the Great Depression offered little else for young men to do. One story he told was when he and his buddies each brought with them a .22 rifle with which, inspired by the cowboy movies, they had a regular shoot-out, hiding behind these massive granite boulders, ricocheting bullets zinging past their heads. One can't imagine doing such a thing today, it would be considered sheer madness, or downright criminal activity. Back then, it was just clean fun for kids living in a tough world; which activities might also have prepared them to face the trials of the Second World War, just a few short years ahead.

I thought about this story as I hiked the trails meandering around these massive boulders, preparing to do a bit of shooting of a different kind. I had with me the F/300 aluminum 5"x8" falling plate pinhole box camera and tripod, while I was by now also experimenting with paper negatives instead of the orthographic litho film I had been using, and which I was finding difficult to control its contrast.

I had already noticed that conventional multi-grade photo paper could also too easily produce images of excessively high contrast, caused by the blue and UV-intensive daylight activating the paper's high-contrast emulsion. For this reason I had begun experimenting with using RC photo paper of a fixed contrast grade instead, whose contrast was insensitive to the color of light; along with adding a faint, even exposure to the paper in the darkroom ahead of time - what I call a "pre-flash" - which serves to increase the paper's shadow detail without significantly increasing the highlight exposure, thereby serving to limit the excessive image contrast. This particular image was created during that period of intense experimentation.

I can't recall now whether the camera was mounted atop my homemade tripod or the heavier but more flexible Bogen; but I do know that, by judging from the foliage along the left side, the wind must have been very calm that morning, since this was a 45 second exposure. This was but one of a series that I've shot since in this same general area, and no doubt you'll be seeing more of these foothills images herein.

Having such an easy to access locale (about two miles from my house) for experimental scenic photography has proven to be of immense help in ironing out the bugs in my process before embarking on lengthier excursions afield. But even so, I periodically return to the Sandia Foothills, that ever-present lodestone that grounds me to home.