Sunday, February 28, 2016
Pinhole Photography at Kiwanis Overlook
One of my favorite destinations, when I feel like an outdoor hike but don't want to drive too far from home, is the Elena Gallegos Open Space area, part of the City of Albuquerque's Parks & Recreation program. The Elena Gallegos was once part of a Spanish land grant, dating as far back as 1694, that encompassed much of what would later be the north and east portions of the Albuquerque metropolitan area. The current open space area is along the foothills of the Sandia mountains, and includes numerous hiking trails, along with picnic areas that can be reserved for private parties.
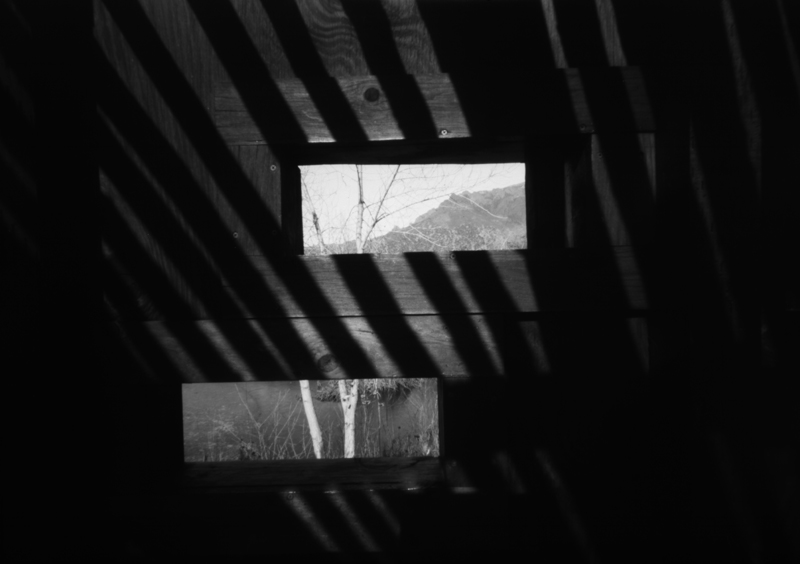
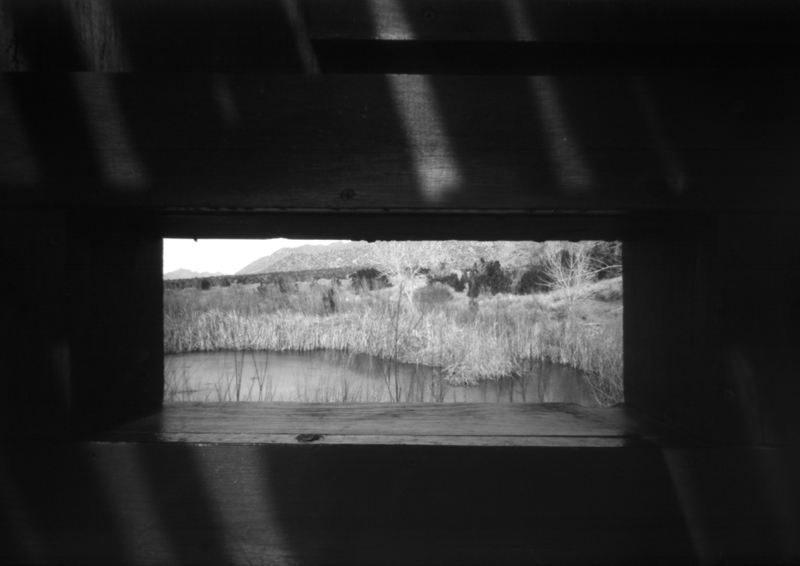
One of my favorite parts of the Elena Gallegos is the Kiwanis Overlook, a wooden structure, built by the Kiwanis organization, that serves as an observation area for a small wetlands pond that is a favored destination for birders.
There are several trails one can hike to arrive at the Kiwanis Overlook, the longer trail starting from the eastern-most parking area and winding its way east and north, across a natural arroyo, while a shorter hike starts from a nearby parking lot on the northwest corner of the park.
I've visited this area repeatedly over the years, for the purposes of both hiking and photography. Although I'm not a birder, I've noted in the middle of the day, when the light is sufficient for pinhole photography, the absence of birds in the wetlands pond. Too, the visitation hours of the area, as managed by the city, precludes bird observation in the early morning and late evening, unless special arrangements are made ahead of time. Still, despite the apparent lack of wildlife, daytime visits are a special occasion for me, as the open air and scenic vistas are both calming and inspirational.
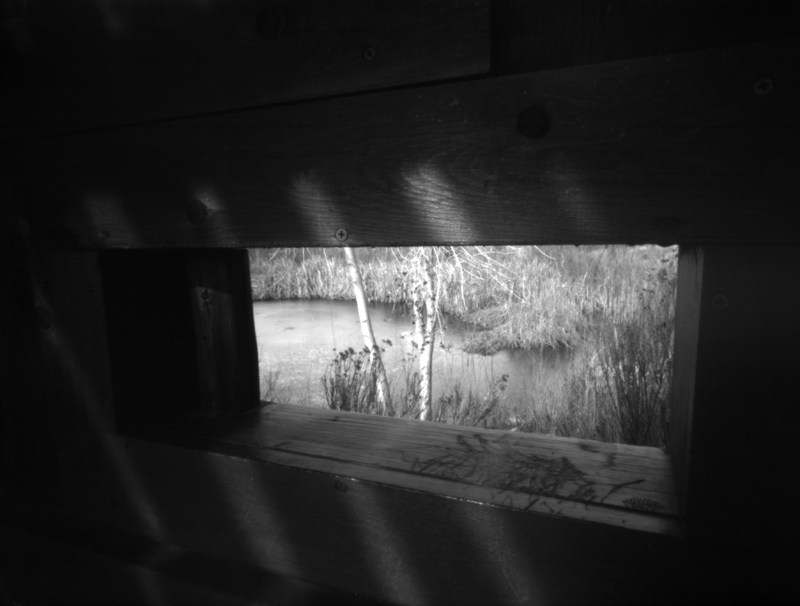
The observation blind structure itself is constructed with numerous window-like openings, revealing various views of the wetlands area beyond, each an ideal vantage point from which to aim a camera. After frequent return trips to the area, I began to notice how these window openings themselves began to resemble picture frames, even being constructed of wood, serving to frame a specific vista beyond, each one unique in aspect ratio and view, as if they were but a collage of paintings hung on some wall.
And so I began a series of photographic studies involving the wooden structure itself, its observation viewing ports and the vistas beyond. At the right time of day, sufficient light is available to render visible the textured details of the wooden planks, even with the limited sensitivity of paper negatives employed in pinhole cameras.
It requires a meditative-like concentration to successfully employ these box cameras as a means for creating landscape images, and thus the presence of other visitors to the area can often be a hindrance. It is for this reason that I prefer to plan my visits for the week days, when the majority of people might be busily employed elsewhere. There's also the further advantage that the parking fee on week days is only a dollar, compared to the two dollar weekend fee.
Over the years I have employed both paper negatives and Harman's Direct Positive paper, in both pinhole and glass-lensed large format cameras, with which to study this area, and find myself returning yet again, in search of something I know not what, except that this wildlife observation area is a perfect metaphor for the act of seeing that is uniquely photographic.
Tuesday, February 23, 2016
All the Better to See You With
Post-Script: This article represents the first "typecast" within this blog. I had written a mashup of these thoughts earlier today, in my AlphaSmart Neo, with the intention of posting to my other blog, but later had the urge to do some typing instead (that is, typing via manual typewriter, something I've done extensively for my other blog). Before I started this blog, I would have posted this article to the other blog, but being as it was photography-related I think it belongs here.
I could have expounded further on this topic addressed herein. One thing I've noticed is that, back in the film days of the 1970s and '80s, depth-of-focus scales on camera lenses were often employed to maximize image sharpness, a common technique being to set one's lens to the hyper-focal distance for the aperture being used. The idea was to use as small of an aperture as subject movement and lens diffraction would permit. Plenty of photography magazine articles addressed this very issue. In large format photography, camera "movements" between the lens and film planes were also commonly employed to maximize depth-of-field, especially in landscape photography. Nowadays, Internet mavens seem to harbor this fixation over large-sized digital sensors as a means for minimizing depth-of-focus. Three decades ago, we would have been excited to have a small-sensor camera like a Fujifilm X10, that could render sharp images while having a small enough sensor to yield intrinsically wide depth-of-focus. It all seems upside-down now, especially since those large-sensor cameras are so darned expensive. And thereby lies my suspicion, that it's more a point of bragging rights - look, I can afford one of these and you can't.
Tuesday, February 16, 2016
Camera Cerebrum, Public Gazing and Street Photography
I've named this blog "Obscure Camera," not just as a play on the term "camera obscura" but also because at times I expect to discuss truly obscure photographic concepts. This article represents one of those times when we do get into the truly obscure or arcane - or bazaar, even.
In the decade following the September, 2001 terrorist attacks I, along with many others, became more aware of a backlash beginning to develop against public photography, simultaneous with an increase in government surveillance of the populace. This dichotomy between an increase in state surveillance and discouragement of public image-making steadily grew during the years around the Iraq war, to be partially abated only with the development of the ubiquitous camera-equipped cell phone, in the mid-2000s. Yet, the dichotomy continues to this day, currently manifested as a backlash against public street and drone photography, and their perceived abuses.
Because I was already interested in these disparate topics of public photography and state surveillance, it was natural that I might ponder a bit deeper their implications and hidden meanings.
What I came up with, several years ago, was a thought experiment, intended to explore the hypothesis that street photography is, in essence, an extension of one's personal gaze; that the photographic act is fundamentally one of direct observation, by a photographer, of a subject in public, with the camera as intermediary. The question I wished to unravel was whether public objection to street photography was an objection to the camera's capability to record, or to the human's desire to observe; do we object because we don't wish to be recorded, or because we don't want to be watched?. And is it a sin to record, or a sin to merely look?
I suspected it was the latter, since as a public we seem curiously resigned to the fact of increased government surveillance, even in this pseudo-democracy where there are systems in place, however ineffective, where our voices might be heard and redress made; instead we heap scorn upon our fellow citizens for expressing their own creativity through public photography. But why this dichotomy?
My thought experiment, intended to explore this question, involved the public act of being seen pretending to photograph others with a fake camera device. In so doing, it was to be part personal experiment and part performance art.
For the purposes of the experiment, I concocted a faux-camera device using a block of wood and various bits salvaged from a defunct Polaroid 600 camera. It looked just enough like a real camera to give someone pause, while closer inspection would reveal it to be obviously not a real camera at all. I considered it important that its appearance ride this razor's-thin edge between validity and falsehood, in order for the experiment's intention to succeed.
One important aspect of the camera's design (that I named the Like-A), was a clicker mechanism that would make a distinct sound, marking the decisive moment when a "faux-photograph" is being taken.
I thought about this project off and on, blogged about it a bit, but really didn't pursue it any further.
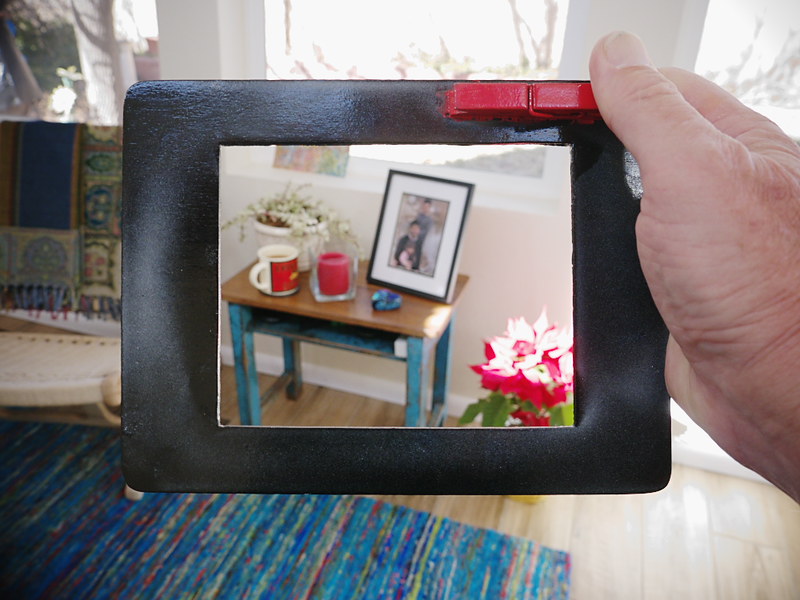
Several years later my interest in this project revived, and I revisited it, having in the interim been additionally informed by the iPad/tablet computer revolution, and refashioned the Like-A into a picture frame-like viewing device, complete with clothespin-powered shutter clicker, whereby the "fauxtographer" would go out in public, frame up interesting compositions and "click" them directly into his cerebral cortex, the theory being that the convergence of a visual composition with some audible stimulation would mark a critically decisive moment, more likely to be reinforced into the fauxtographer's memory as a mental image of the scene just viewed, which I termed (for obvious reasons) the Camera Cerebrum; a device intended to impart photograph-like images, wirelessly, directly into one's brain.
It is important to point out that, though this project was intended to involve an abstract kind of photography, and strictly in the public arena, the execution of it thus far has only been simulated - I have yet to go out in public with the express intention of being seen using the Camera Cerebrum framing device. But I could at any moment; such is the nature of conceptual art. In my case, however, it has been more like conceptual-conceptual art.
It became obvious to me that for this project to succeed as an act of faux-image-making, it would have to not only be performed in public, but photographic documentation of the performance must be made, else it would remain merely hypothetical.
And so I've arrived at the point where I must decide to go out into some public venue equipped with the Camera Cerebrum, accompanied by a camera crew to document what might ensue.
It is important here to clarify my intentions. I don't desire to become purposefully controversial, or push peoples' buttons just for the sake of inciting some reaction, or merely to seek attention, for my personality naturally avoids confrontation. I'm truly interested in how photography works in the public context, the interplay between the subject, the camera and the photographer; I've long harbored the suspicion that these interrelationships are much more complex than one might otherwise think.
However uncomfortable a person such as I might be about being observed photographing others in public without their permission, doing so using an obviously pretend device like the Camera Cerebrum brings with it another set of issues, pertaining to the veracity of one's intentions. Even for someone objecting to having their picture taken, there is at least some small comfort in knowing that the photographer is employing standard photographic equipment and techniques. But what are they to think when it becomes obvious that photographs, as we commonly understand them, are not being made here at all, but rather it seems to be some picture taking-like ritual being acted out?
Let's approach this scenario from a different angle. What this device doesn't do is function as an actual image-recording device; but what if it did, and looked so strange as to be unrecognizable as such by the common person on the street? Would their reaction remain the same? I assume so. How are they to know that my little framing device with attached clothespin doesn't actually contain some micro-electronics?
On the other hand, what if I were to conduct this experiment using a real film camera, empty of film? Or a digital camera minus the memory card? People's expectations are based on past experience. It would appear, for all intentions, as if their images were being captured; and their reactions would be just as you'd expect, depending on their personality, and tolerance for being an involuntary participant in such activities.
But the whole point of this framing device is to function as a synthesis between apparent-picture-recording-apparatus and mere-window-for-gazing-out-at-the-world, where the observed subject might not initially be certain of which it is; the resulting ambiguity being entirely intentional. It is up to them to decide what it is exactly that triggers their own objections to perhaps-being-recorded or perhaps-being-observed, whereas my role is to merely help define some clear distinctions between the two.
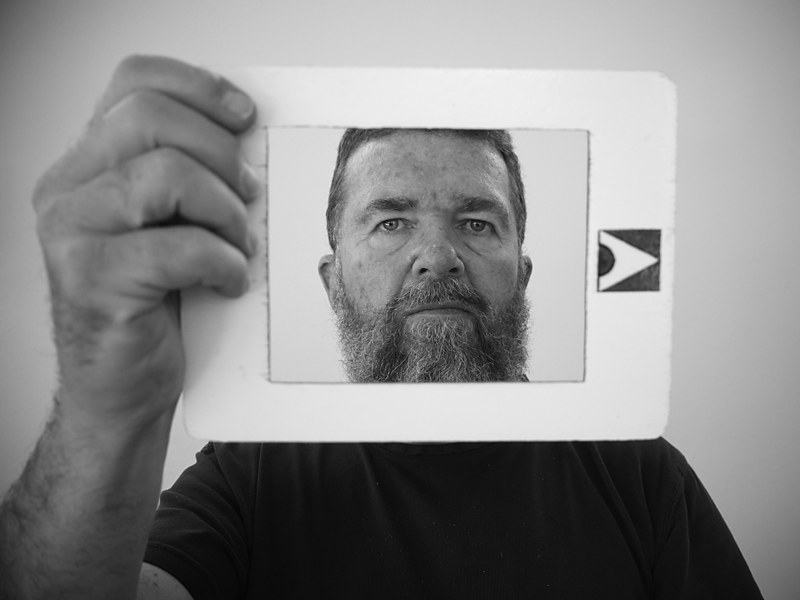
If we (in the United States) are assumed the right to photograph subjects in public, does that also confer upon us the right to stare at others in public? Absent a legal education, it's hard to say. Common sense dictates that such behavior in the extreme is frowned upon, depending upon the context. What if the "looker" were equipped with paint brush and easel, or sketch pad and pencil, would it matter any more or less?
There are many gray areas that this experiment could serve to explore, the role of both photography and observation in an open society.
Personally, I don't intend on being the subject of a Supreme Court test case, however curious my photographic theorizing might be. And so, unless I suddenly work up enough courage to conduct a bit of public "frame-viewing," it will have to remain a hypothetical question.
So, What's the whole point of this useless experiment? you might be thinking. Just to get a reaction? Just to appear clever or original? If that were the case, I'd deservedly get whatever scorn or contempt might be thrown my way.
But I'd like to present for your consideration a more honorable intention, that being the mere study of visual composition itself. Suppose my interest were in some hybrid artistic approach between painting and photography, where the study of the kinds of compositions normally found within the public venue requires some framing device be utilized? What if my interest were purely in the art of composition itself, wherever that might be found? What if I were storing up in my mind's eye a treasure-trove of visual scenery, to be recollected at a later time for some other noble, artistic purpose, like sketching or painting? Would that be so harmful? It doesn't sound like it would be, necessarily. And if not, then public photography itself shouldn't be, either. And yet, reality is never that simple. And that's my point precisely.
I am not naive; I understand why there might be objections to both recording or looking at strangers in public, certainly for the case involving children, or women, because of the fear our culture harbors toward pedophilia or sexual titillation. There are also fears of being blackmailed or otherwise exploited, due to one's public image being misused. I don't expect this project, even if it were fully realized, will unravel these issues at all, or lessen their severity within our culture; nor will our fear of being observed by others be abated, for much of that is biologically programmed. What this project does illustrate, if it does nothing else, is to demonstrate the power of image-making and observation, and the caution that those who wield it must demonstrate.
Post-Script: I did have a chance to try out this framing device in a pseudo-public setting, that being an experimental cinema production, put on by Basement Films and hosted by the Guild Cinema. Interestingly, the subject of the show involved the role of memory and photography, and so my happening to bring the camera cerebrum to the show was fortuitous. I had opportunity to try recording "cerebrograms" on several subjects, as well as explaining my theory behind the device to a number of people. While I'm not so certain that I convinced any of them to go out tomorrow and make one for themselves (developing a gathering of followers is not high on my wish list), they were at least polite enough to listen.
Of course, a specialist audience of experimental film adepts is hardly the same thing as truly engaging strangers on the street, but it's a solid first step.
As to the question of whether the memory-recording feature of the device actually works, there is one such image, of a Basement Films member outside the theater before the show, that I can still distinctly remember.
Tuesday, February 9, 2016
The Tangible Reality of Print in Hand
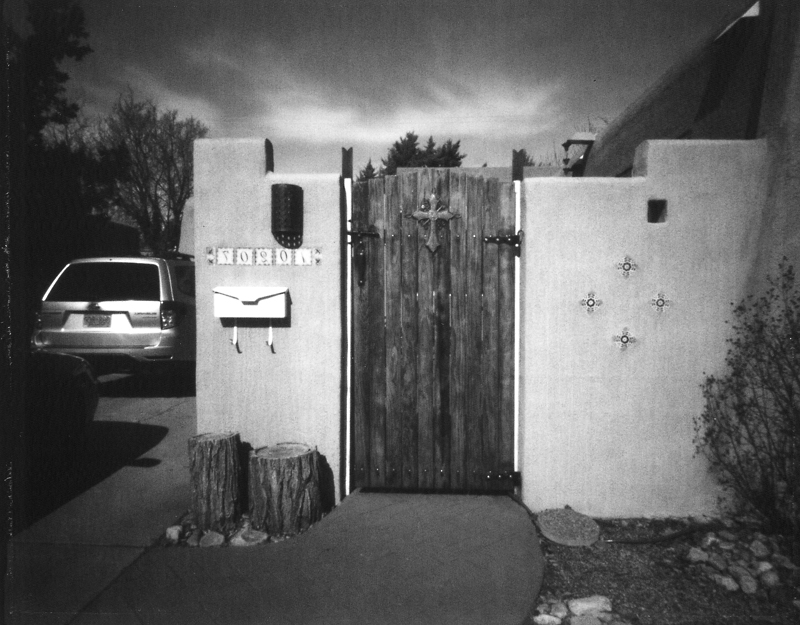
Gate
Having recently worked to refine my methodology for exposing and processing Harman Direct Positive paper, I've begun to create more pinhole camera-based, in-camera prints. This is after a long hiatus of a number of years, where the volume of my pinhole work was minuscule.
Part of the reason for this dry spell was that, at the time, I'd been working almost exclusively for over a decade with paper negatives - which don't directly produce a finished print - instead requiring either a contact print be made in my darkroom (a laborious process made impractical in the colder months of the year), or scanned to create positive digital image files.
It was this second process method, of scanning paper negatives, that I had mostly used, resulting in files to be posted and shared online, but still absent any physical print in hand.
Eventually, I left pinhole behind almost entirely and instead concentrated my creative energy mostly on digital camera-produced imagery; creatively satisfying but absent a real silver print in hand.
My initial experiments, a few years ago, using Harman positive paper in pinhole cameras involved larger sized formats, with longer focal lengths and the resulting larger focal ratios, which resulted in extended exposure times, even in bright sunlight, of well over a minute. For this reason I balked at continuing to use this paper in pinhole cameras, and ended up using it mainly with faster, lens-based cameras.
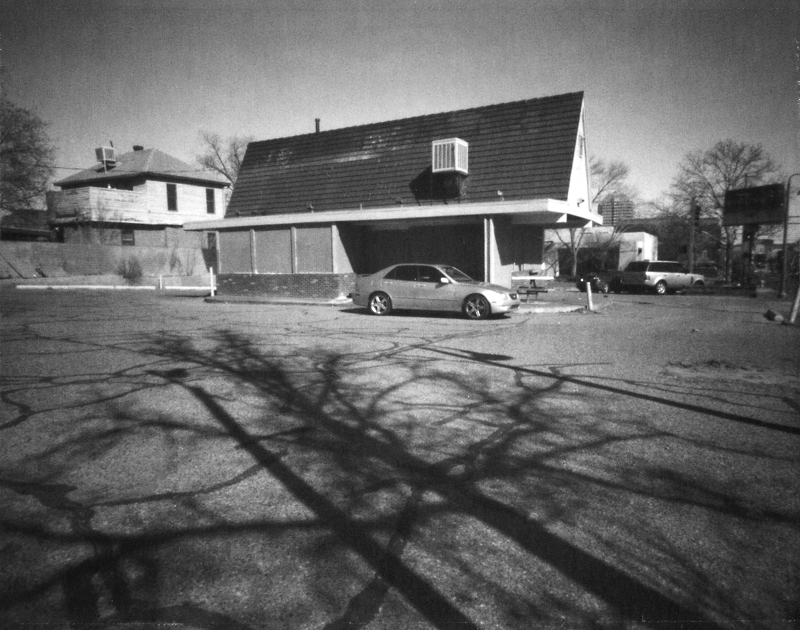
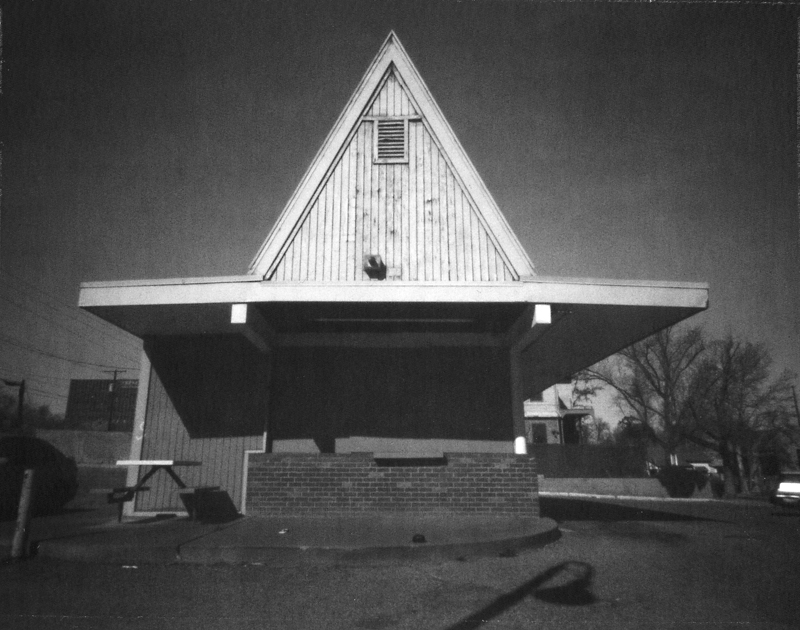
Pop-N-Taco, Albuquerque
However, results from recent experiments with exposing small pieces of Harman paper in pinhole cameras with smaller focal ratios has suggested that successful direct in-camera pinhole prints can be easily made using reasonably short exposure times. Most notably was having made test exposures in the little 2"-by-2" brass pinhole plate camera. Its F/140 aperture was fast enough to warrant reasonably short exposure times in bright sun, inciting me into changing my mind about direct positive pinhole print work.
Now I've begun working more with a 4"-by-5" wooden pinhole box camera, with a focal ratio of F/285 - small enough of an aperture to render reasonably sharp prints while keeping the exposure times well under a minute.
Despite requiring a tripod mount and lengthy timed exposures, the focus-free nature of pinhole photography implies that alternative composing methods can by employed, enabling accurate framing while streamlining the image-making process, as compared to the more traditional large-format process, where the photographer tucks in under a dark-cloth, squinting into a view-screen with magnifying loupe in hand. The "viewing dots" on my pinhole box camera provide an accurate and convenient method of composing a scene, as an alternative to either the cumbersome large format methods or the questionable accuracy of mere point-and-guess aiming with box cameras absent any viewing system whatsoever.
In the previous article I discussed the merits of employing extremely wide angles of view with pinhole cameras using orthochromatic media like Harman Direct Positive paper, as a strategy for creating landscape images with a reasonably dark sky tone. While this 4"-by-5" camera has not nearly as wide of an angle of view as that cardboard box camera discussed previously, I'm still able to get skies rendered with a reasonable degree of tonal detail, while the exposure differences from center-to-edge are much less severe in light fall-off.
Pop-N-Taco, Albuquerque
Holding these little prints in hand, they seem to be much sharper than their pinhole origins might otherwise suggest. One doesn't appreciate this as much with Internet-posted digital scans, however, since they don't hold up well to the closer scrutiny afforded by a larger computer monitor.
This reminds me that one of the greatest thing about creating these in-camera prints is their physical presence; the paper's thickness, texture and surface sheen; how one has to hold such a print close to oneself, an intimate interaction, an experience that remains lacking when merely simulated on a digital viewing screen.
So while IBM's Deep Blue A.I. might be able to best the world's Chess or Go champions, there's still nothing like holding a silver print in hand, an entirely non-Internet-based, physical experience.
Monday, February 8, 2016
Wide Angle Direct Positive Work
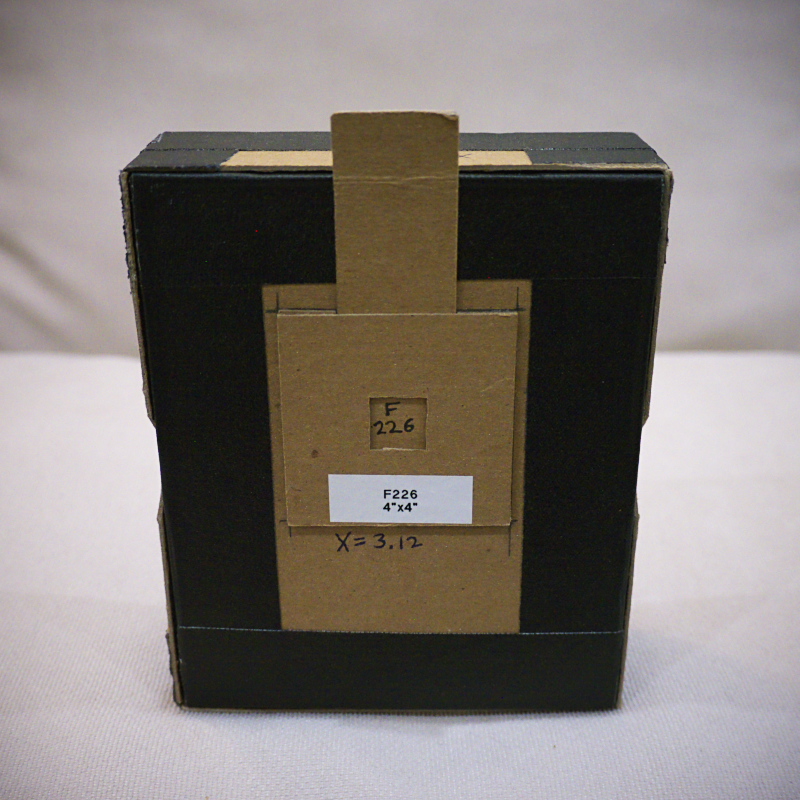
There was a time, several years ago, when I decided to make yet another pinhole camera, this one being a one-shot box camera made from "chipboard" cardboard (available in packs at Michael's crafts store) and gaffers tape. Using a paper size of 4"-by-5", and an image area of 3.5" square, its principal feature was a very wide angle of view. I had used this camera briefly, with paper negatives, then set it aside for a time.
Then last week I had a hankering to work again with this camera, only instead of using paper negatives I wanted to try Harman's Direct Positive paper, which I have been using extensively these last few months in other cameras, having arrived at a more accurate working exposure index and development methodology.
I created two images that day, exposed with my usual method of rating its ISO speed at 8 and metering the scene reflectively. I reference the exposure time on my meter opposite F/128, then multiply that by the camera's "X-value", marked on the front of the camera, that adjusts for the camera's true focal ratio, to arrive at the working exposure time.
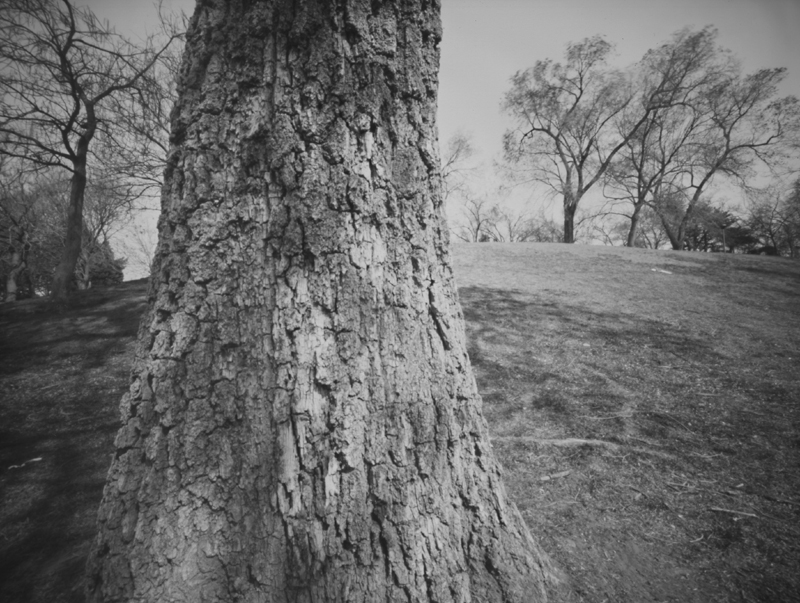
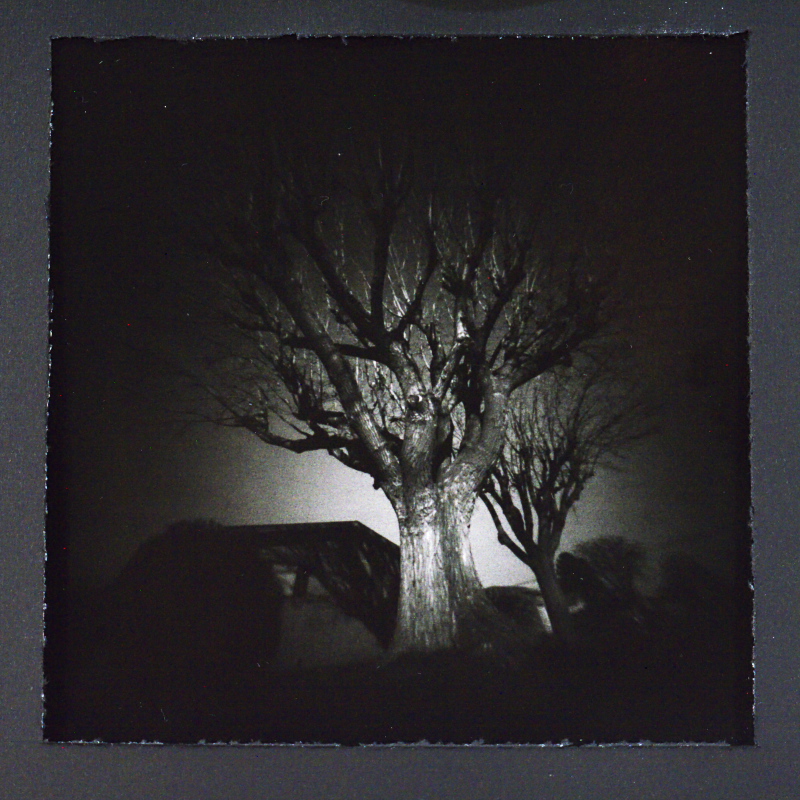
For this first image, of a tree in a front yard along a neighboring street, in the morning light, the meter indicated 15 seconds at F/128, while the actual exposure, taking into account the camera's actual focal ratio using the "X-value" multiplier, was 47 seconds. To make the setup small and convenient to carry, I didn't bring a regular tripod during this morning walk but rather just a tabletop mini-tripod, which I set on the ground in front of this tree, looking upward. I had to ensure that I stayed out of the way of the pinhole's field of view after sliding open the cardboard shutter, given the extra wide angle of view of this short camera. Metering was done against the brightly lit front part of the tree trunk.
Inspiration for this image was found that previous evening, during a stroll, when I noticed the stark, barren branches illuminated by the dim light of a street lamp.
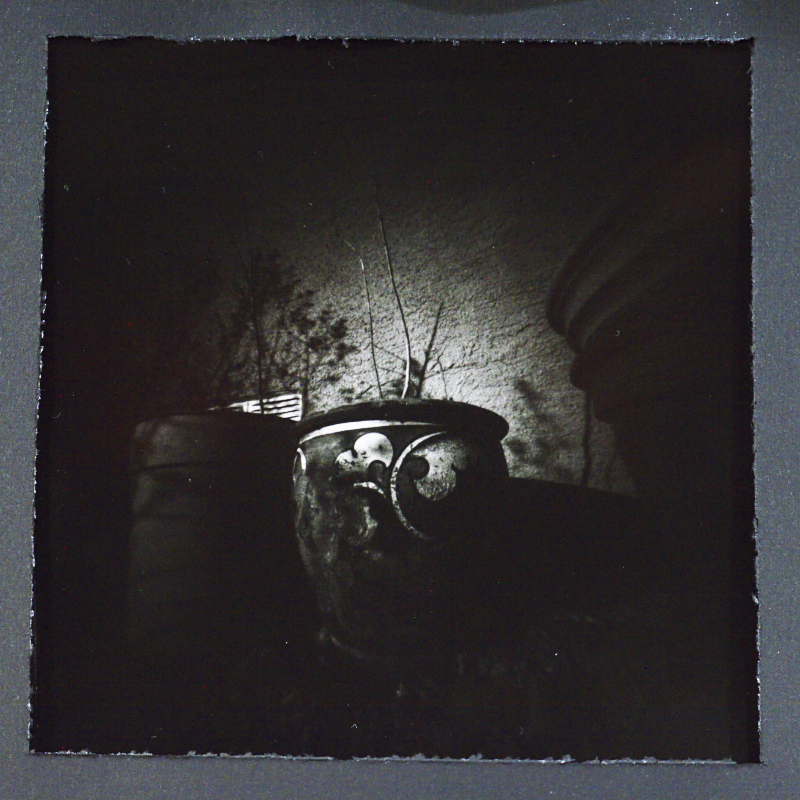
This next image was created after returning from this morning walk, of a pot near my front courtyard, again taken from a ground-level perspective, with the camera atop the mini-tripod. The meter indicated 10 seconds at F/128, while the actual exposure was 32 seconds.
Several aspects of these images interest me. For one, there's the extremely wide angle of view, causing the severe vignetting. I like the way that the central image area seems framed in a surrounding area of blackness. Also, the sky in the first image appears to be nicely dark in tone, rather than the usual blown-out whiteness when using orthochromatic paper media.
Both of these aspects are actually interrelated, since the reason for the relatively dark sky tones is because of the light falloff caused by that severe vignetting. Were the camera of a "normal" angle of view (where the focal length is about the same as the format size) there would be much less vignetting and light falloff toward the edges, resulting in a much more over-exposed sky.
This is an important point to consider when designing a pinhole camera for scenic photography that's intended to be employed using orthochromatic paper media. The severe light falloff caused by these short focal length, wide-angle cameras can serve to darken the edges and corners sufficiently to render the sky with a more pleasing, darker tone, more like what we'd expect using panchromatic film.
Of course, when doing so one must also accept the resulting severe foreshortening effect of such wide-angle optics, rendering objects even relatively near the camera rather diminutive in size, unless they are only inches away from the aperture.
It is possible to find a reasonable compromise with angle-of-view, that renders objects with a more normal perspective while still affecting some degree of light falloff sufficient to render a bit of sky detail visible. In my experience this occurs in angles of view somewhere in the range between 90 and 120 degrees. Some experimentation is required, for your individual needs. A handy rule of thumb is that a 90-degree angle-of-view occurs when the film or paper is twice as wide as the focal length.
These little 3.5" square prints will work very nicely when matted to a larger frame size, and I can see an entire series being presented in this manner. What makes this possible is the refinement in my process that I've worked toward, from camera to finished print via rotary processing of Harman Direct Positive paper.
Monday, February 1, 2016
Custom Roller Base Project
For a few years now, I've been working with the Harman Direct Positive Paper, a silver gelatin, fiber based, black & white print paper that has a direct positive emulsion, meaning that it can be directly exposed inside of a camera to produce, after development using standard chemistry, a one-of-a-kind print. There was a point in time, for about a year, when the paper was out of manufacture, due to a chemical supplier going out of business and another source having to be found, but now it's once again being made, and supplies are plentiful.
I've created one-of-a-kind prints using this medium in a variety of sizes, from sub-miniature Minox-sized to 8"-by-10". While the larger formats require either tray development in a darkroom setting or a large processing drum, and the Minox-sized prints were best handled in small containers in a darkroom, it is in those intermediate-sized formats, from 35mm to 4"-by-5", that I've done most of my work with this paper, and hence would like to find more convenient working methods.
One of the main issues I have is during the winter months, when my unheated, garage-based darkroom requires considerable time to warm up using a space heater, precluding spur-of-the-moment boughts of darkroom creativity. What I'd like is at least a way to work with the Harman paper in the convenience of my kitchen.
While I do have a Jobo processing drum for 4"-by-5" prints, the associated manual roller base is a rather pricey and fragile item. However, for smaller-sized prints - such as those cut to custom sizes for loading, one-at-a-time, into small and medium format cameras - there is no custom-fit processing tank available.
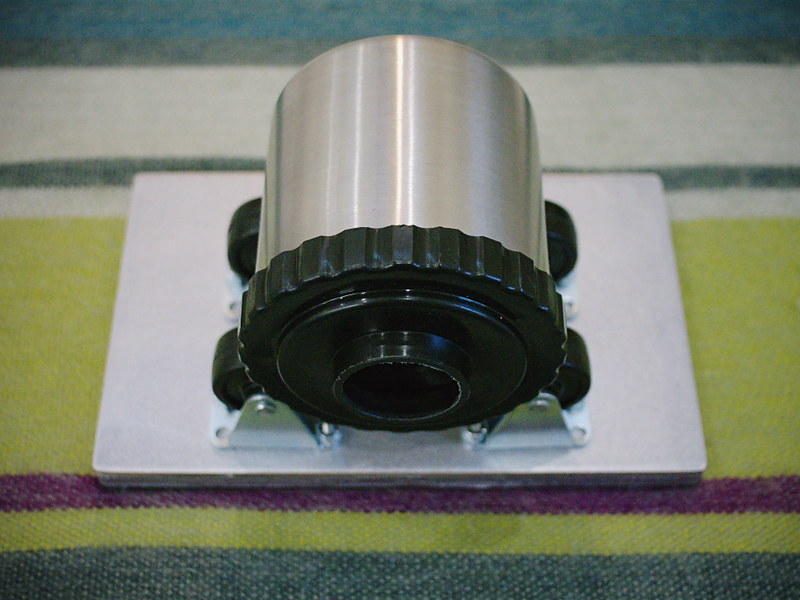
Several years ago, in a fit of inspiration, I decided that I might be able to use a stainless steel 35mm developing tank as a makeshift rotary processor for these special-sized smaller prints. The idea was that the reels would be kept inside the tank and the paper would be slipped into the gap between the outside of the reels and the inner surface of the tank, with the emulsion facing inward. With the lid installed, an adequate quantity of chemicals - about 100mL - can be used for processing without sloshes spilling from the lid, as the tank is oriented sideways and continuously rotated.
What I needed to make this work was a roller base. I had the Jobo base for my larger formats, and I figured out how to rearrange the roller brackets to make it work somewhat for the smaller steel tank, but I wanted a dedicated solution, so I wouldn't have to keep re-configuring the Jobo roller base; it being made of plastic, I was concerned the pieces would eventually break.
And so last week I went to the hardware store and looked for some caster wheels. I noticed there were three kinds, two of which were unusable because the wheels swiveled on bearings. I wanted wheels that rolled on a fixed support mount but didn't swivel. I found what I was looking for, and went immediately to my workshop to begin fashioning the roller base.
I first had to figure out how to properly space the four wheels. So I used an old scrap piece of plywood as a test base and, using clamps, tried various configurations with the wheels and steel tank until I found an optimal configuration where the tank easily rolled on the wheels. I then measured the positions of the wheel brackets and transferred those measurements to the nice piece of plywood, that I had prepared ahead of time by spray painting a metallic silver color.
I countersunk flathead screws through the bottom of the base, with the holes tapped to fit, and used nylon locking nuts to secure the wheels. The bottom I covered in a sheet of rubber matting material via a hot glue gun, making for a nonskid, water-resistant surface.
The result is a roller base custom fitted to my stainless steel developing tank, with which I can continue in earnest creating more small-gauge, silver gelatin, direct positive prints.
I also created a video about this project, which I encourage you to watch.
I've always been intrigued by small-format black & white prints. I can recall a time, about 15 years ago, when I saw an exhibit of Edward Weston prints at the Portland Art Museum. I was absolutely stunned by the quality of the work, the physical appearance of the prints and their intimate, diminutive size. You needed to get in close to them, in order to properly appreciate their beauty. In turn, that physical intimacy allowed one to perceive them as real objects, with real physical attributes such as surface finish and tone, rather than mere image files.
I believe in this age of media over-saturation that we need to reconnect to the tangible reality of the physical art object itself. Direct positive prints, made on a gallery-quality substrate of Ilford's best double-weight, fiber-based photographic paper, represent just such a medium, ripe for further exploration.
I'm hoping that projects such as these will provide you with the inspiration and tools necessary for you to pursue your own exploration of the world of direct positive photographic prints. I'd like to hear about you work, so leave a comment if you can.
Subscribe to:
Posts (Atom)