Tuesday, May 31, 2016

Film Canister Pinhole Camera Project

DSCF4967a
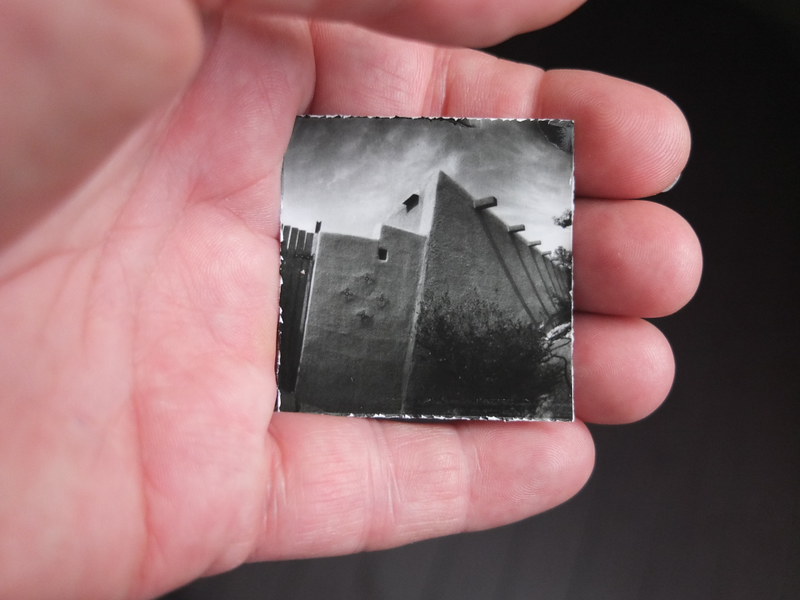
An exquisite little jewel of a print that fits in the palm of your hand

Last week, after a long, long hiatus from much of any pinhole or gelatin silver photographic work, I embarked, in a sudden fit of inspiration, on a mad rush to build a set of nine pinhole cameras from black 35mm film canisters. Why the sudden inspiration, after all this time of little creative photographic output? Hmm. Best not to question the Muse, but rather to strike while the iron's hot; there'll be plenty of time, down the road, to ponder the whys.

My intention was for this set of small cameras to use Harman's Direct Positive paper, cut down to 1.75" square, which after a standard processing in black & white chemistry produces one-of-a-kind, fiber paper prints. Think "wet Polaroids" and you get the general idea.
DSCF4970a
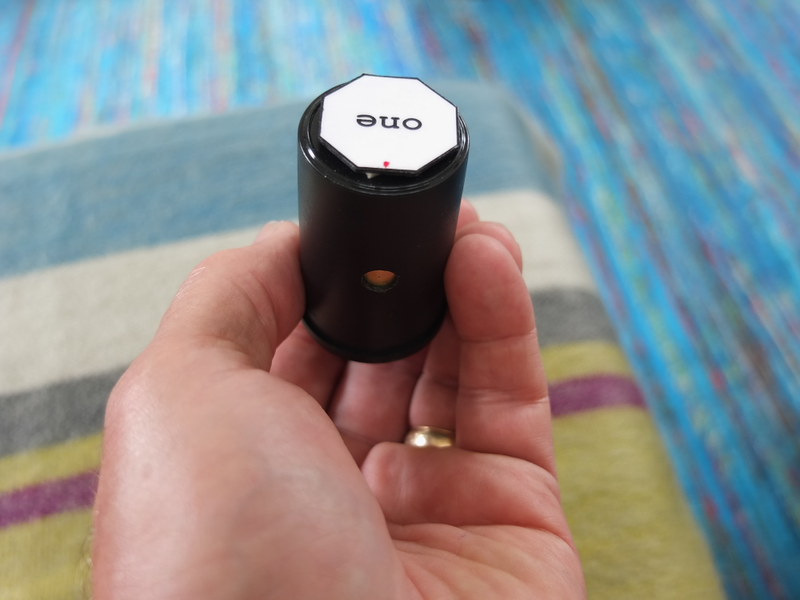
Camera number one, with black tape shutter removed. The red dot on the cap indicates the direction of the pinhole.

My previous experience with this paper in pinhole cameras has shown that it doesn't tolerate lengthy exposures in cameras sporting hefty focal-ratios, since I rate its "exposure index" (the fancy term for the paper's "film ISO") at a value of 8 - much, much slower than what one might expect in a modern digital camera, for example. Given the paper's slow "speed" and the minute apertures found in bigger pinhole cameras (whose focal ratios often extend in the 100s), a smaller-sized camera, with a shorter focal length, would have a more reasonable f-number, yielding exposures short enough to be practical. In the case of these cameras, their f-numbers come in at around f/120 or so. I say "or so" because all nine of the pinholes were made by hand, and thus might not be exactly identical; but they're close enough.

I made the pinhole into 2-mil (i.e. 0.002" thick; NOT 2 millimeters) sheet brass, using a sewing needle and 600-grit emery paper. I've made a video to demonstrate my pinhole making technique, linked below.


Making Pinhole Camera Apertures

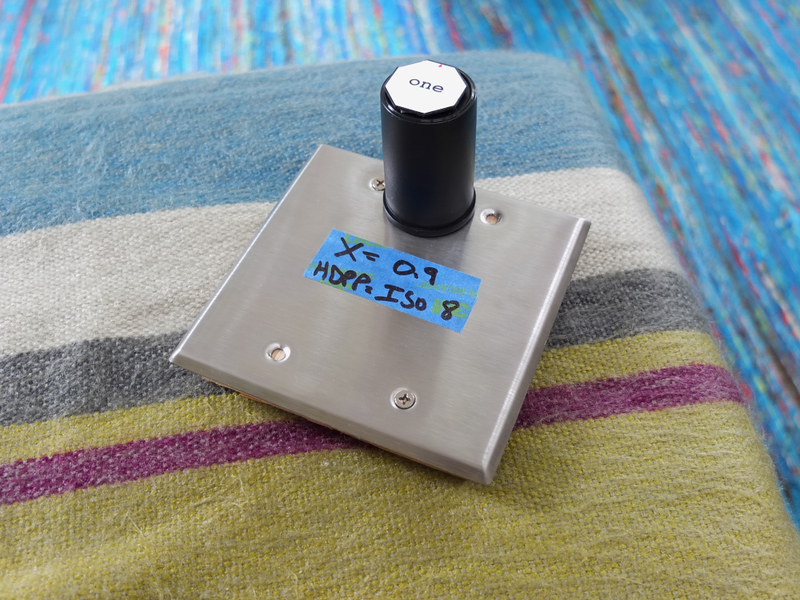
After doing a fairly good job at making the cameras themselves, and their little storage box, I had to decide how to use them with a tripod. After over-thinking it with ideas of pipe clamps and whatnot, I finally hit on the simply elegant idea of using the power of magnets, like Jessie Pinkman in the AMC series "Breaking Bad." Yea! Magnets, b*tch! (If you don't understand the reference, Google is your friend.) I installed magnets on the caps of each camera, which mate with a metal plate, screwed to a wooden base with tripod fitting underneath. I can place multiple cameras atop the metal plate, and the attractive force is strong enough to keep the cameras secure in almost any position.
DSCF4971a
Camera number one atop the magnetic tripod head

This morning, I took these little cameras out into my front and back yards, to make a series of test images. My standard metering and exposure technique is to use a Gossen Luna Pro F meter, set to the paper's exposure index of 8, using either reflective or incident metering (I used both during today's tests); reference the exposure time recommended for f/128, then apply the correction factor for the cameras' focal ratio. Since these cameras were about f/120, and the correction factor was about 0.9, I ended up just using the f/128 reading itself for about half of these shots; close enough for the tolerances of the process. This also represents a convenience factor, since I can use the meter reading directly without having to pull out a calculator to do the conversion.

All the cameras worked as expected, no light leaks noted, and the exposures were all pretty good; there was one image, of irises whose leaves were in bright sun but background was heavily shaded, where I metered the leaves themselves, and ended up with them being around medium-gray in tone, with the background almost completely black. Again, as one would expect; for a better image I should have added a +1 compensation to the exposure to brighten those leaves. I also did not do any pre-flashing of these prints, as I normally do with Harman Direct Positive paper (and also paper negatives), as I wanted to see the images straight away as the cameras record them, without any additional compensation.

Another image was taken in shade, with an exposure time of 55 seconds, the longest of the session, and it came out fine, with a good tonal range (as one would expect of this paper in shaded light), further proof as to the accuracy of my pinhole measuring technique.

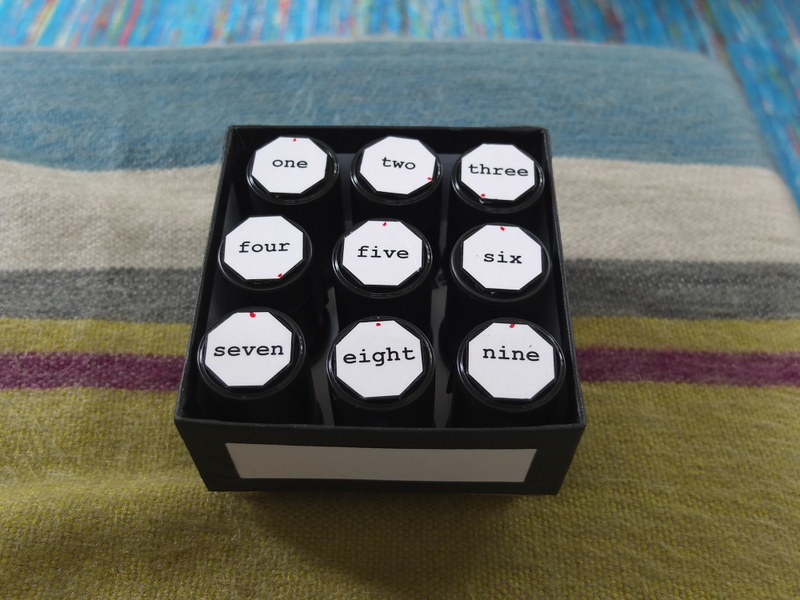
In actual use, I keep the cameras in the box with their lids facing downward, the bottoms of each canister having a clearly visible number label affixed via double-sided tape. I start with camera #9. After its exposure, it goes back in the box cap-side up, so its number is no longer visible; so then, the highest numbered camera is 8, telling me that I have 8 exposures left. Simple but effective, and keeping me from getting confused, while out in the field.
DSCF4968a
The set of nine pinhole cameras in their carrying box

For shutters on the cameras, I've gone with the simple but elegant method of using black electrical tape. Best not to over-engineer what should be a very simple camera.

I've made another video documenting this project.


Film Canister Pinhole Camera Project

As I indicate at the end of that video, my desire is for this to be the start of some "serious" pinhole work, and not merely another camera-building project. I've built countless pinhole cameras over the last few decades, but much less have I seriously employed them in the service of some long-term documentary project. I hope this marks the start of a long stretch of productive pinhole creativity.

For those of you technically-minded, the pinholes were about 0.2mm in diameter, with the nominal focal length about 27mm (the curved film plane in the canisters ranges from 25mm at the center to 30mm near the edges). I expose the Harman paper using an exposure index of 8, then process them in a makeshift rotary drum (a standard metal 35mm tank laid on its side) for 3 minutes in a 100mL volume of Ilford Multigrade paper developer at a concentration of 1 + 15, followed by standard stop bath, fixing and rinsing.
Tuesday, May 24, 2016

Jumping Back In

Ken001a

I've had these three rolls of film sitting around in my office for so long that I couldn't even remember what year they'd been exposed. I knew they were exposed because the film leaders were retracted in their cassettes, but that was about all. They were all Ilford FP4 Plus, medium speed black and white film.

My "analog" (gosh how I hate that term) photographic activity has been essentially dormant for a year, when I last was working with the instant box camera project and paper negatives; and before that it's been virtually exclusively paper negatives or Harman's Direct Positive paper, for a number of years. But film? Nada. Oh, maybe a few rolls of color, sent off to my local lab. But black and white? Nope, not even.

This is almost a sin. Having a darkroom at home, capable of processing and printing every kind of black and white film, from 35mm to 8"-by"10" formats, and prints up to 11"-by-14" in size. Two enlargers. A film drying cabinet of my own design. A hobbyist darkroom any photo student would be envious of. And what has it used for, these last few years? To store my darkroom equipment, that's about it. And Christmas and birthday gifts (but don't tell the grand-kids, okay?).

I'd been eyeing those rolls of film in my office for some time now. They'd been sitting in a green glass candy dish up on one shelf of my bookcase. I'd occasionally take them down, open up their containers and eye them suspiciously. After thinking about processing them, "one of these days," I'd put them back in the dish.

Noah003a

Last week I finally decided to tackle one of the rolls. I figured it was safe to start off with just one roll, since my skills were rusty and thus there'd be less to lose if something went awry. I also was suspicious of the quality of several bottles of developer sitting out in the darkroom. Getting up the nerve, I finally decided to give it a go.

I collected all the bits I'd need. Jobo processing tank? Check. Mixing containers? Check. Changing bag? Check ... but not until after a lengthy search revealed the bag to have been stored away, high up in the loft. Thermometer? Check. Fixer? Check. Scissors? Check. Can opener? Nope. I'd have to improvise. Stop bath? Nope. I'd have to use white vinegar. White vinegar? Nope. I'd have to use apple cider vinegar. More improvisation. Hopefully it wouldn't leave some funky residue on the film.

Developer? I checked the bottle of HC-110 concentrate, but crystallization along the inside of the bottle ruled that out. Oh, well, more wasted money. Agfa Rodinal? Yep, a used bottle, only 1/3 full. Should I use it? My better judgement said no, despite Internet wisdom on its longevity. Finally I found a newer bottle of R09, a Rodinal-like substitute, that appeared in good condition, no crystals or other funkiness. Time to get busy.

I decided on a more standard dilution of 1 + 25, with regular agitation, despite more Internet suggestions of excess grain with Rodinal and I should be doing semi-stand development, for improved granularity, yadda-yadda-yadda. Sometimes you have to shut your ears to all the online experts and go with your gut feel. I'd had bad experiences, years ago, with used developer and development procedures I'd only read about and not experienced personally. Best to be safe. Don't jump in the deep end too soon.

I had less issues loading the roll of film than I expected. Sometimes these plastic film reels can be finicky, and other times they can be wonderfully easy. It's all a crap shoot. But this time I did something a bit more deliberate, which was to trim the two front corners of the leader, like what's suggested for loading old film cameras, and this helped a lot, keeping those otherwise sharp corners from snagging in the plastic reel as it's being threaded.

Not wanting to give any negative results an excuse, I was careful with the chemical mixing and also ensuring proper temperatures were employed. The data sheet on the bottle of R09 suggested 8 minutes development time, which I stuck to, while opting for agitation every 30 seconds, using my normal method of several medium speed inversions while the tank is being constantly rotated along its axis. I suppose it's like riding a bike, you never forget.

Past experience with issues of residue and dust taught me to use for the final rinse Kodak Photoflo surfactant diluted 1 + 200 into distilled water, which I measured accurately and mixed thoroughly. In the past, I'd been sloppy enough to just slop a bit of Photoflo into tap water without so much as any measurement at all, resulting in either a film residue left on the film after drying, from too much Photoflo, or water spots from not enough.

Whereas I used to hang the film in a bathroom shower whose cleanliness was questionable, this time I had the convenience of a film drying cabinet, that I built some years ago and used for drying prints but never until now had actually hung any film inside. Its 100 watt heat lamp and HEPA-filtered laminar airflow seems to work wonders in drying film with little or no dust spots, because my scans afterwards were virtually spot-free; hardly any clone-stamping work needed to be done in Photoshop.

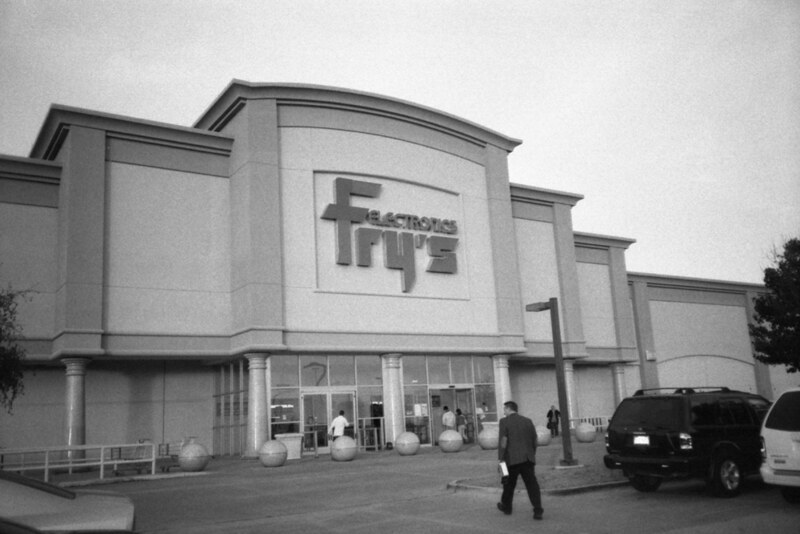
Fry's001a

My results were promising enough that I tackled the other two rolls yesterday. This time I used white vinegar for stop bath, but otherwise everything was done the same, with the exception of agitation every minute instead of every 30 seconds. The results were also very good.

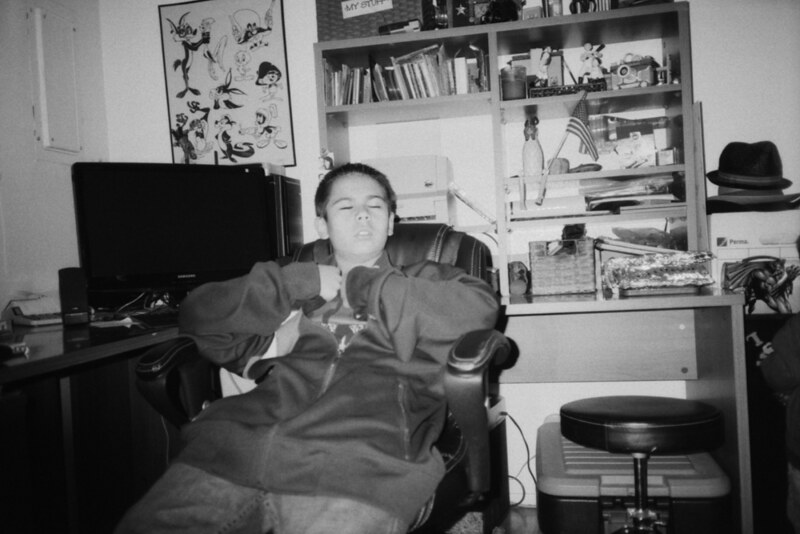
Christmas_Family006a

Afterwards, I found a roll of Ilford HP5 that had been exposed last December, and I again processed it with no issues. The roll hasn't yet been scanned, but initial inspection suggests good results.

Some years ago I bought a brick of the HP5 film from a local camera store, used some of it, but still had a number of rolls left. So this afternoon, buoyed by my recent processing success, I unearthed my Minolta X700, purchased last year from KEH Camera (and that's only seen several rolls of color film since), and loaded up a roll, with a yellow filter over the lens. I've yet to make any exposures, but I figure it's "almost free," since the film's been long payed for, as have the camera, chemicals and post-processing scanner and software. So it's almost the same as digital, except the added fun of processing and scanning. But working with manual focus film cameras is so enjoyable, and inexpensive, as to truly be a valid alternative to expensive digital systems for monochrome photography.

I don't know if this is just a soon passing fad, or if I'll stick with shooting more film. I hope it's the latter. The Minolta X700 deserves to be used more, as does my darkroom. I also have a Soviet-era Zorki IV and Kodak Retina IIIC rangefinder cameras that also need to be used more. And if I get enough good negatives, perhaps even a session of wet-printing onto gelatin silver paper might be in order. If so, I'll update you here.

I think the lesson here is never sell off your darkroom equipment just because you're currently not using it; nor should you tear down your darkroom, if you can at all help it, because film and printing paper are still readily available, as are all those wonderful old film cameras. Now's the time to take the leap, before economic considerations threaten the future of this marvelous medium.

Tuesday, May 10, 2016

Camera (Not So) Obscure: Learning to See

DSCF4958a

Yes, it's been almost two months since this blog has been updated, and in the meantime my callous disregard of my millions of readers has resulted in much hand-wringing and sleepless nights around the globe, I am certain. Please, let's do nothing rash and the global panic will subside.

Though I've managed a few mediocre digital snapshots since then, I have experienced a complete lack of motivation or interest in gelatin silver photography. Part of this is due to the majority of my time and creative energy being spent on typewriter-related projects, such as my Hermes 3000 "Nekkid-Riter" and custom storage box, which has been covered in my other blog.

DSCF4944a

But within the last week I've had an interest in camera obscuras, most notably the small, handheld kind, that an artist might use as a tool for painting and drawing, rather than the room-sized, walk-in variety.

Camera obscuras can employ either a pinhole or refractive lens as the image-forming device, and as such fall into a larger category of related optical devices that I've dabbled with over the years, such as the "fauxtographic" viewing frame and the pixellator camera (and its cousin, the light pipe array), all of which I've employed as live-viewing devices, and would be appropriate subject matter for future blog articles.

Though I've also fashioned over the years innumerable pinhole and refractive-lensed picture-recording cameras, yesterday's project was the first time I've built a glass-lensed camera obscura as a dedicated viewing-only device.

DSCF4959a

I've come to believe that, in this image-saturated culture where most everyone carries on their person a picture-recording camera device of some sort, the very act of direct observation has been lost to the immediacy of constant recording. Billions of such images are now recorded every year, yet it seems as if the subtle nuances of the real world, from which these myriads of images have their origin, are lost to our present consciousness. We blindly go about our business of constant picture-taking while simultaneously being entirely unconscious to the reality of that which we're recording - or so it seems.

I'm beginning to suspect that what is needed in my personal photography is first an increased awareness of the visual world. My present modus operandi seems to be a hurried rush through some public area, blindly blasting away with my AK-47 of a camera while paying little attention to what's happening around me; as if I were more relying for success upon some happenstance, chance encounter with good fortune, rather than there being a purpose-felt dialog of exploration in a continual spirit of curiosity.

I'm feeling like I've been blind, having not yet learned to see.

I've built this little handheld camera obscura as a device to gaze into, in order to learn to see more completely round about me. Peering down into its viewing hood at the five-inch-square screen below, what's presented is a live, full-color moving picture of the world in front of me, compressed down into a flat, two-dimensional image, complete with the optical effects of its lens, whose point of sharpest focus can be set upon objects far distant or close up, to within several feet even; much like looking into a twin lens reflex camera.

My intention is to use the camera obscura as a means for meditatively watching, rather than habitually recording. There will be no memory card or film holder full of the detritus of purposeless recording; rather, the images will reside in "wet-ware" as memories and recollections upon which to ponder.

TECHNICAL DETAILS:

DSCF4943a
DSCF4942a

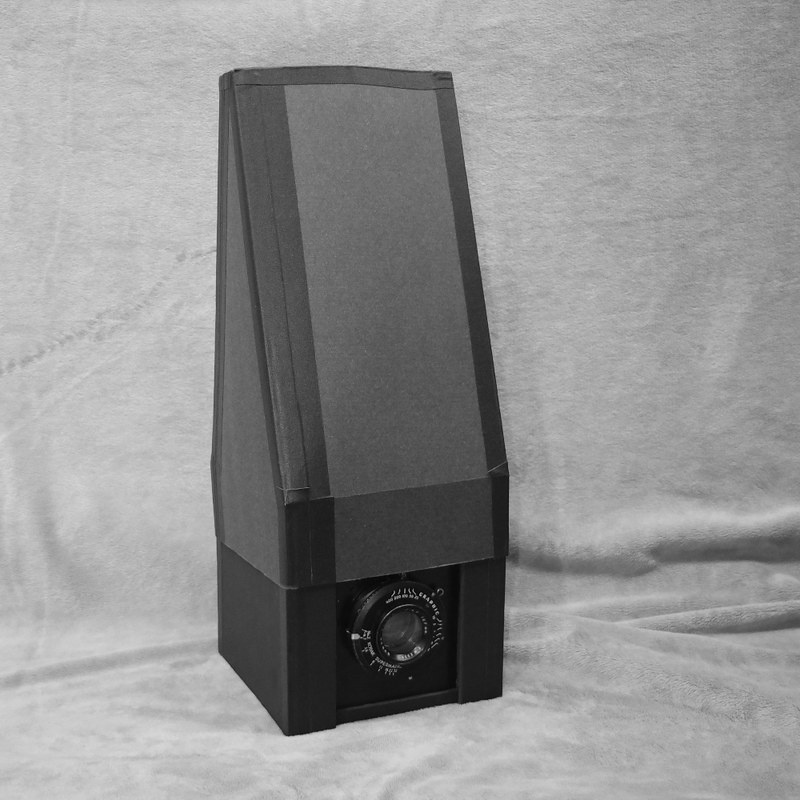
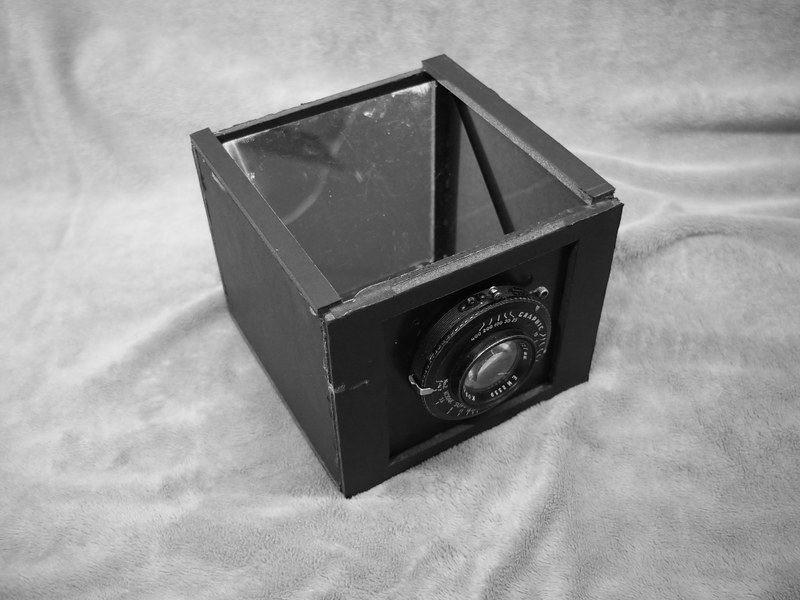
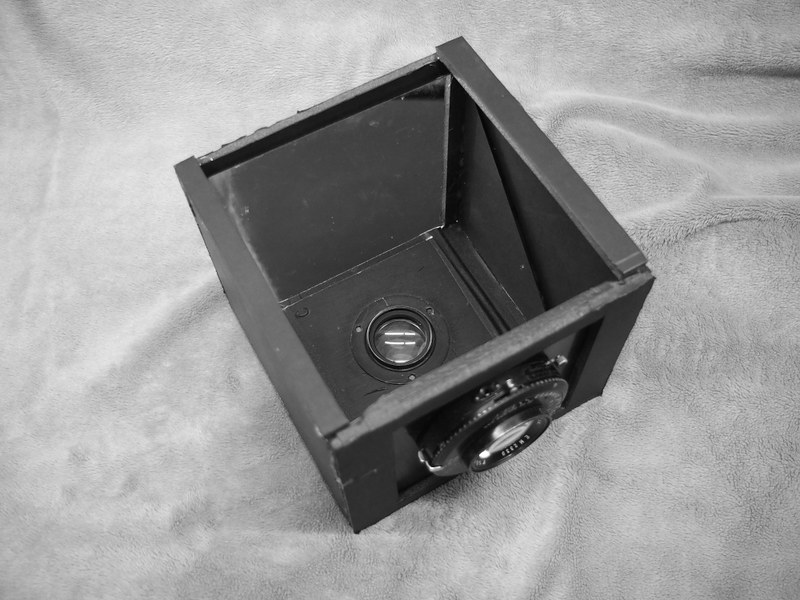
I've had in my possession for the last several decades a front-surfaced mirror, salvaged from an old projection television; which serves, along with a Kodak Ektar 127mm, f/4.7 lens, taken from a Graflex Speed Graphic camera, as the heart of the system. The viewing screen was made from a thin sheet of Lexan plastic, one side of which was ground down using fine emery paper on a random orbital sander. The body of the camera obscura is made from black foam core board, hot glue and gaffer's tape - the basic tools of the pinhole photographer.

A bit crude in appearance, perhaps. But with the application of some adhesive counter-top laminate or shelf liner material it could be made more presentable and weather-resistant.

It does remind me of that old Graflex SLR camera used by famed photographer Margaret Bourke-White, with its tall, chimney-like viewing hood.

There remains an acute similarity between the traditional camera obscura device such as this and the recent fad of "TTV" - Through The Viewfinder photography - where the view through a waist-level screen of a twin lens reflex film camera is rephotographed digitally.

OPERATION:

DSCF4965a

In use, the long hood places one's view conveniently located with the camera comfortably held at waist level, helping to eliminate most of the daylight glare. Though the handmade plastic view-screen serves quite well, it's not as bright as a commercially-made ground glass.

With the camera supported from underneath, the upper half of the camera, including view-screen and hood, can be easily adjusted vertically to selectively focus the image. Its default focus position, when fully down, is at infinity focus, with enough travel to permit a close-focus to within a few feet before ambient light spills in under the view-screen and washes out the scene.

I use the Kodak Ektar lens with its aperture fully open to f/4.7, and thus there is evident in the projected image some artifacts of narrow depth-of-focus. Thus, using the camera obscura as a viewing/observation tool, one sees the world as a camera lens would see it, rather than the way human vision collages together multiple points of focus to synthesize visual reality.

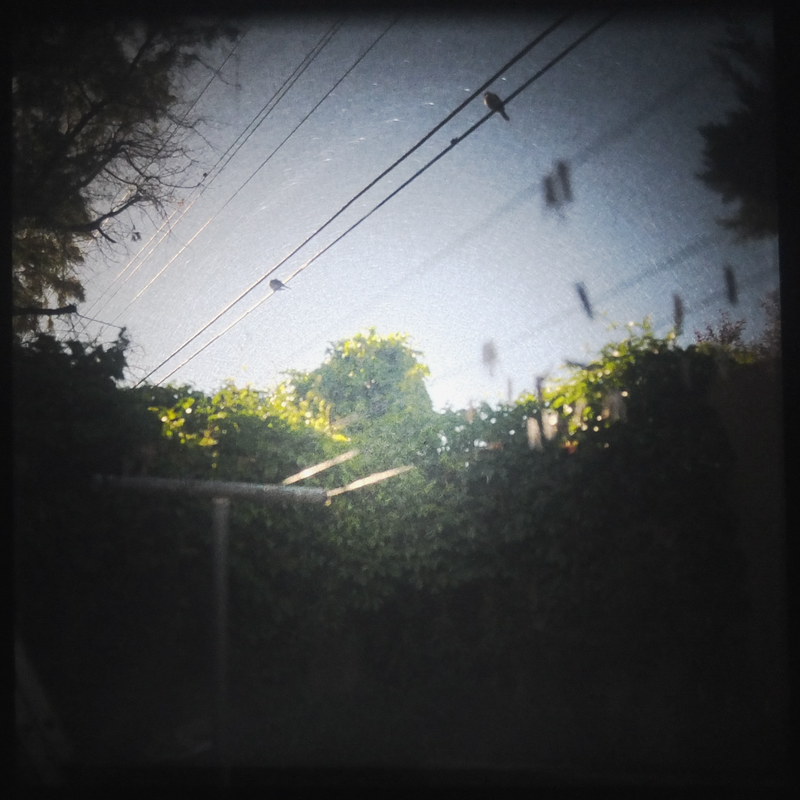
Standing in my backyard, gazing down into the camera obscura, I'm able to selectively focus upon either the garden trellis in the foreground or neighbor's trees in the background, racking focus back and forth with gentle up and down movements of the viewing screen/hood assembly; almost cinemagraphically.

Though these simple elements that make up the camera obscura - lens, mirror and view-screen - are essentially the same as found on many photographic recording cameras, the experience is different from the typical large format view camera, because the image remains right-side-up (though reversed left-to-right), essentially the same experience as using a twin lens reflex camera but with the luxury of a much larger (5" square) image.

FURTHER REFLECTIONS:

P1110747a

In taking the camera obscura out to a public setting, I'd expect much the same kind of curiosity and reaction as one would with employing a recording camera, though others' reactions might be less pronounced were I to be found employing the device in the more innocuous activity of sketching, rather than merely observing.

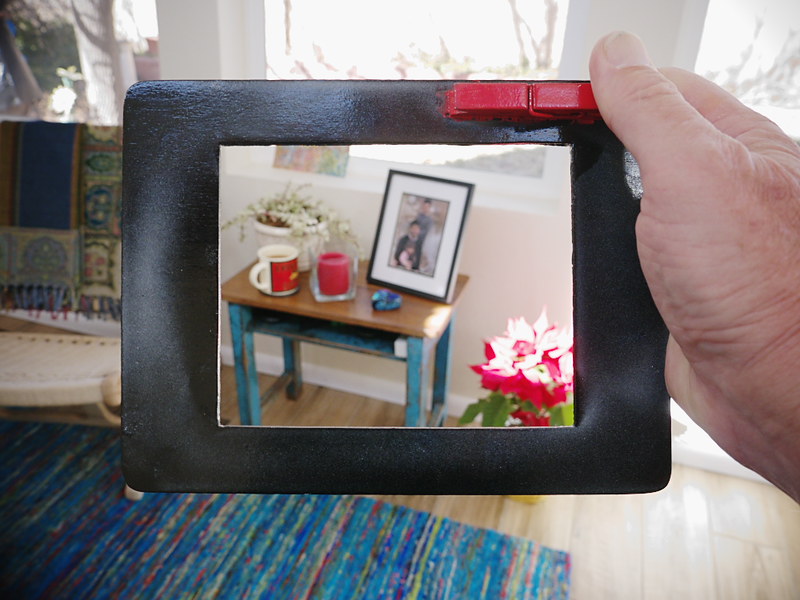
Which gets to the point of a similar kind of device, mentioned earlier, what I call a "fauxtographic" viewing frame, very similar to the kinds of viewing aids employed by large format photographers and film makers in photographic previsualization, but with the added feature of a clothes pin clicker device that serves to mark the "decisive moment" by simulating the firing of a camera's shutter.

I had independently co-invented the viewing frame, not for the purposes of aiding photographic composition (though it does serve that purpose admirably) but as an instrument of public performance art, as a kind of social commentary, or even protest, in counter-reaction to post-9/11 America's documented phobias over the act of public photography.

I was curious to deconstruct this phenomenon. Was it the mere act of human observation that was deemed objectionable, or the more specifically photographic act of placing borders around a specific point of view, then isolating it in time with the click of a shutter?

Skeptics might argue that there's no deeply-thought-out conspiracy at work against the philosophy of public photography; that in these times of heightened tensions and increasing concern over "security issues" one can never be too careful - just go with the flow, keep your head down, pay your taxes and just you no never mind. It's a small price to pay to be safe. Whose side are you on, anyway? Say, you're not one of them there Elk Hiders, now are you ... ?

No, I'm not one of them there Elk Hiders. But I do think about the act of photography, at its most fundamental level, as being a literal extension of the act of seeing. A photograph most essentially represents a simple human gaze, frozen in time.

And so, any objection to public photography is really an objection to direct human observation itself, disguised under the rubric of "security". It's not enough that we shouldn't photograph in public; what's really being asked/insinuated/demanded of us is that we not pay any attention at all to what's really happening. Keep your head down, your eyes averted and your mouth shut. And don't think too much, it'll just get you in trouble; not what would be required of responsible citizens in a (supposed) democracy, since (in theory) self-governance requires continual observation of the elected by the electorate.

With the portable camera obscura, however, it's not a device easy to carry or conceal, like the fauxtographic viewing frame. It's big, black and draws attention to itself. More importantly, it's not an instrument intended for social commentary, but a tool for a very personal kind of visual exploration, a device for learning to see all over again.

Post-Script: Though I've included three digital snapshots of the camera obscura's view-screen as an illustration of the kind of image it makes, it in no way is convenient or practical to do so, given my ready availability to other, better-suited photographic devices. I see these example images as the photographic equivalent of typecasting a manually typed page - it provides the viewer a reasonable facsimile of the original, but in no way is intended as a substitute for the live, physical artifact.

An even simpler version of the camera obscura is possible, if an upside-down image were of little consequence, that being to dispense with the front-surfaced mirror and project the image onto the back of the box. This opens up the possibility of cobbling together such devices from commonly accessible materials, such as magnifying lenses, plastic sheets and any sort of box-like enclosure. And gaffer's tape. Don't forget the gaffer's tape.