Monday, November 16, 2015

Falling Plate Fundamentals

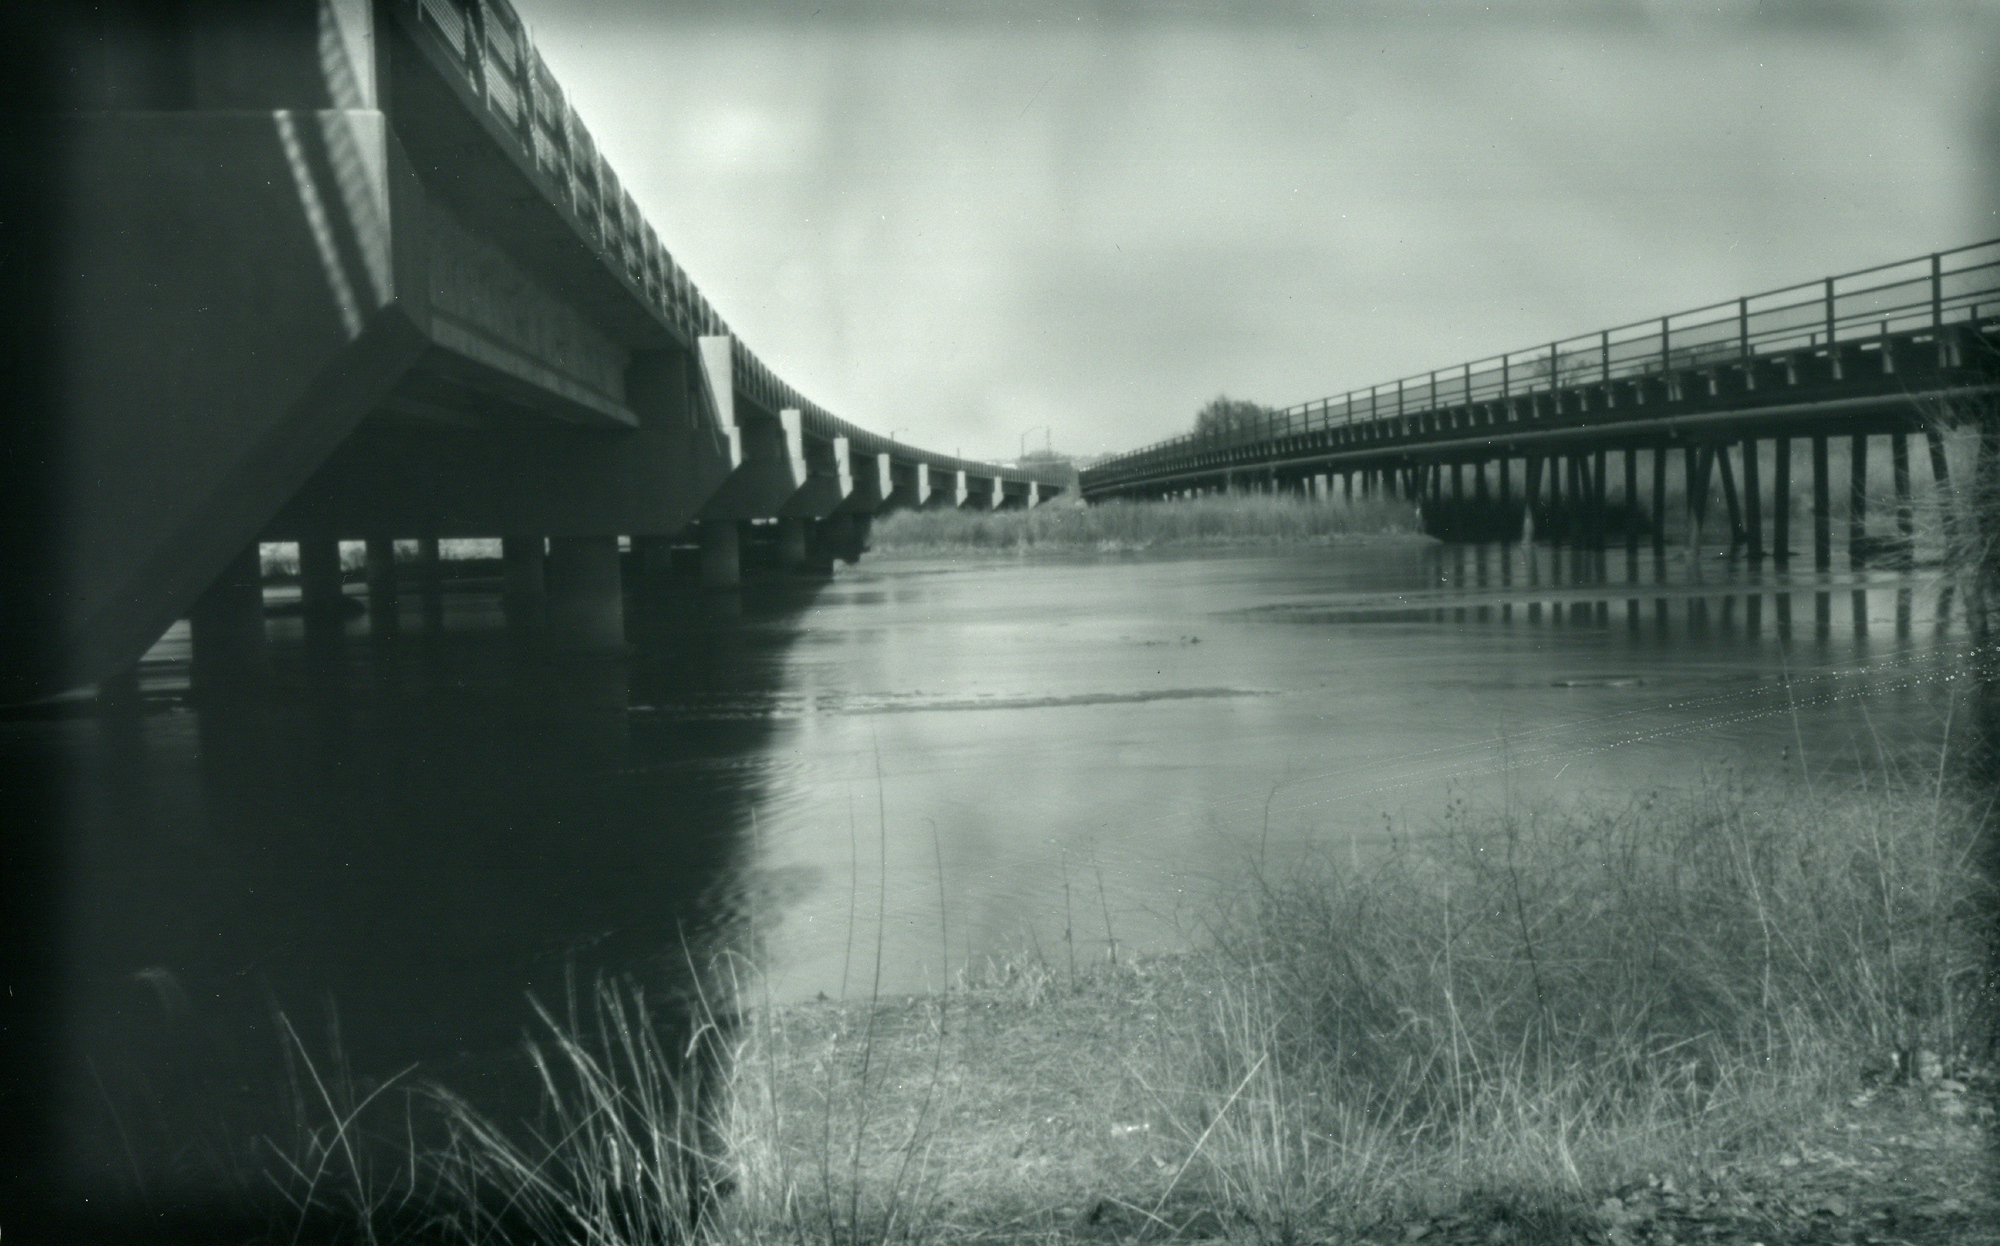
Alameda Bridge001a
(Contact print of Arista 200 film negative. F/300, 5"x8" falling plate pinhole camera. Alameda Bridge, Rio Grande, near Albuquerque. Circa 2004.)

Let's go back in time, but not all the way to the beginning of my pinhole adventure; instead, we'll go back to 2004, when I had recently completed my third falling plate camera design.

Once a person begins to build and use simple pinhole box cameras, it becomes rather tedious to have available only one sheet of film or paper at a time. True enough, cameras can easily be made that use roll-film, permitting multiple images to be recorded in one outing, but my interests have always been in larger formats. One has to thus settle for making only one image at a time; or bringing multiple pre-loaded cameras; or a changing bag within which to swap out the film; or use sheet film holders. While I did have 4"x5" holders, I wanted larger images, and I didn't want to go to the expense of purchasing a number of larger sized film holders for this bigger sized camera; especially considering that, with a little ingenuity, I could figure out a creative alternative.

I didn't invent the falling plate camera, as they've been around since the 19th century, I later learned. But after much cogitating on the problem, I had reinvented the idea on my own. This version uses a stack of thin aluminum film plates, sitting upright at the rear of the camera, each with a film or paper negative affixed with tape. Each plate has a slot in the top edge, with the slots in the plates alternating left-right-left, etc. A sliding knob on the top of the camera operates a sliding pin, that prevents the front plate from falling until the pin is moved over to coincide with that plate's slot. With a little help, by tipping the camera forward, the front plate will fall face-down to the bottom of the camera, revealing the next plate ready to be exposed.

There are several caveats to this design. Most crucially, the camera has to be carefully handled and transported in an upright orientation, else the already fallen plates will move out of position and jam the operation of the subsequent plates; or the plates yet to be exposed might fall off their narrow ledge at the rear of the camera and jam up the works. Second, because the plates need to fall face down into the bottom floor of the box, the focal length is required to be greater than the height of the film format, precluding cameras with ultra wide angles of view.

Those limitations aside, this design eventually proved, after several modifications, to be quite reliable, and with it I subsequently made many successful images.

The film used in this image was a high-contrast orthographic film that could be handled and processed under darkroom safelights. The challenge, however, was always trying to tame the excessive contrast, especially in bright daylight scenes, since this film was intrinsically contrasty. At this time period I had yet to discover the magic of pre-flashing (to be covered in a future article) and so I was still at the stage of experimenting with techniques of minimal agitation and pulling the negative out of the highly dilute developer after an extended sit time. As a result of insufficient agitation, the sky areas of this image appear blotchy and streaked, while the edges are under-developed. But sometimes such accidents can reveal the unexpected, which I think works well in this example.

Out From Obscurity

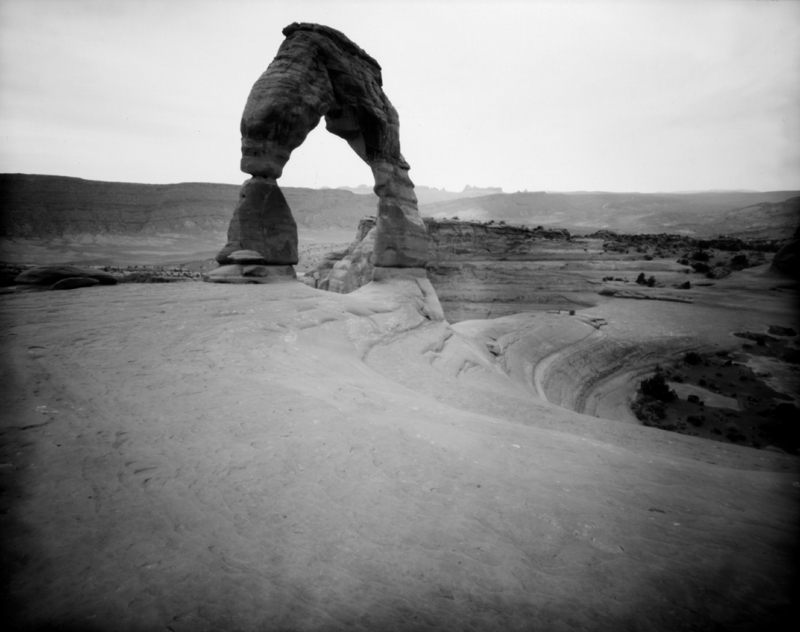
DelicateArch002a
(Delicate Arch, Arches National Park. 8"x10" paper negative.)

There are 3-ring binders full of paper negatives, that I've exposed in handmade pinhole cameras over the last two decades, sitting in storage unseen but by my own imagination. At one time, there was a viable global creative community of pinhole photographers at F295, where many of these images have been shared, but now that discussion forum is gently passing into the digital night and I am left wondering where and how to best share these images with a wider, and newer, audience. Obviously, a blog comes to mind, since I've been blogging continuously since 2006, but that blog, while yet strong and ongoing, has purposefully not been used expressly for the subject of experimental photography. A new venue seemed necessary, which this blog represents.

A few years ago, my wife and I made a vacation trek to Moab, Utah, where we lugged around an 8"x10" foam core pinhole box camera and Bogen tripod. This camera employed a storage compartment, behind the film plane - a slot wide enough to contain dozens and dozens of sheets of photo paper, with a floating divider separating exposed from unexposed sheets.

In operation, I would have to first find someplace to sit down, perhaps a makeshift seating area like a rock or stump, where upon my lap I would set out a large changing bag, into which I'd zip up the large camera. Once my arms were inside the sleeves, I'd open the box's lid, remove the previously exposed negative from the film plane, slide it back into the storage compartment, then remove a fresh sheet and position it carefully at the film plane; then close up the camera, unzip the changing bag and go searching for the next image to make.

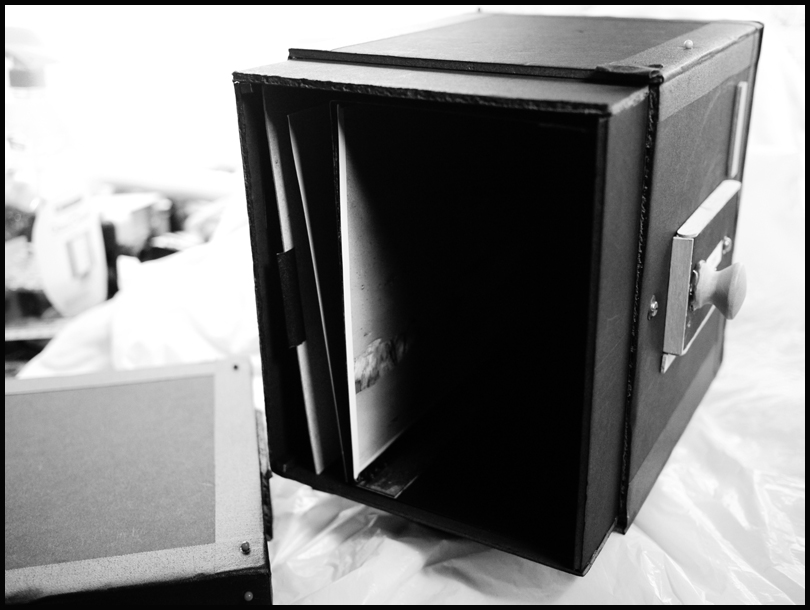
Here's an image of a similar camera I made more recently, to illustrate the concept:
P1100814a
The side-mounted door has been removed, where you can see an example paper negative at the film plane (mounted by magnetic strips) and behind it the storage compartment with movable divider.

I'd mount the camera atop the tripod, using the 1/4-20 bushing on the camera's plywood base, then carry tripod and camera over my shoulder, with day pack on my back, until I found some likely subject or scene. In the case of this image, we had hiked up the slick-rock mountain to Delicate Arch, then had to wait for people to clear out for each image to be exposed - or, if they were constantly moving, they would remain invisible.

Aiming the camera involved sighting along the sides and top of the box, where round plastic push-pins had been mounted to serve as viewing triangles. Primitive, but surprisingly effective.

Using black & white printing paper as an in-camera film is an obscure method of recording photographic images, one that involves first knowing the effective film speed of the paper - gleaned only through experimentation ahead of time - setting that speed into one's light meter; metering the scene; calculating the required exposure time; then making the required exposure.

Pinhole cameras naturally produce images with less sharpness than lens-based cameras; the degree of relative sharpness desired will often dictate the format size - larger formats are typically sharper than smaller - while one's subjective sensibility will dictate how important sharpness is to begin with. Sharp images are not necessarily better, and there does not exist an objective science of ranking photographic images based upon measurable criteria, since esthetic and artistic sensibility is totally subjective; so while the science of optics can inform us of the performance of a pinhole lens, it can't tell us how best to employ such a tool to our creative advantage.

In the case of this camera, I had desired to optimize it for some relatively sharp images (by pinhole camera standards) by using a quite small sized aperture. And so, standing atop the slick-rock mountain adjacent to Delicate Arch, with the early April wind howling, it was necessary to wait for a lull in the wind before opening the shutter, since the large but relatively light box acts like a sail, vibrating enough upon the tripod to excessively soften the image. The exposure time was about a minute (I'm guessing here, as I haven't gone back to research my notes from that trip), during which I worried incessantly about a heavy wind picking up, or someone walking into the scene and stopping long enough to record their ghost-like image (which can be an interesting effect).

Afterwards, I have to find somewhere else to sit down, in order to form a lap, upon which I can reload the camera.

A person has to be peculiarly focused to want to do this type of photography during what would otherwise be a normal family vacation trip. There are, of course, other forms of image-making much more convenient, that produce images much sharper, and in color. Which begs the question, Why?

That's what we are going to explore within this blog, the question of Why.

~Joe